If you wish to sell your downloads then our shop feature is what you are looking for. In order for the shop to work you need the follow these steps:
-
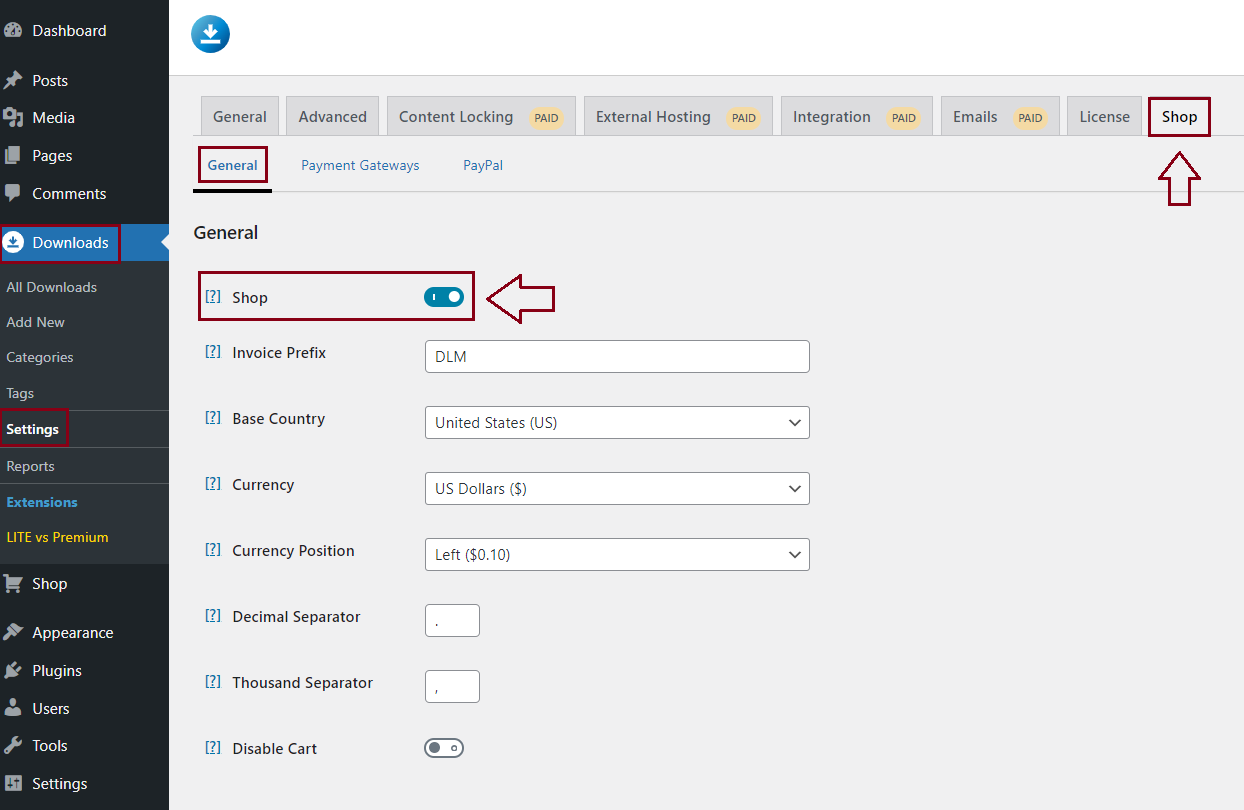
You need to go to your dashboard > Downloads > Settings > Shop > General > check the “Shop” box.
-
Create a “No Access” page
Go to your WordPress admin dashboard > Pages > Add new. We recommend naming this page “No Access Page“.
Once your page is created, insert the
[dlm_no_access]shortcode into the page content.After adding the shortcode, navigate to your WordPress dashboard and go to “Downloads” > “Settings” > “Advanced” > “Pages” Here, you will find the “No Access page” option. Select the “No Access Page” you just created from the dropdown menu.
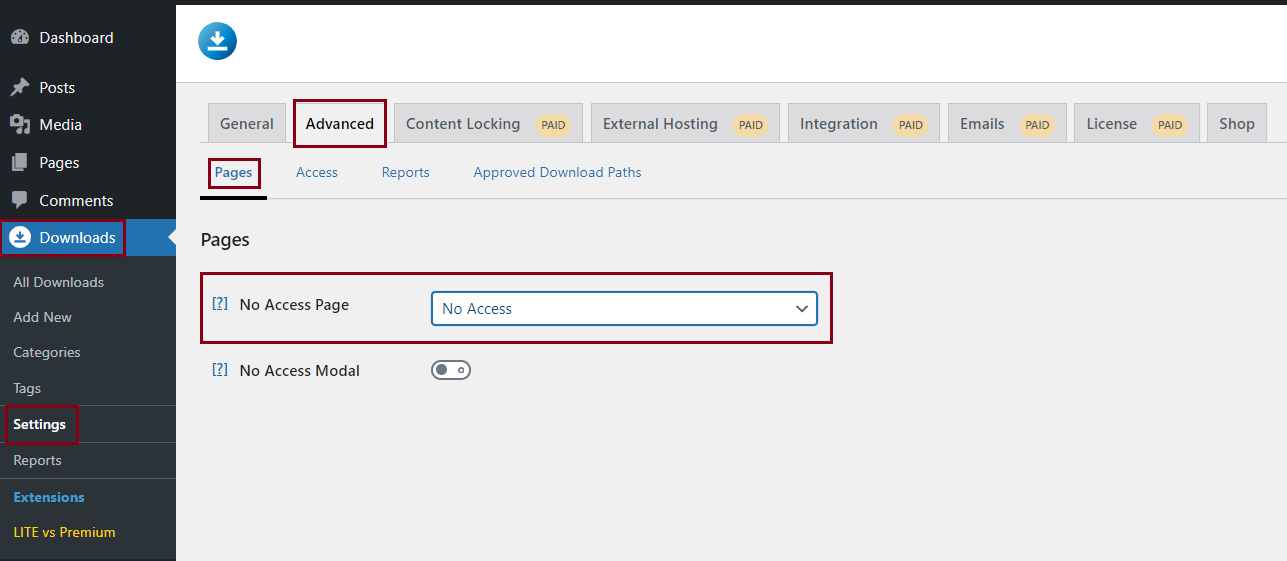
More info here.
-
Create a Cart page
Create a new page and add the
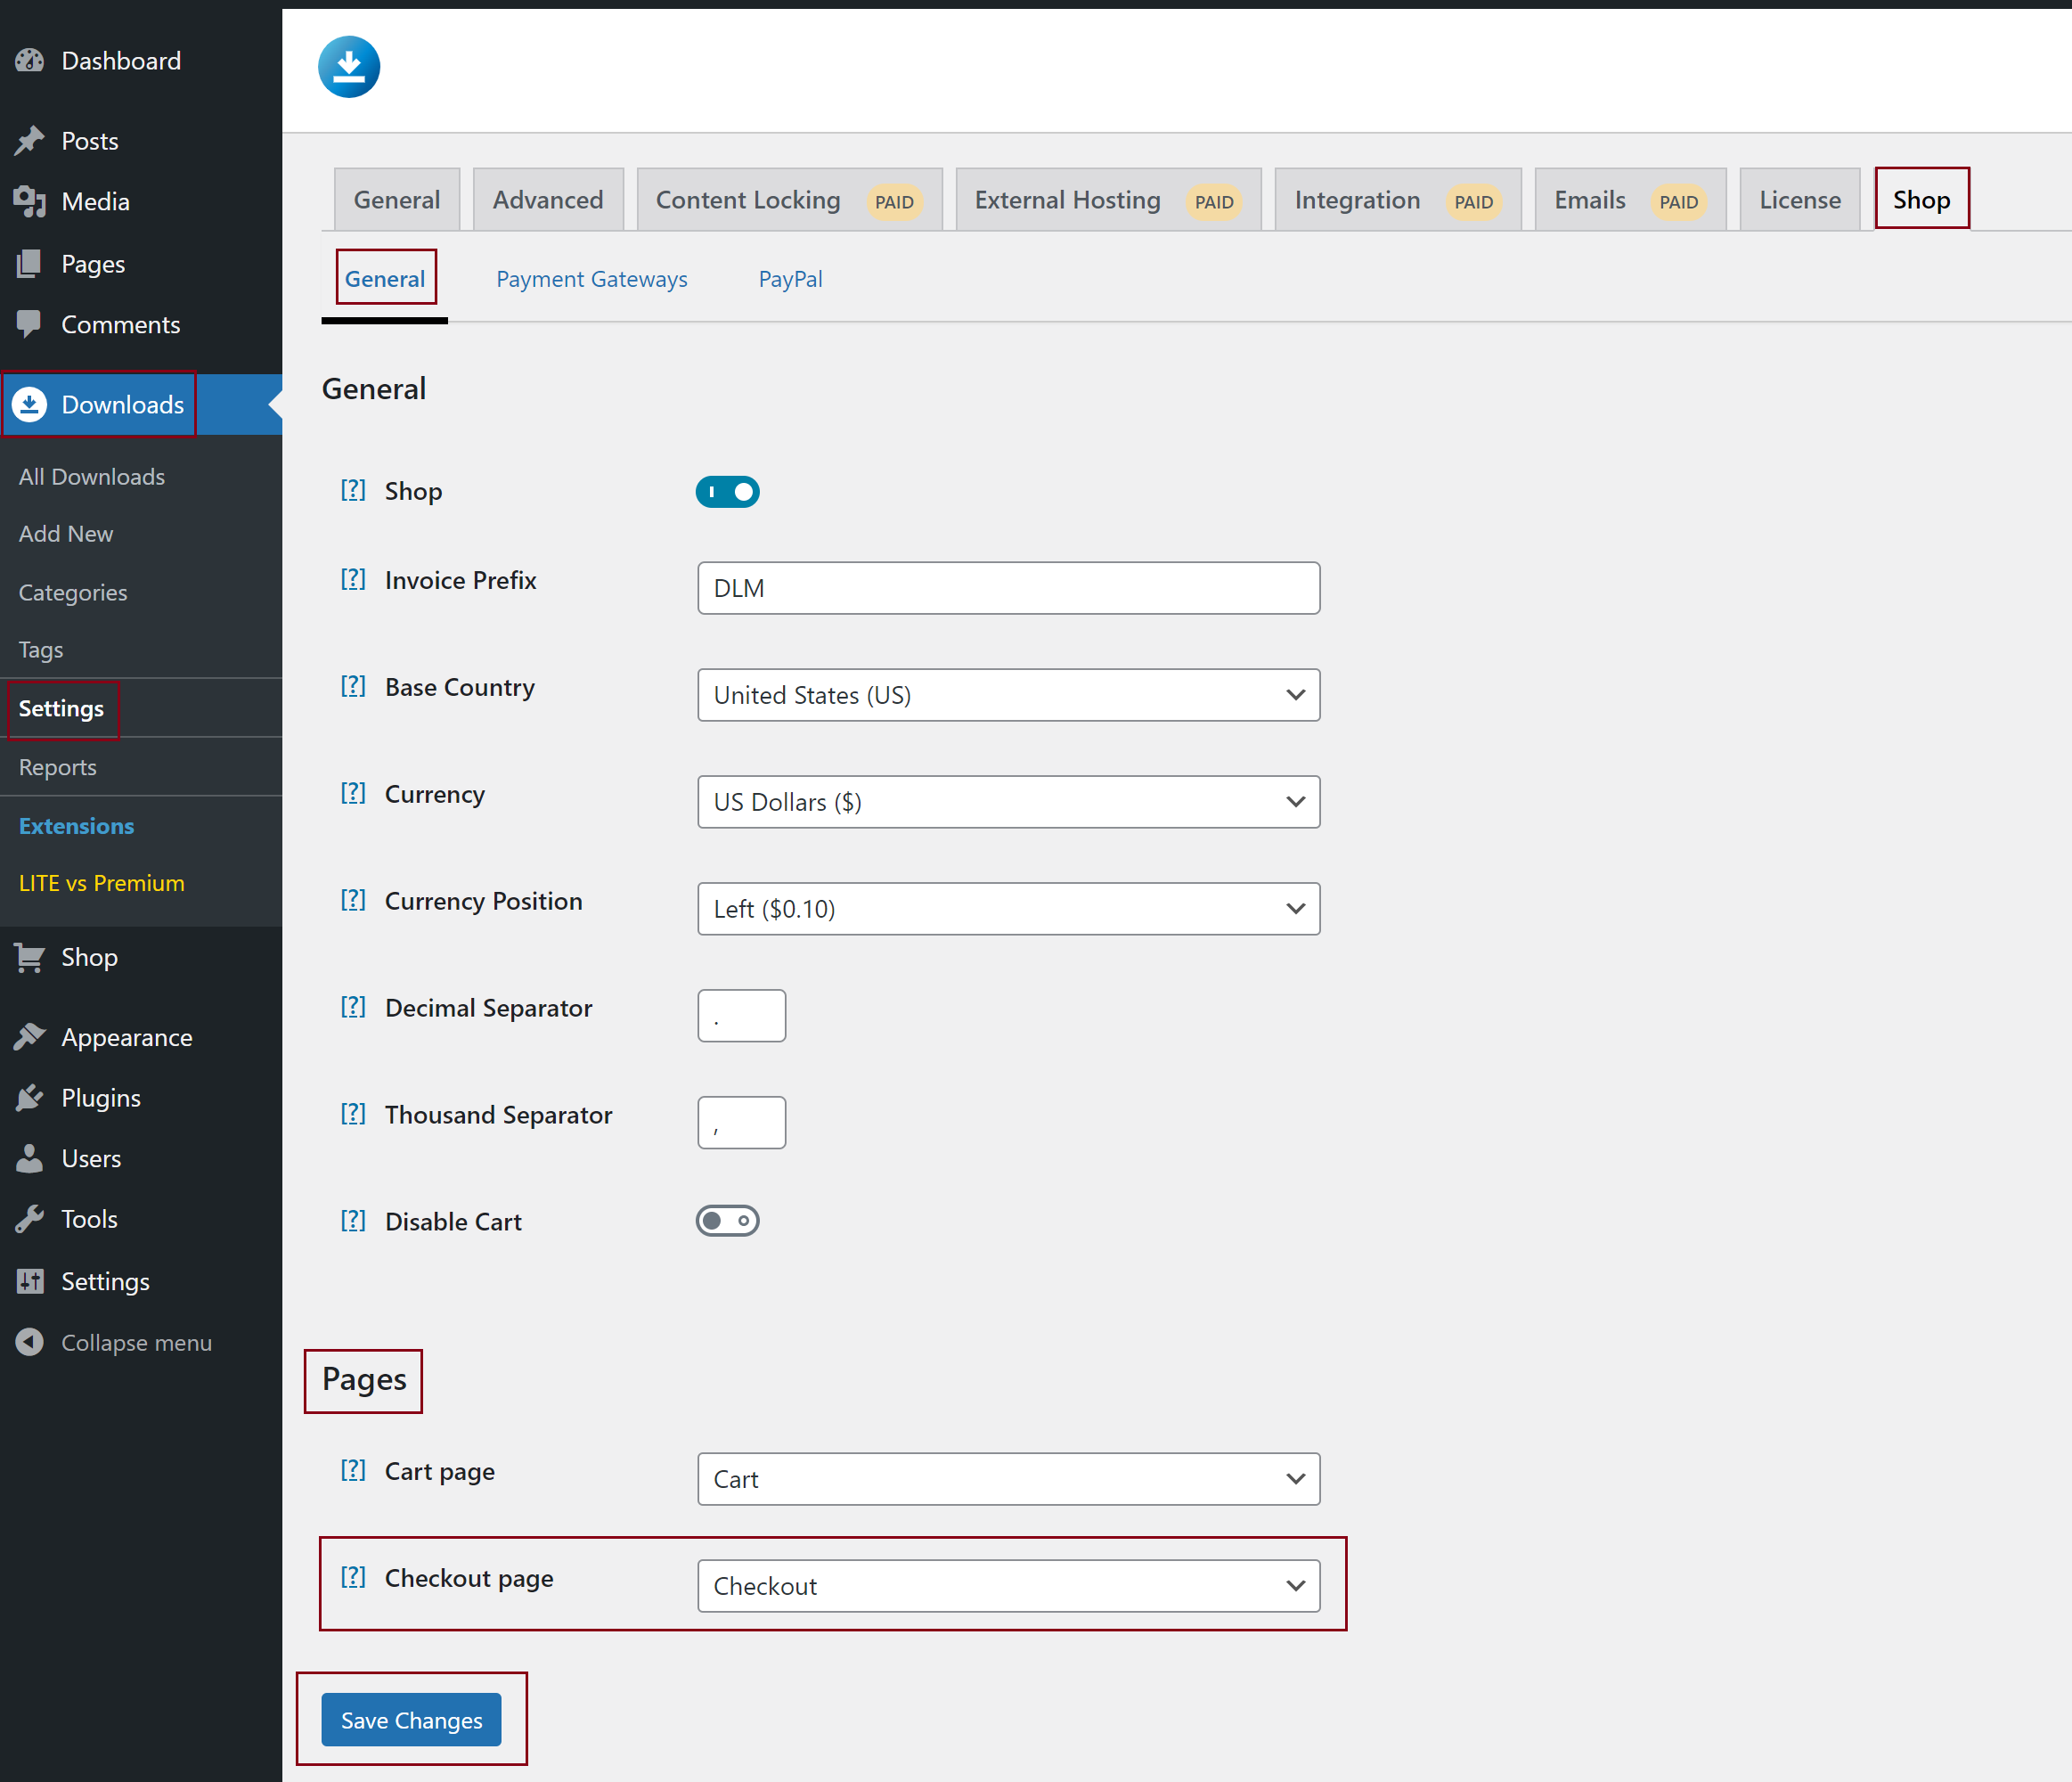
[dlm_cart]shortcode to the page.After you’ve published this new page, go to your Download Monitor settings. In the Shop tab, select your newly created page as your cart page in the General > Pages section. Click Save Changes and you’re done. Your cart page is now fully functional.

-
Create a Checkout Page
Create a new page and add the
[dlm_checkout]shortcode to the page.After you’ve published this new page, go to your Download Monitor settings. In the Shop tab, select your newly created page as your checkout page in the General > Pages section. Click Save Changes and you’re done. Your checkout page is now fully functional.
-
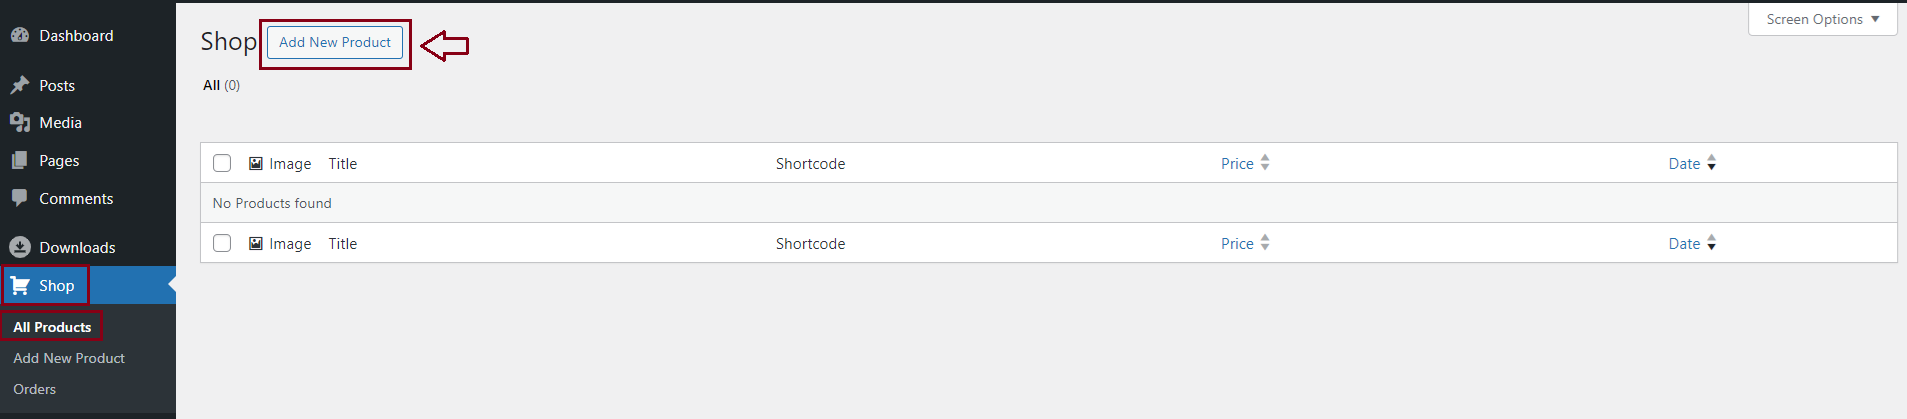
Add your products
Products in Download Monitor are what your customers can buy in your shop. You link your product to one or more downloads, allowing your customers access to these downloads after they purchase the product.
You need to go to your dashboard > Shop > Add New Product
Set the title of the product > add content so it will be displayed on the detail page of the product > set your price of the product > choose the downloads which the customer will get access to after purchasing this product > set the excerpt which will be used in the buttons and on the overview page.

In order to accept PayPal payments on your website, you will need to configure the PayPal Gateway with the help of Download Monitor.
-
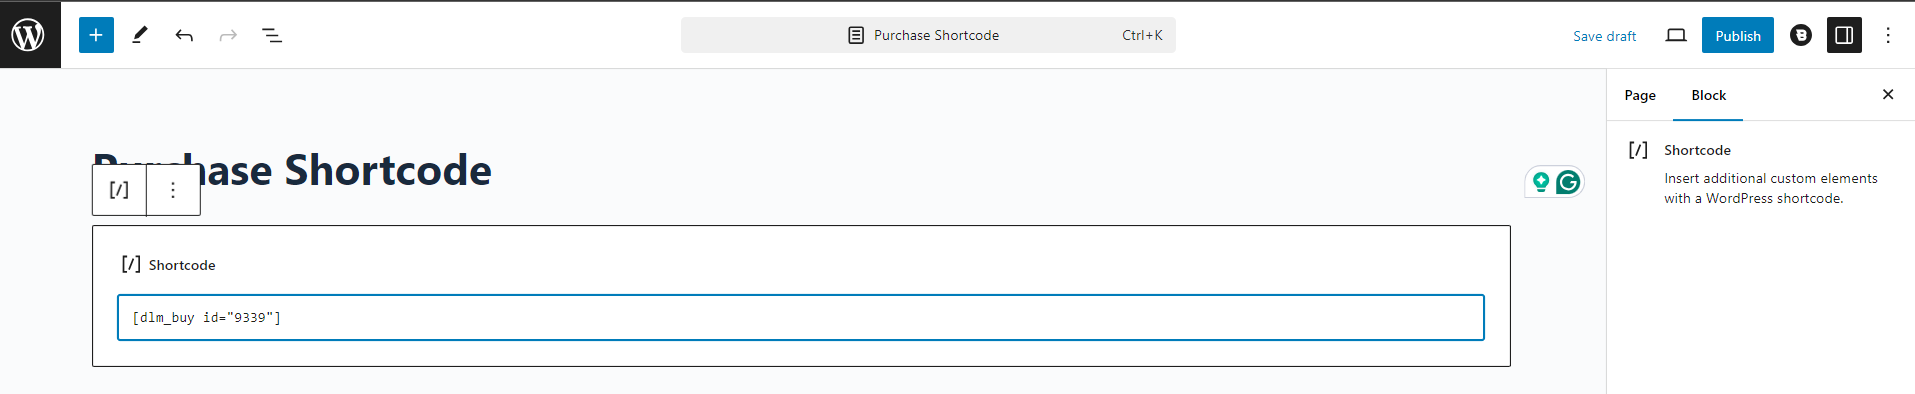
Use the Purchase Shortcode
With the
dlm_buyshortcode you can display a buy/purchase button on your website. By adding attributes to your shortcode, you can control what product is used on how the button is displayed.This shortcode takes the following arguments:
idThe template is used to output the download. Leave blank to use the default add-to-cart.phptemplate.templateThe template is used to output the download. Leave blank to use the default add-to-cart.phptemplate.The template argument in this shortcode uses content templates. Go to your dashboard > Pages > Add New > add the shortcode.