Navigating the complexities of WordPress development often requires granting temporary administrative access to support teams. Whether for troubleshooting issues or plugin assistance, the ability to create a temporary admin user can streamline the process without compromising site security. In this guide, we’ll explore two approaches—manual creation within the WordPress dashboard and utilizing a dedicated plugin—to help Download Monitor’s support team and their debugging efforts.
Follow the steps outlined below to establish a temporary admin user, test its access, and safely revoke privileges once the support task concludes.
- Log in to Your WordPress Dashboard
Initiate the process by logging into your WordPress admin dashboard using your existing administrator credentials. - Navigate to Users
Locate the “Users” option on the left-hand side menu and click on it to access the Users page.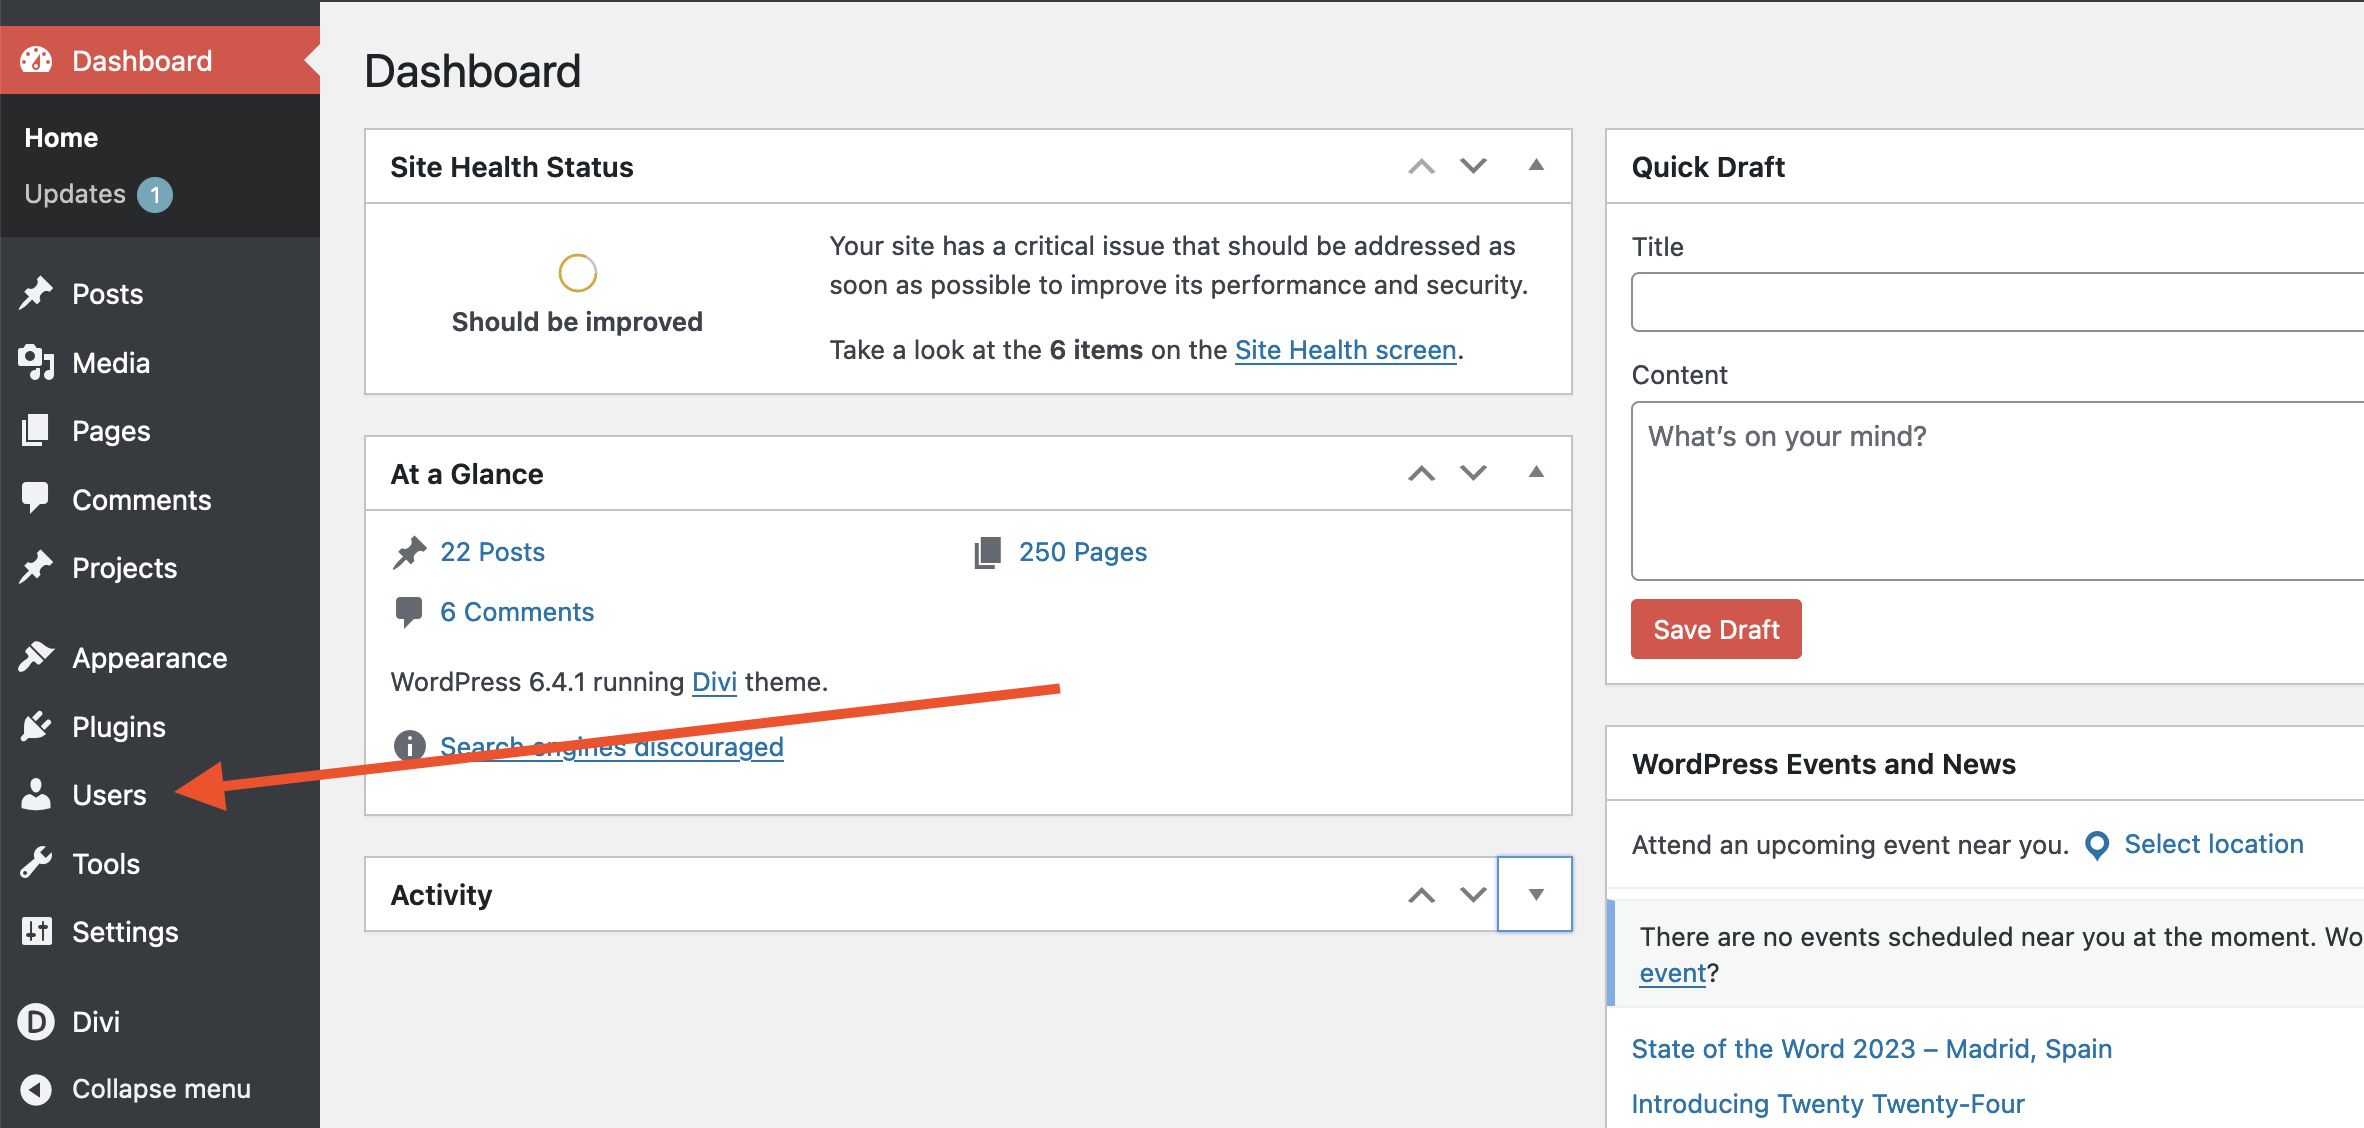
- Add New User Manually (Option 1)
Option 1: Manually Creating a Temporary Admin User
-> Click “Add New” on the Users page to create a new user.
-> Complete the required user details, such as username and email.
-> Assign the user role as “Administrator.”
-> Generate a strong password or set one manually.
-> Optionally, send the new user a notification.
-> Click “Add New User.”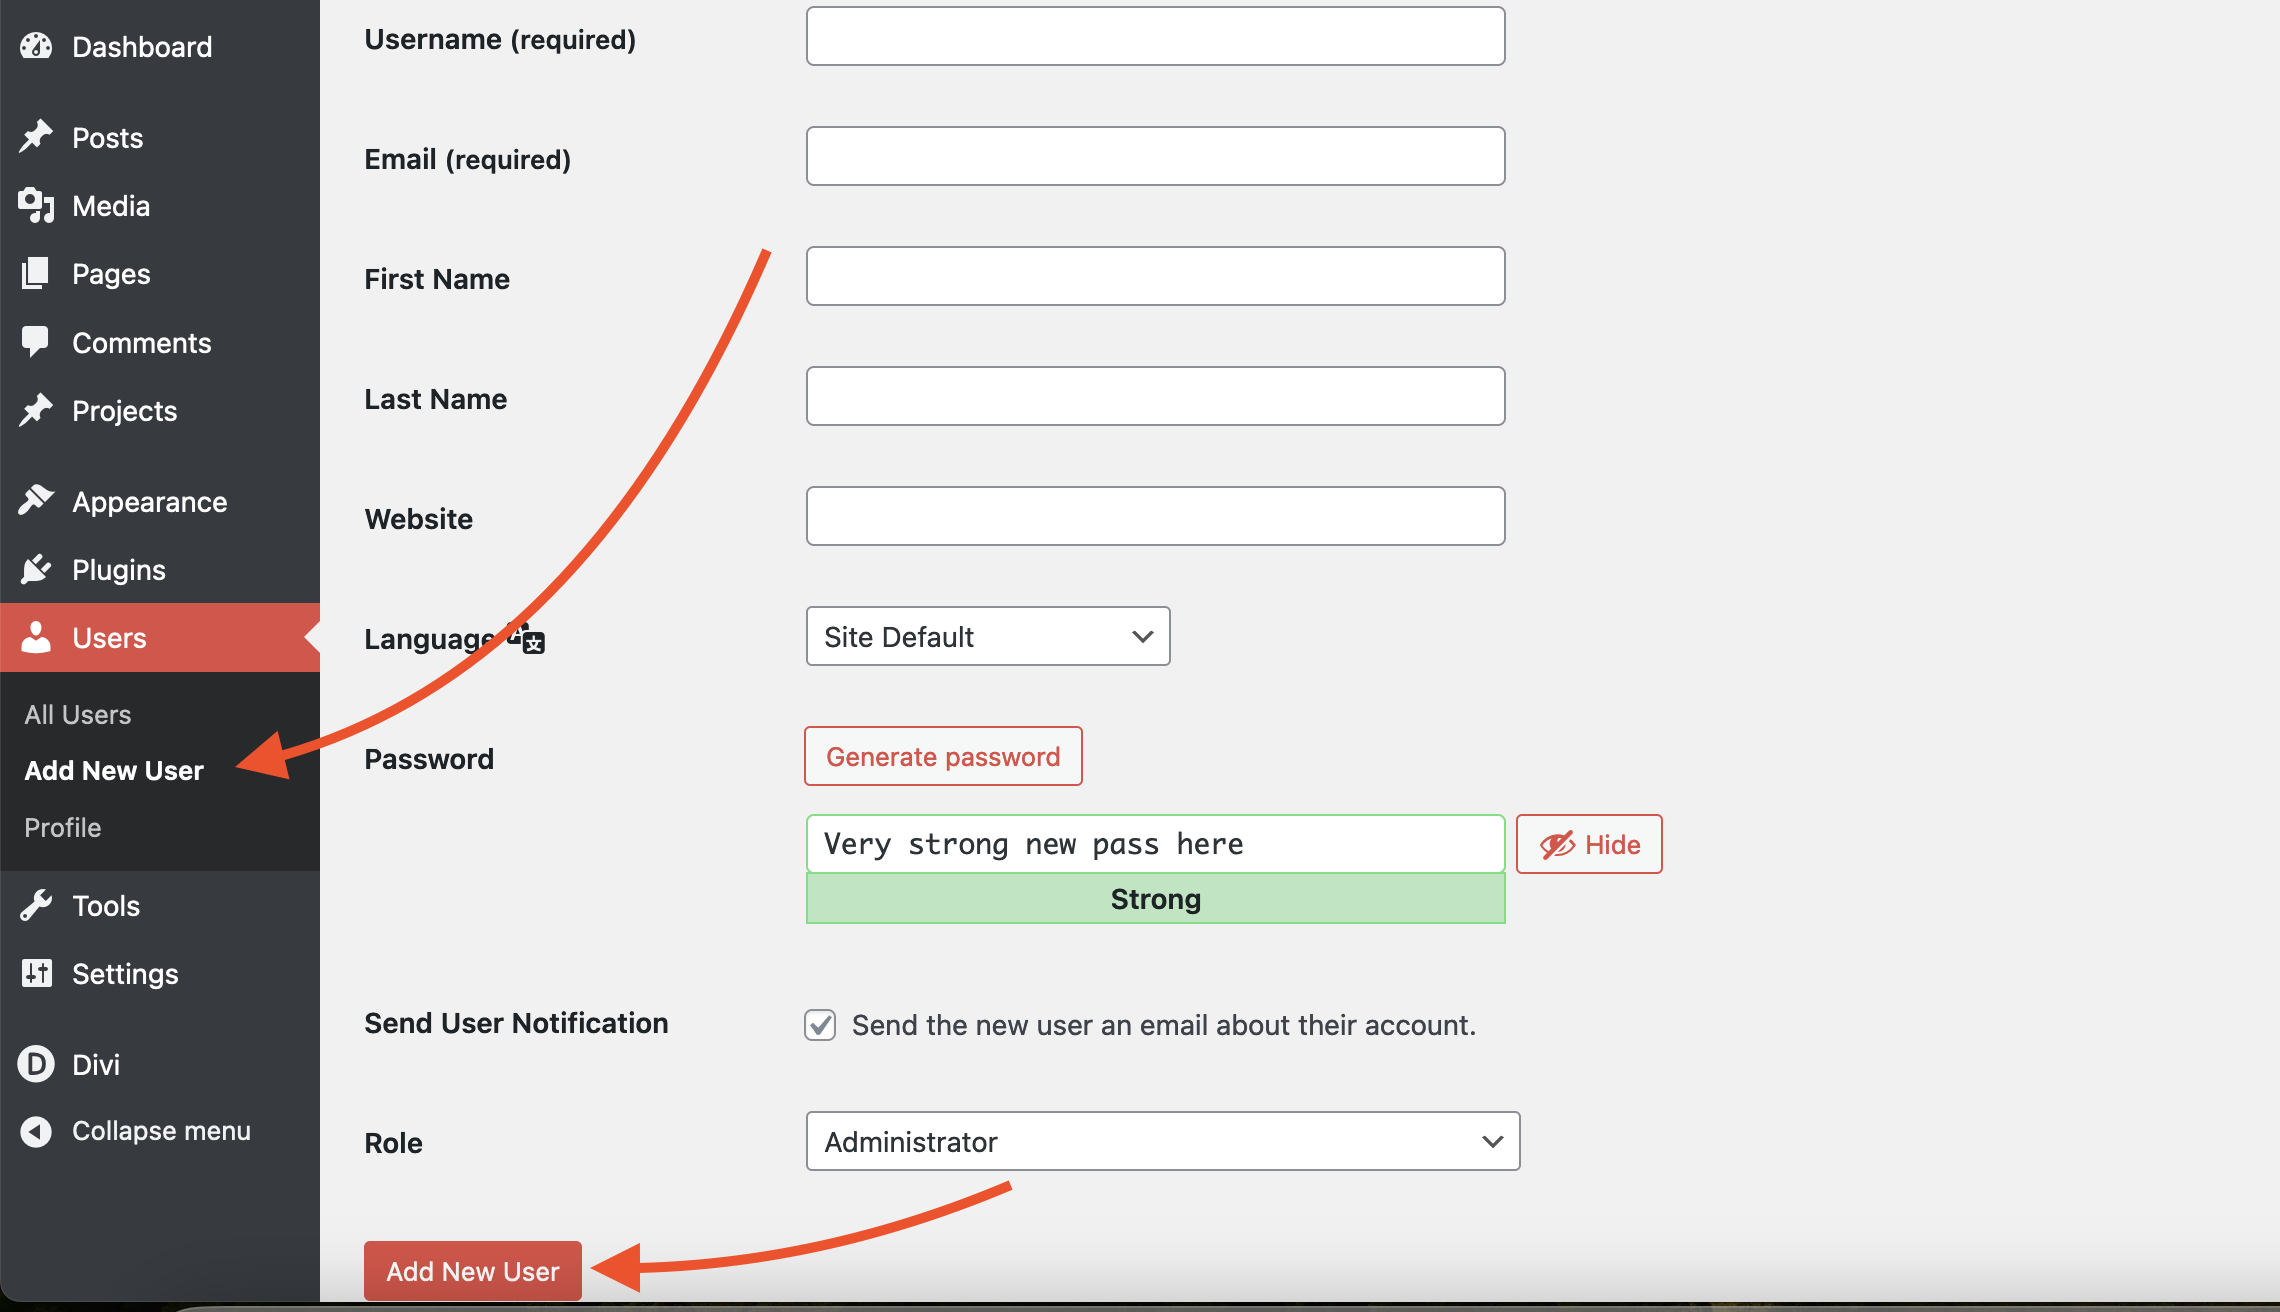
Test the New User: Log out of your current admin account and log in with the credentials of the newly created temporary admin user to ensure that it works as expected.
Remove the Temporary Admin User (After Use)
After Download Monitor’s support team finishes debugging or providing support, you can go ahead and remove the temporary admin user. To do this:
-> Go back to the Users page in the WordPress dashboard.
-> Locate the temporary admin user in the list.
-> Click on the user to edit their details or hover over it to see the option to “Delete”.
-> Scroll down to the bottom and click the “Delete” button.
Option 2: Using the “Temporary Login Without Password” Plugin
Install and Activate the Plugin:
-> Navigate to the “Plugins” section in your WordPress dashboard.
-> Click on “Add New.”
-> Search for “Temporary Login Without Password.“
-> Install and activate the plugin.
Generate a Temporary Login Link:
->After activation, navigate to the “Users” page.
-> Click on “Temporary Logins” and then click on the “Create new” button.
Configure Temporary Login Settings:
-> Enter the email address and name of the new user.
-> Set the expiration date for the temporary login link.
-> Choose the user role for the temporary login (Administrator, Editor, Author, etc.).
-> Click “Submit.”
Share the Temporary Login Link:
-> Once configured, a temporary login link will be generated.
->Share the link with the person who needs access.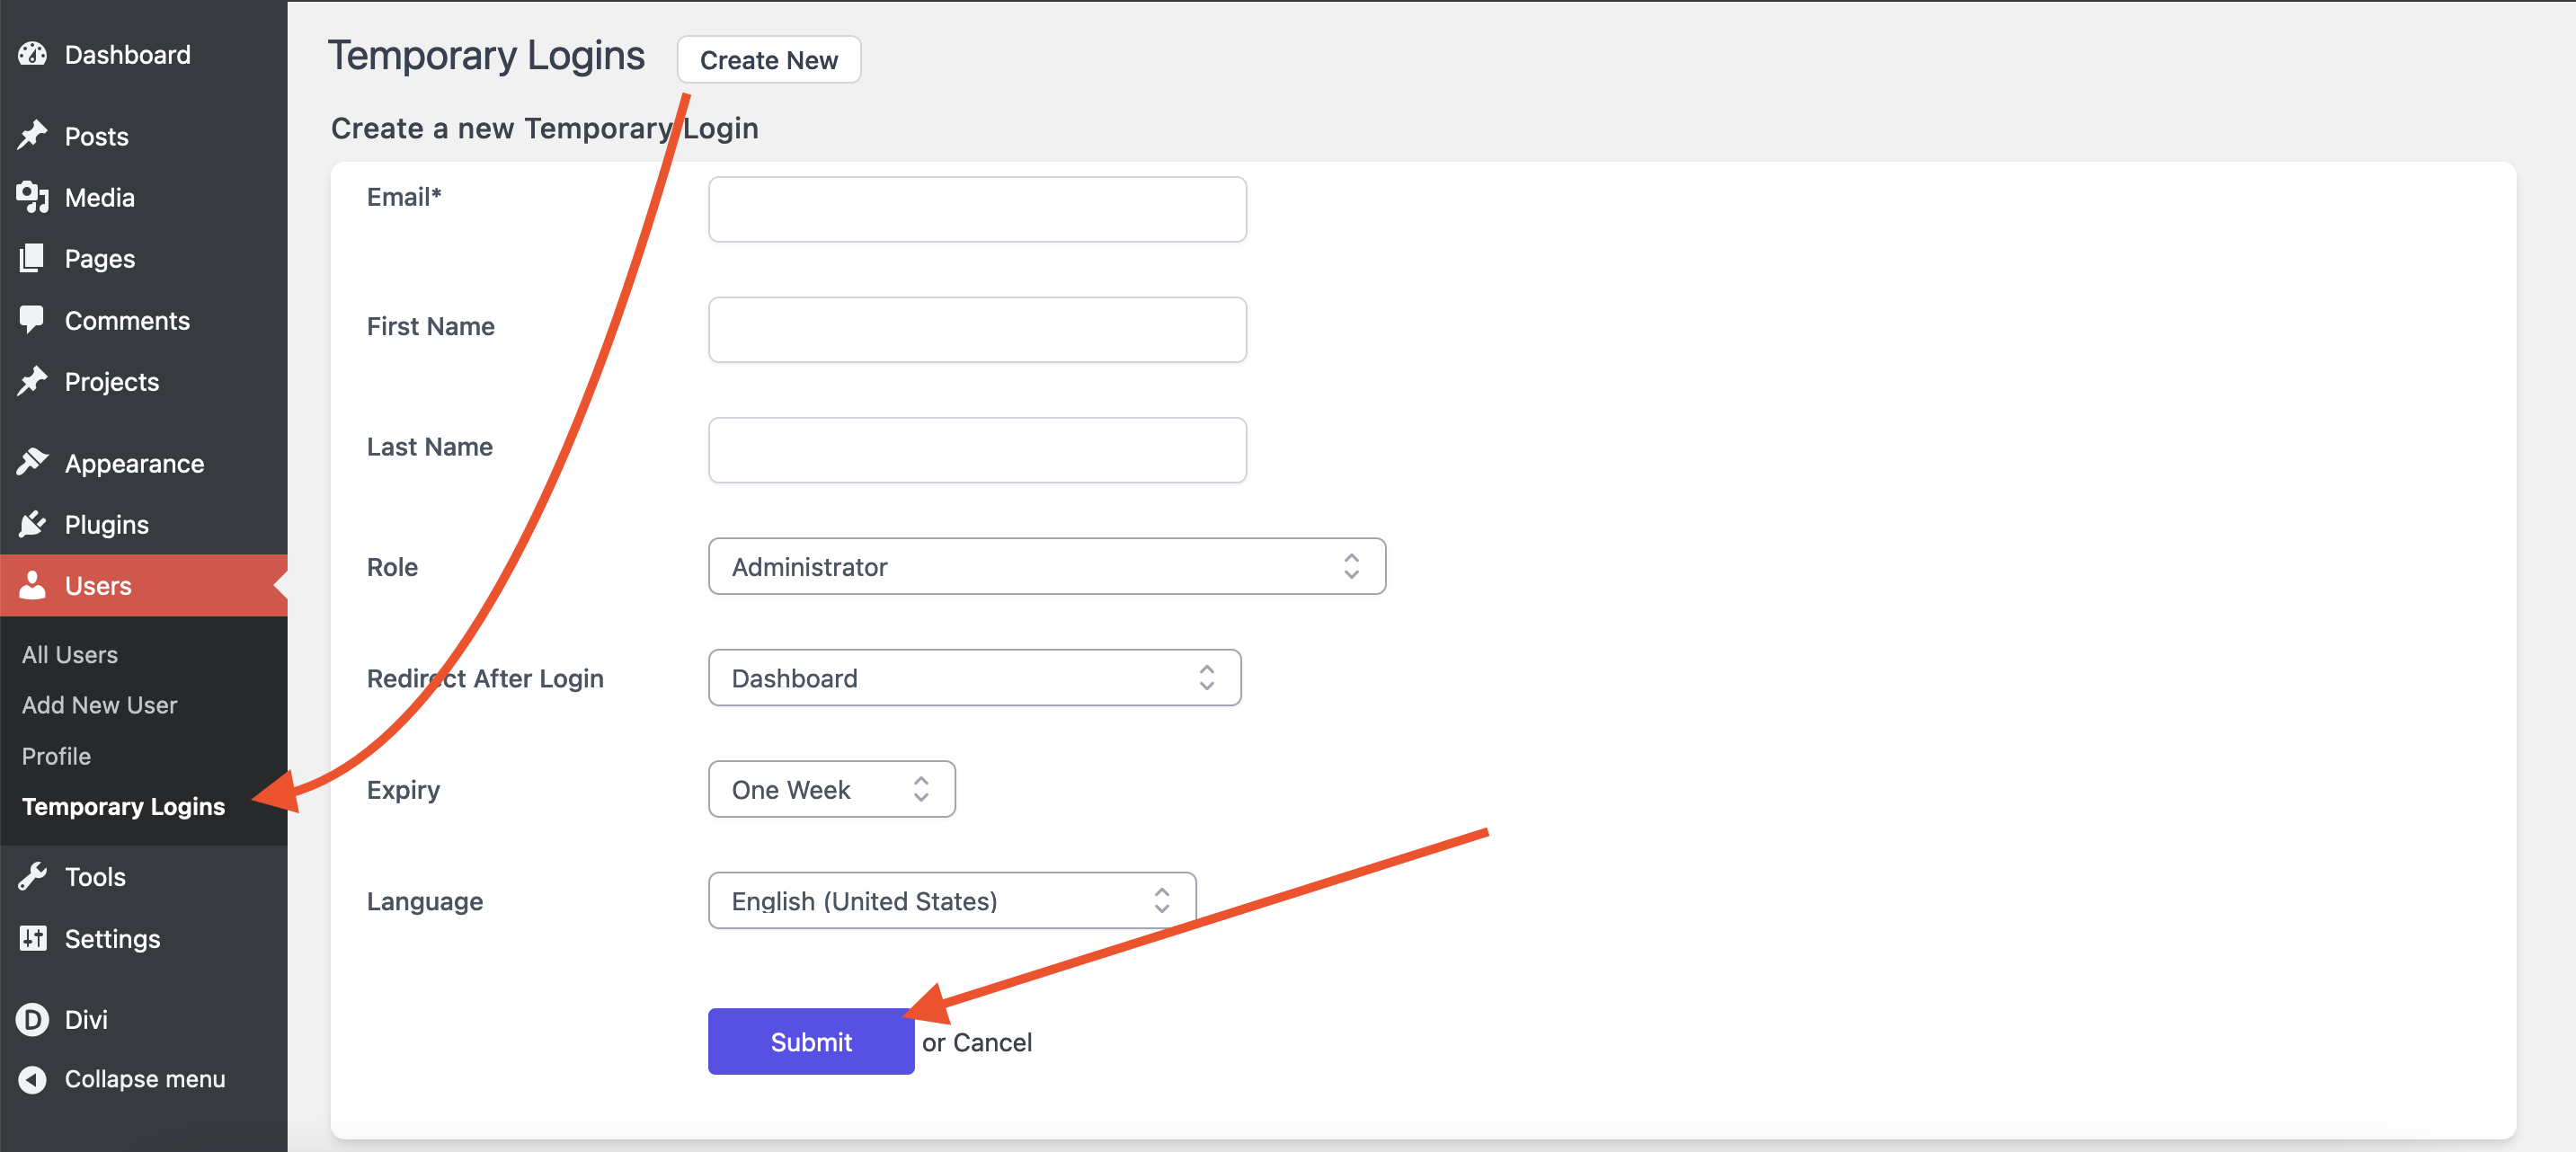
Allow Download Monitor’s support team to help debug faster using one of these methods for creating temporary admin users. Whether opting for the manual approach or leveraging the Temporary Login Without Password plugin, these techniques provide flexibility and security, ensuring a seamless support experience while safeguarding your WordPress site.