Instead of copy-pasting your content, you can use our extension to add Amazon files to your website with Download Monitor.
Using Download Monitor, you can link to files hosted on Amazon s3 so that you can serve secure, expiring download links to your users. Let’s see what needs to be set!
PHP Version 5.5 or Higher Required
Since version 2.0.0 of this extension, your server needs to run PHP version 5.5.0 or higher in order to run the Amazon S3 extension. This is because the new library created by Amazon to interact with the new Amazon API (v4) requires PHP 5.5 or higher.
Installation
- Unzip and upload the plugin’s folder to your /wp-content/plugins/ directory
- Activate the extension through the ‘Plugins’ menu in WordPress
For more information on installing and activating Download Monitor see here.
Setup
Before the plugin can be used, you need to set up your Amazon S3 Access keys.
- Go to Amazon AWS s3 console https://s3.console.aws.amazon.com/ and log in to your account.
- On the left menu, click Buckets, then Create bucket.

- You’ll need to set up the Bucket name and AWS Region in this section.
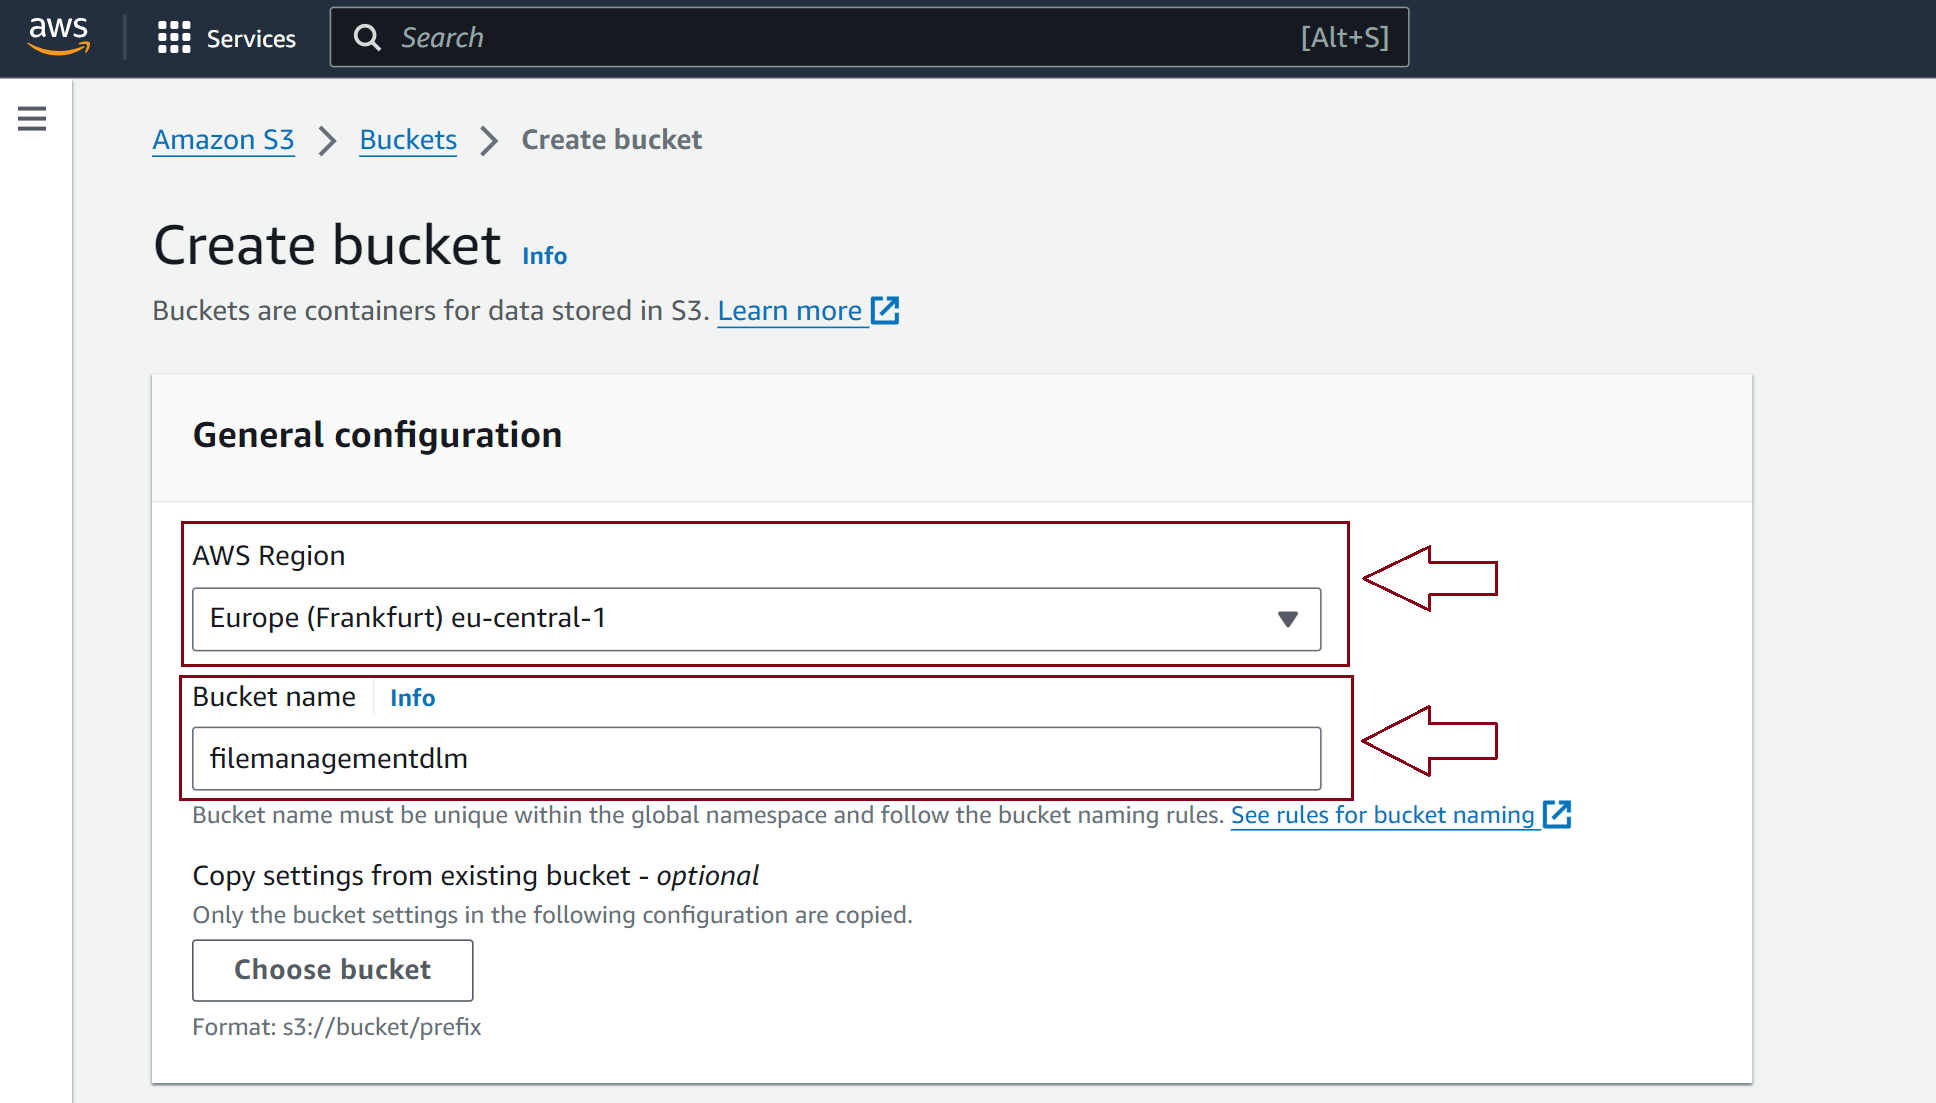
- Once you’re done, click Create bucket.

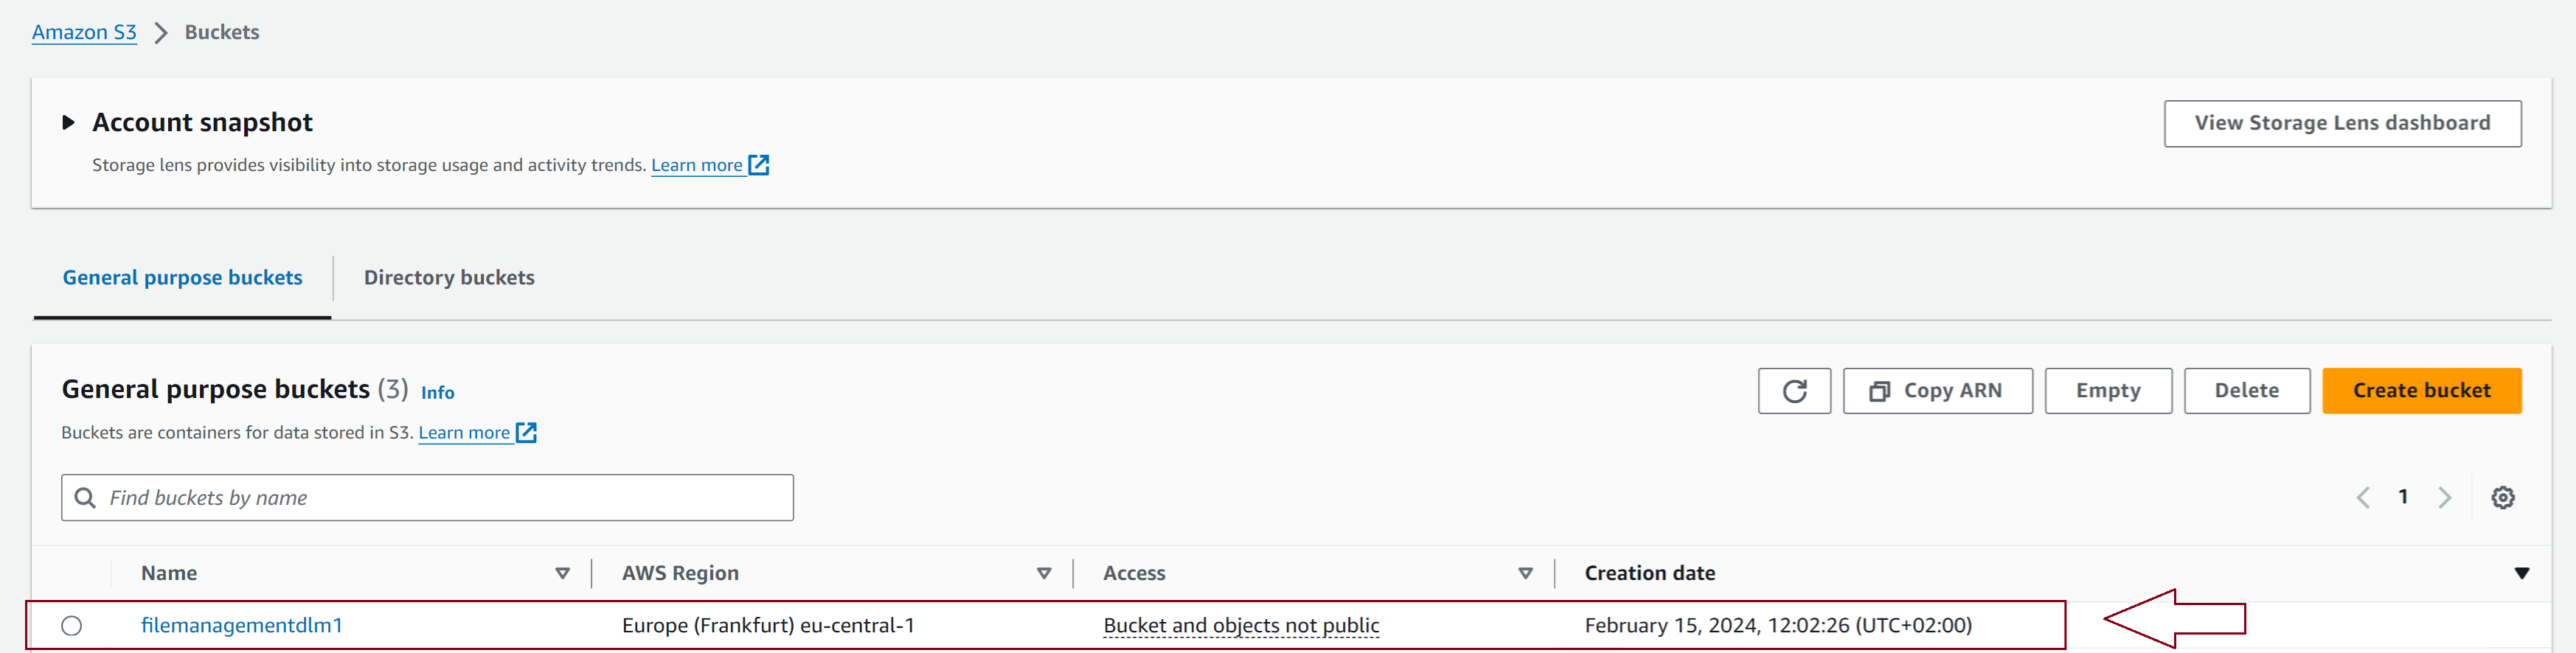
- In the Buckets list, click on the bucket you want to connect with the DLM Amazon S3 extension.
- Click on the Permissions tab.

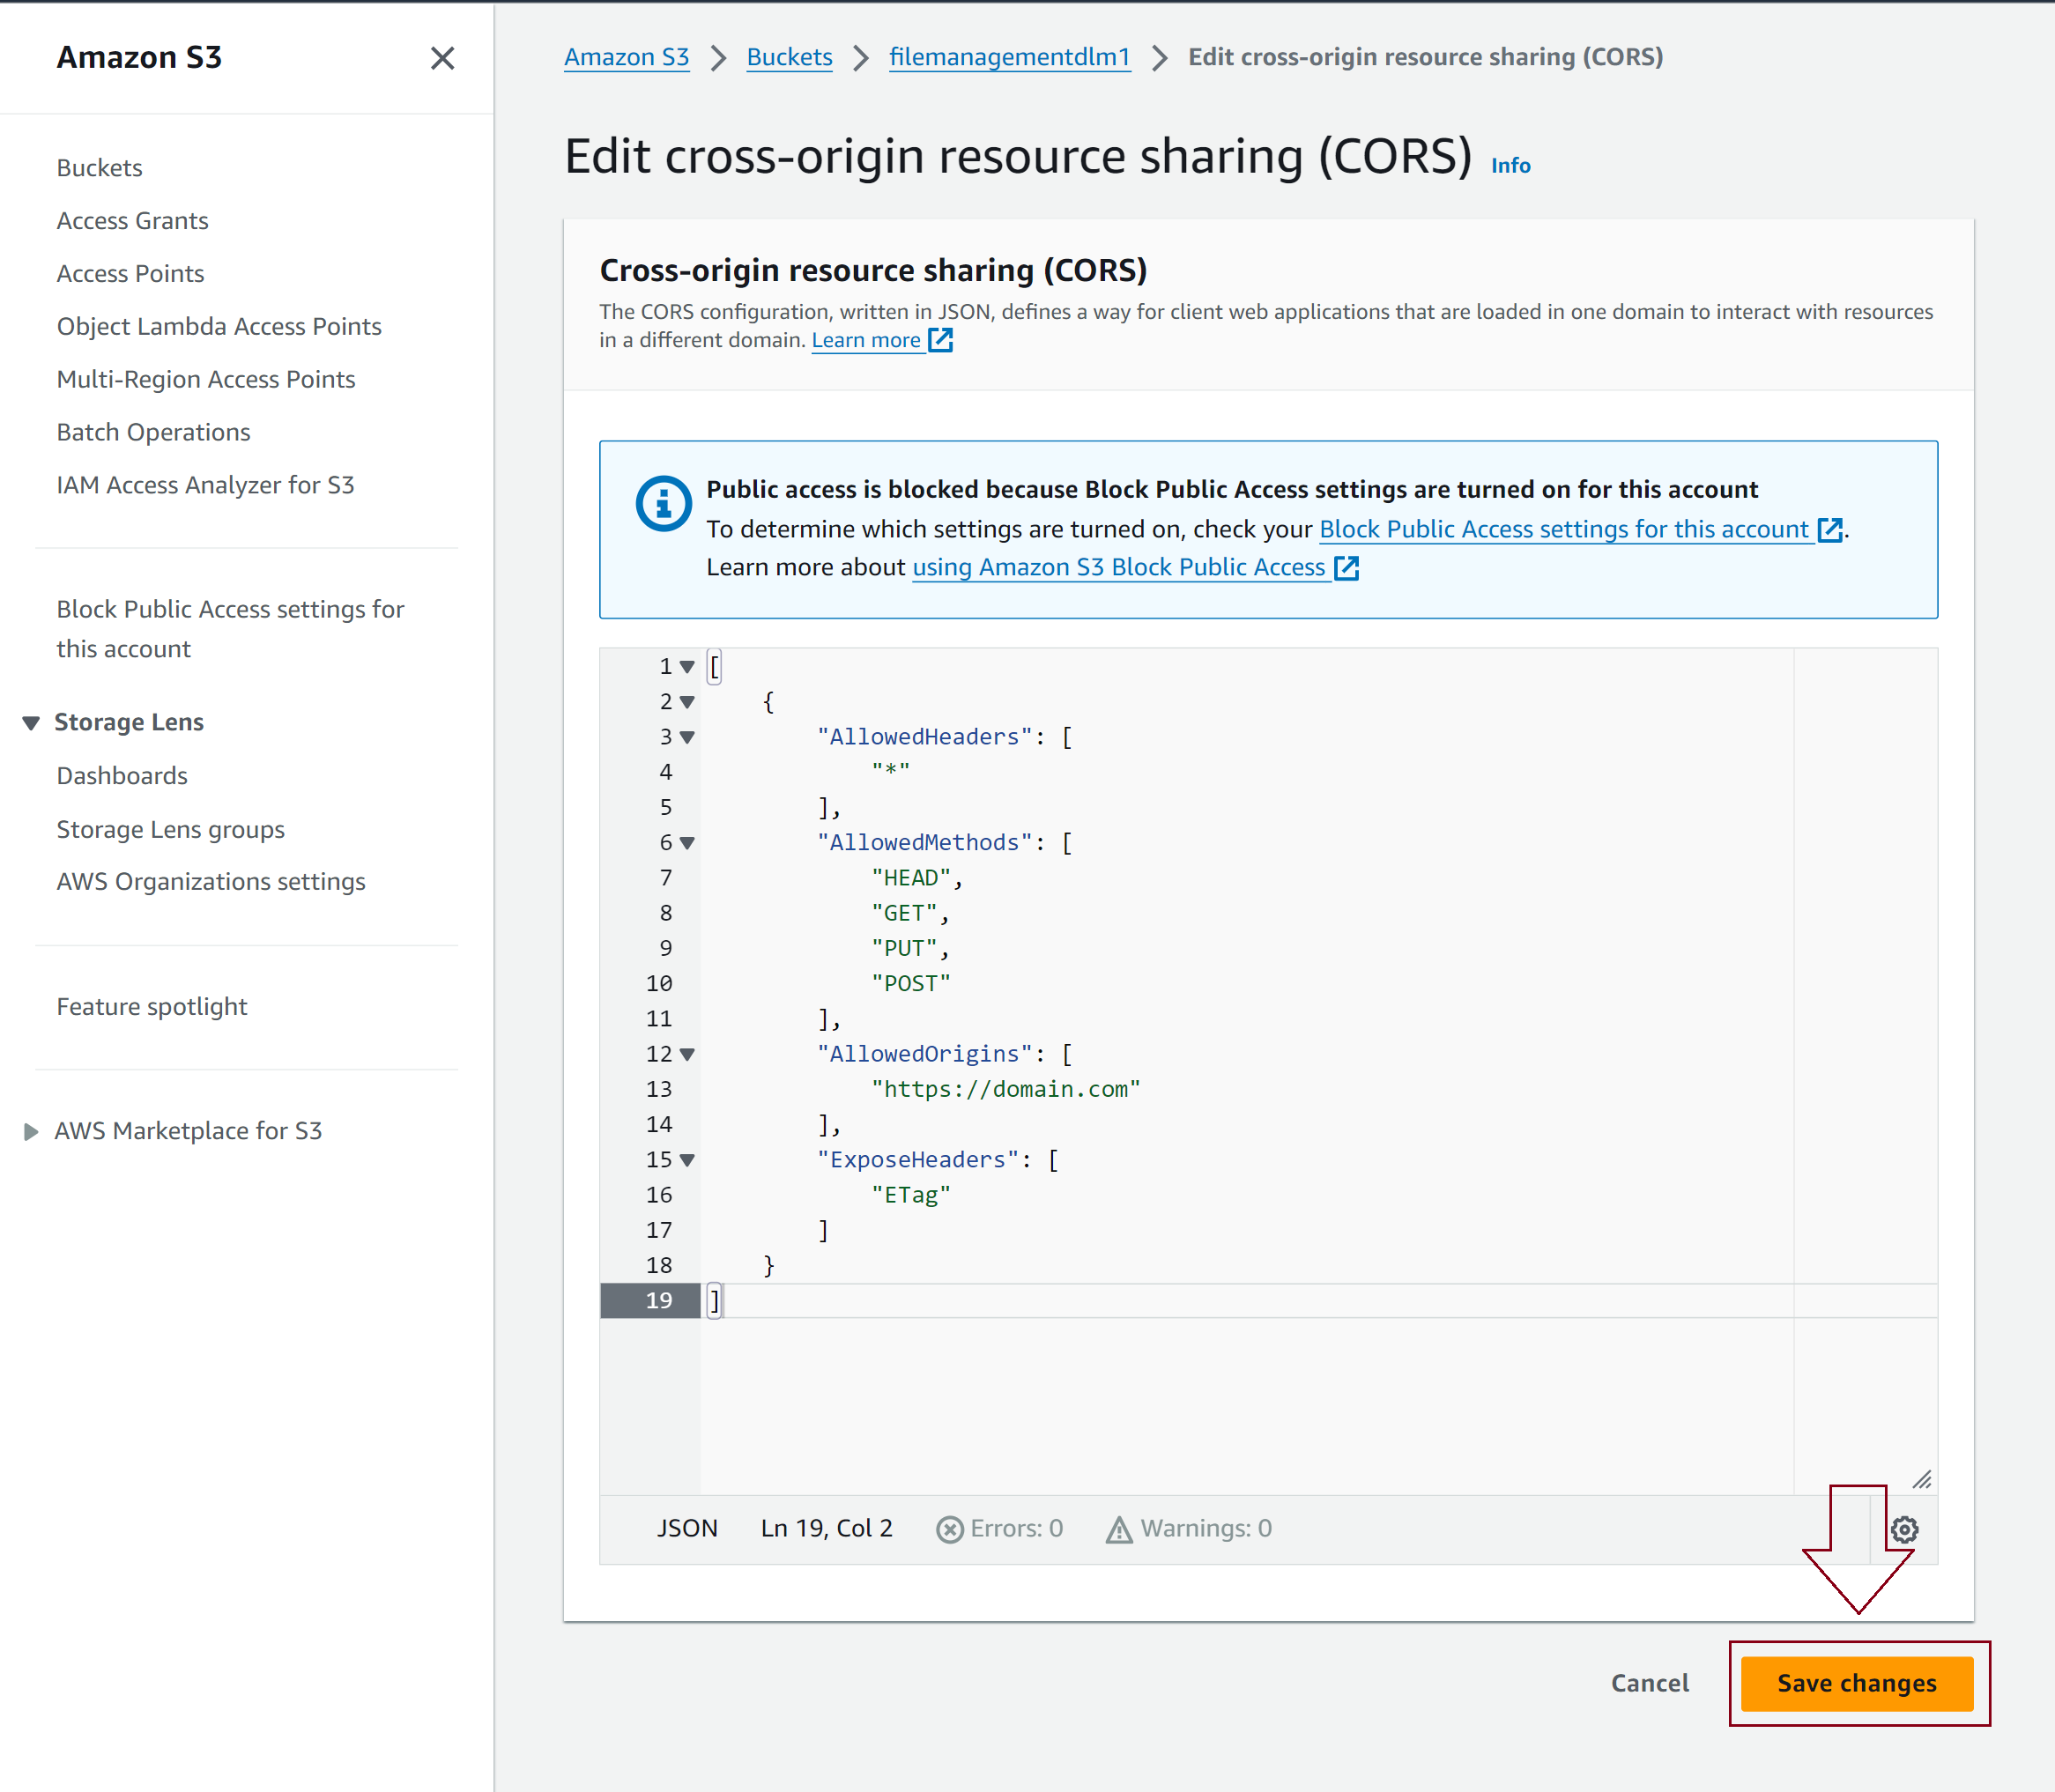
- Scroll down to Cross-origin resource sharing (CORS) and click Edit.
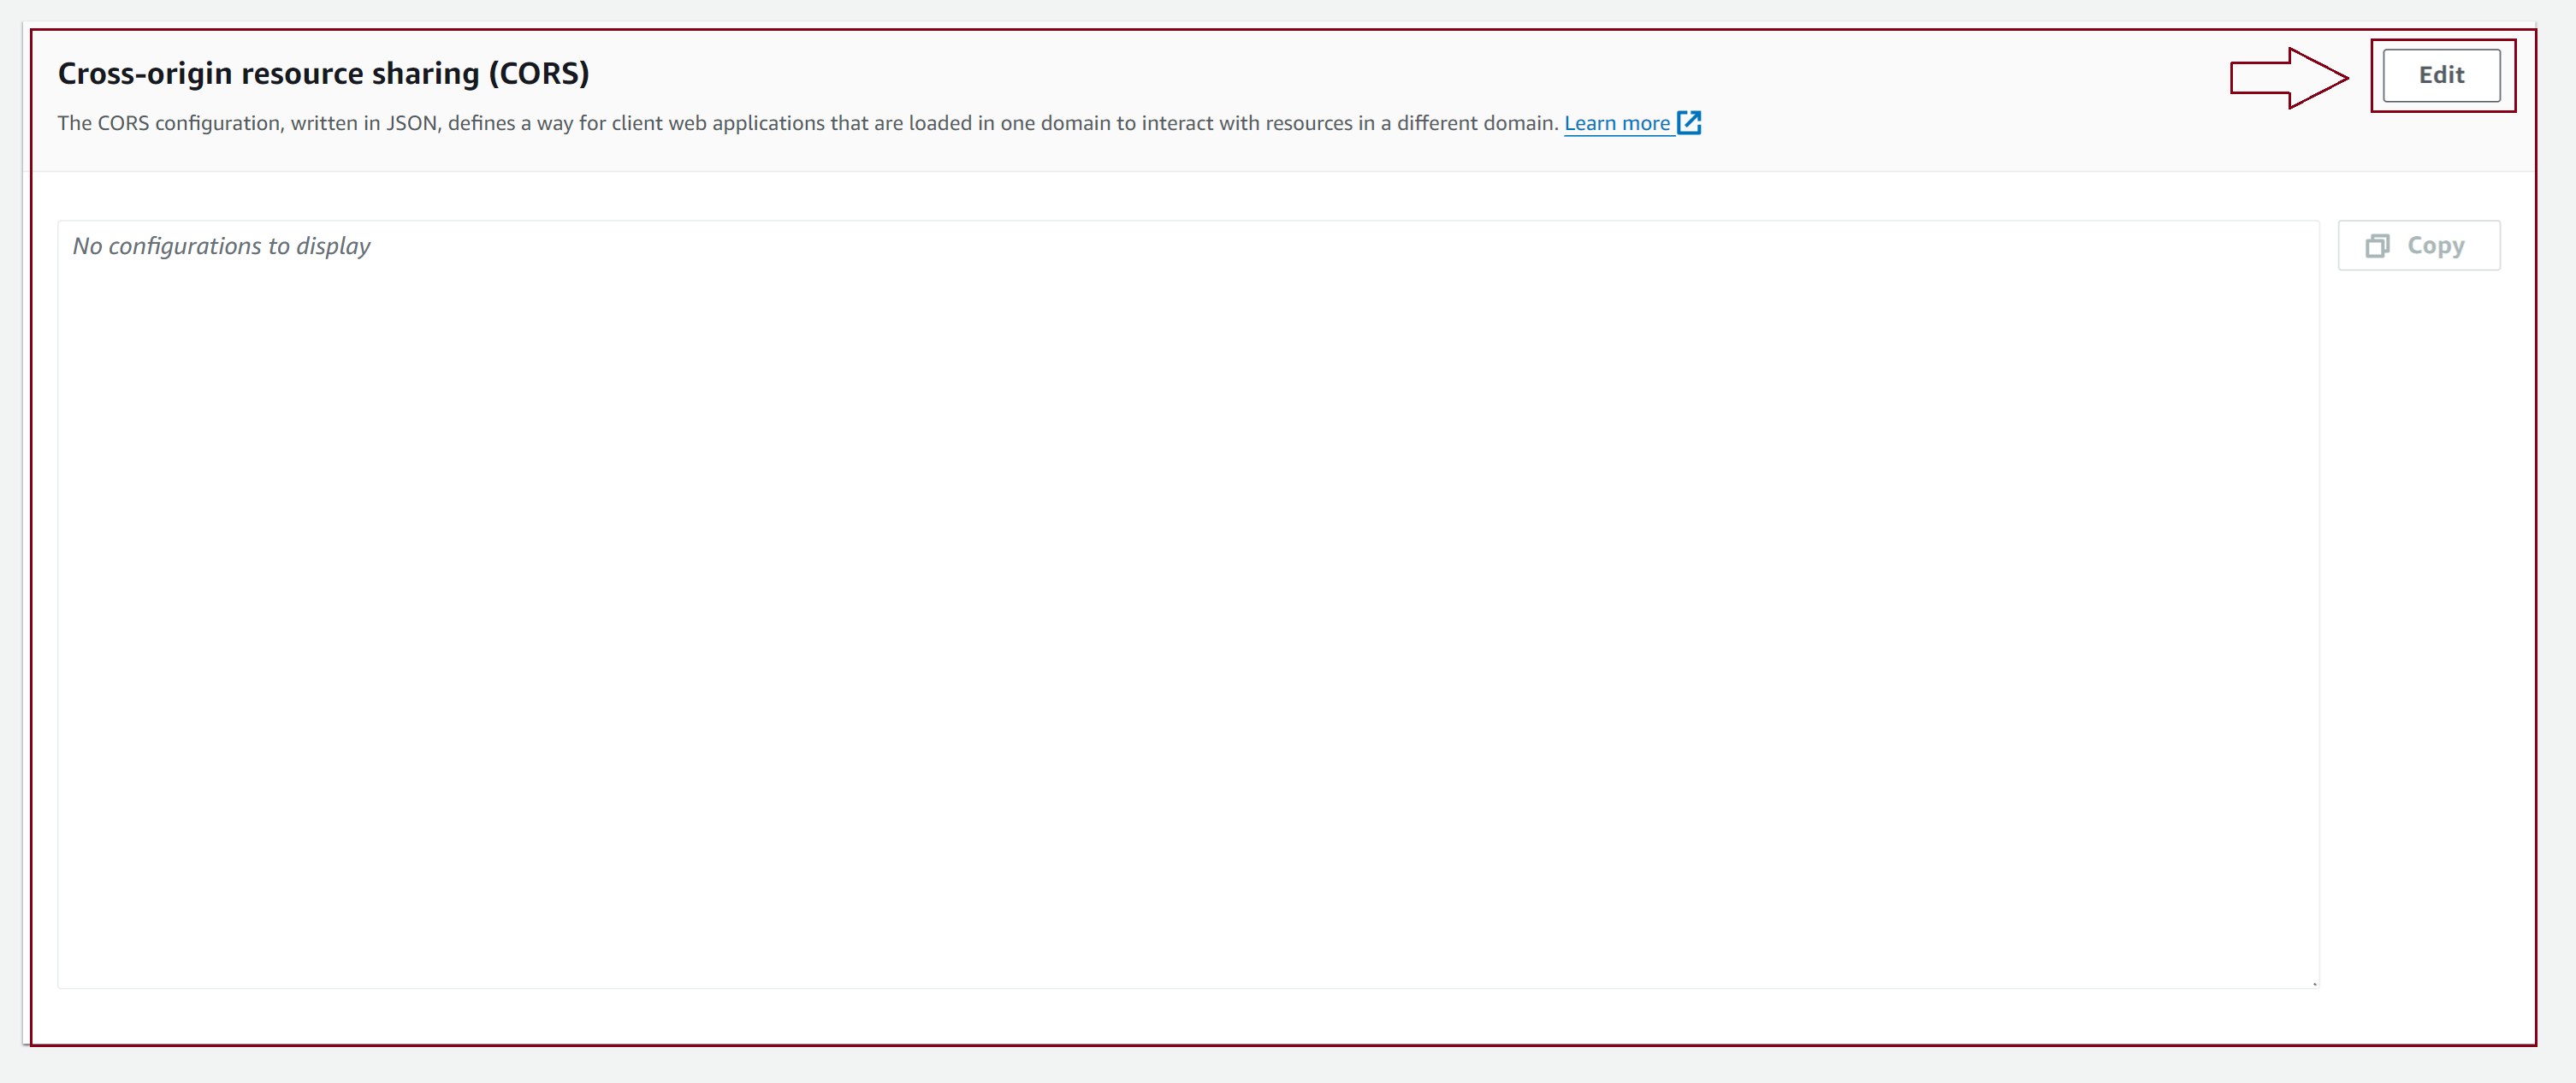
- Copy and paste the following JSON into the text field:
JSON
[ { "AllowedHeaders": [ "*" ], "AllowedMethods": [ "HEAD", "GET", "PUT", "POST" ], "AllowedOrigins": [ "https://domain.com" ], "ExposeHeaders": [ "ETag" ] } ] - Change the “AllowedOrigins” with the domain you would like to use the Download Monitor Amazon S3 Extension.MARKUP
... "AllowedOrigins": [ "https://domain.com" ], ...
-> The origin string can contain only one * wildcard character, such as https://*.domain.com. You can optionally specify * as the origin to enable all the origins to send cross-origin requests. You can also specify https to enable only secure origins.
-> If you want to share your Amazon files to a subdomain, add the URL you would like to use the Download Monitor Amazon S3 Extension, as shown below:MARKUP... "AllowedOrigins": [ "https://subdomain.domain.net" ], ...
-> Or to share Amazon content across all subdomains of a domain:MARKUP... "AllowedOrigins": [ "https://*.domain.com" ], ... - Click Save changes in the bottom-right corner of the text field.
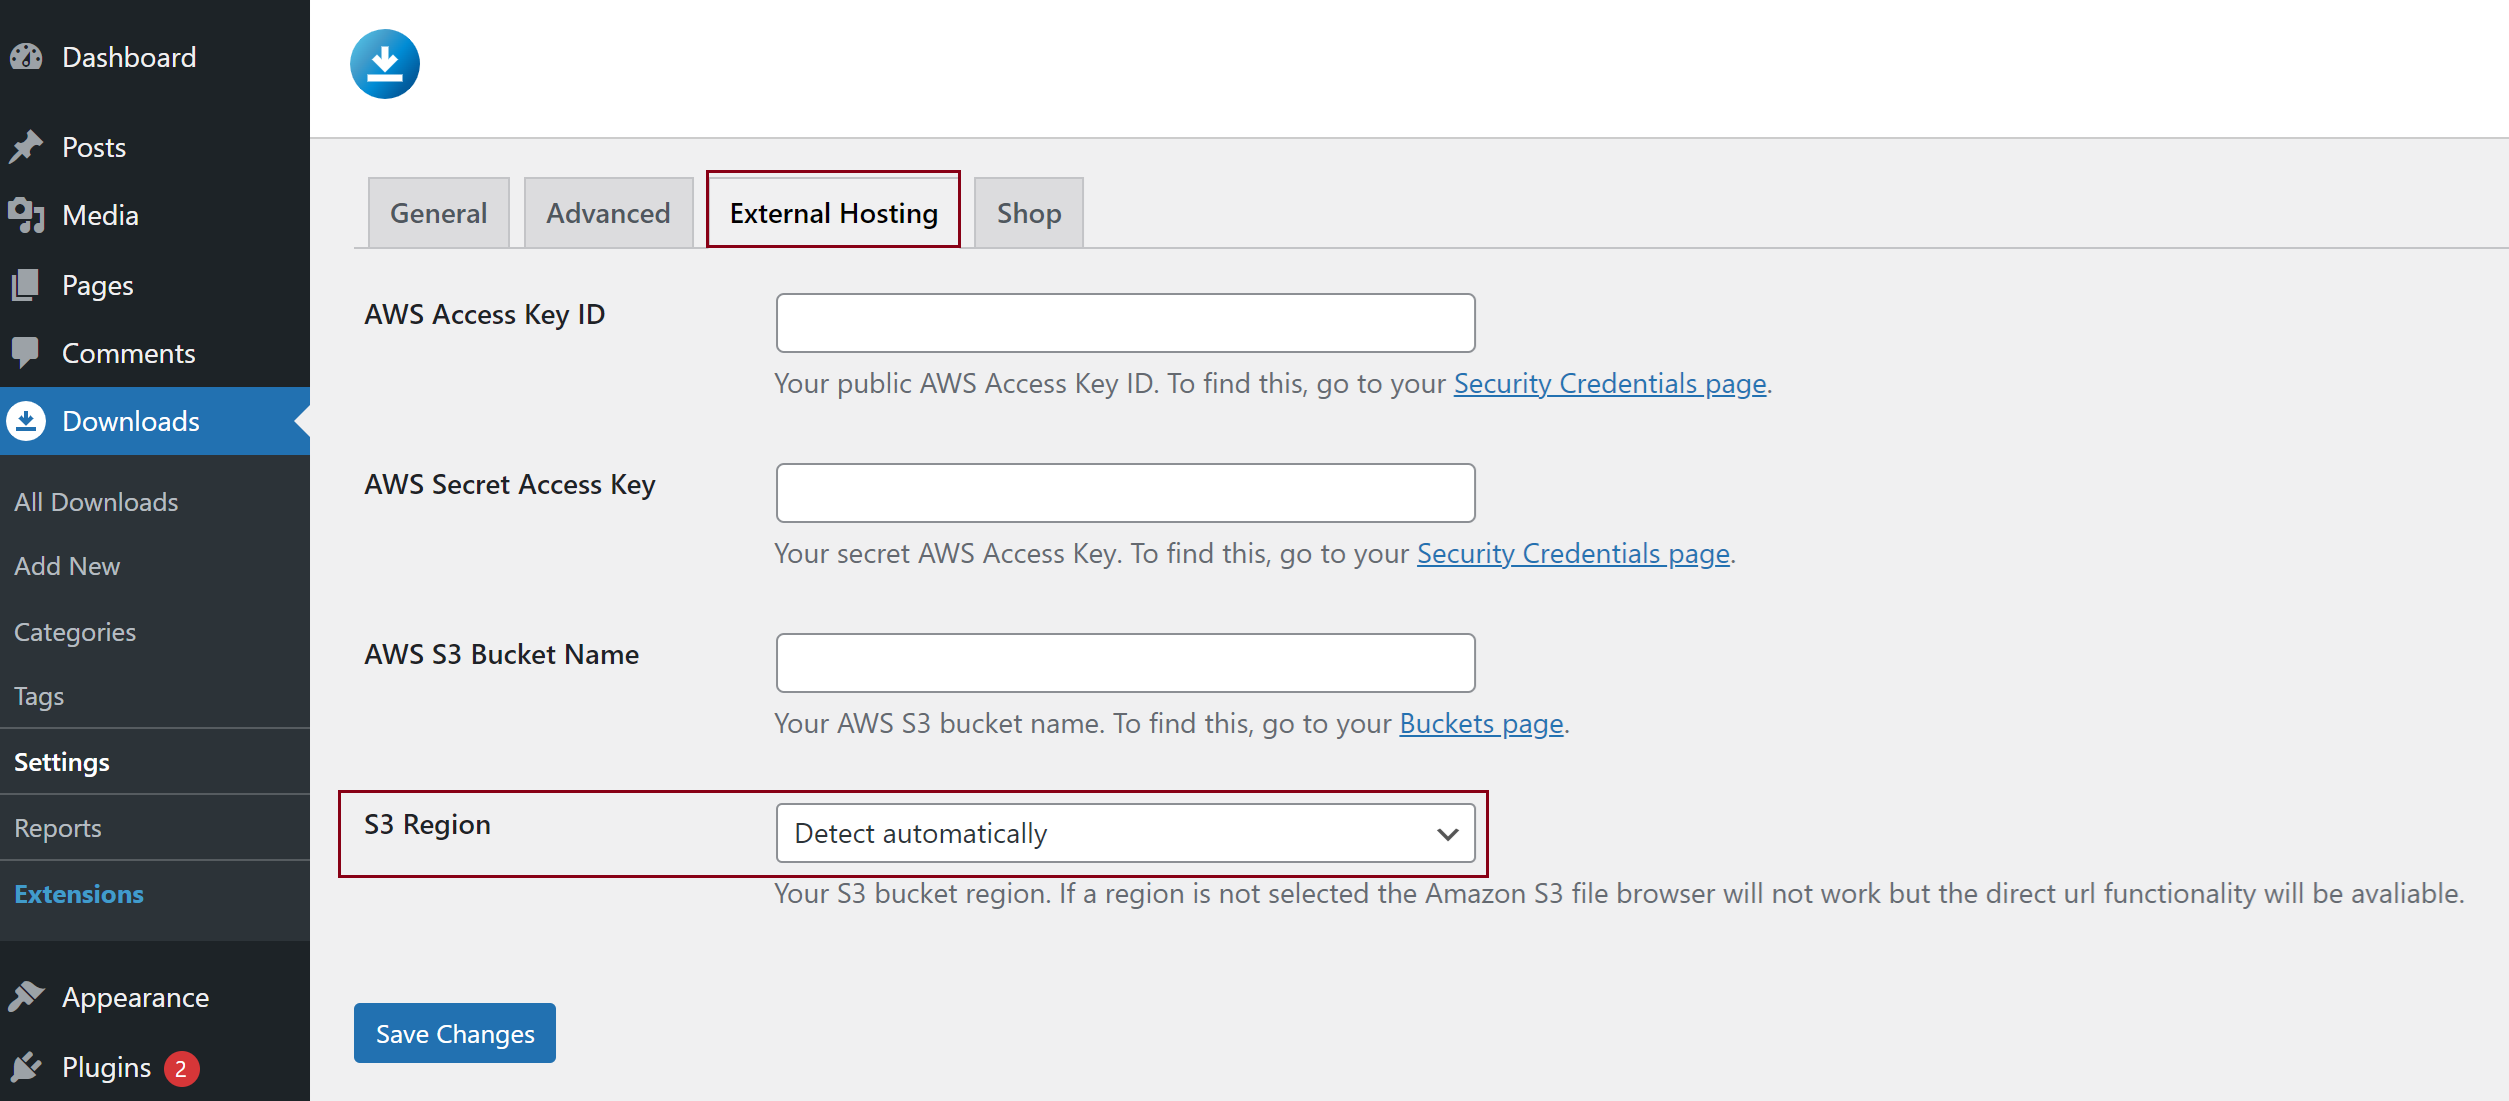
- Next, go to your WordPress dashboard > Downloads > Settings and look for the External Hosting tab.
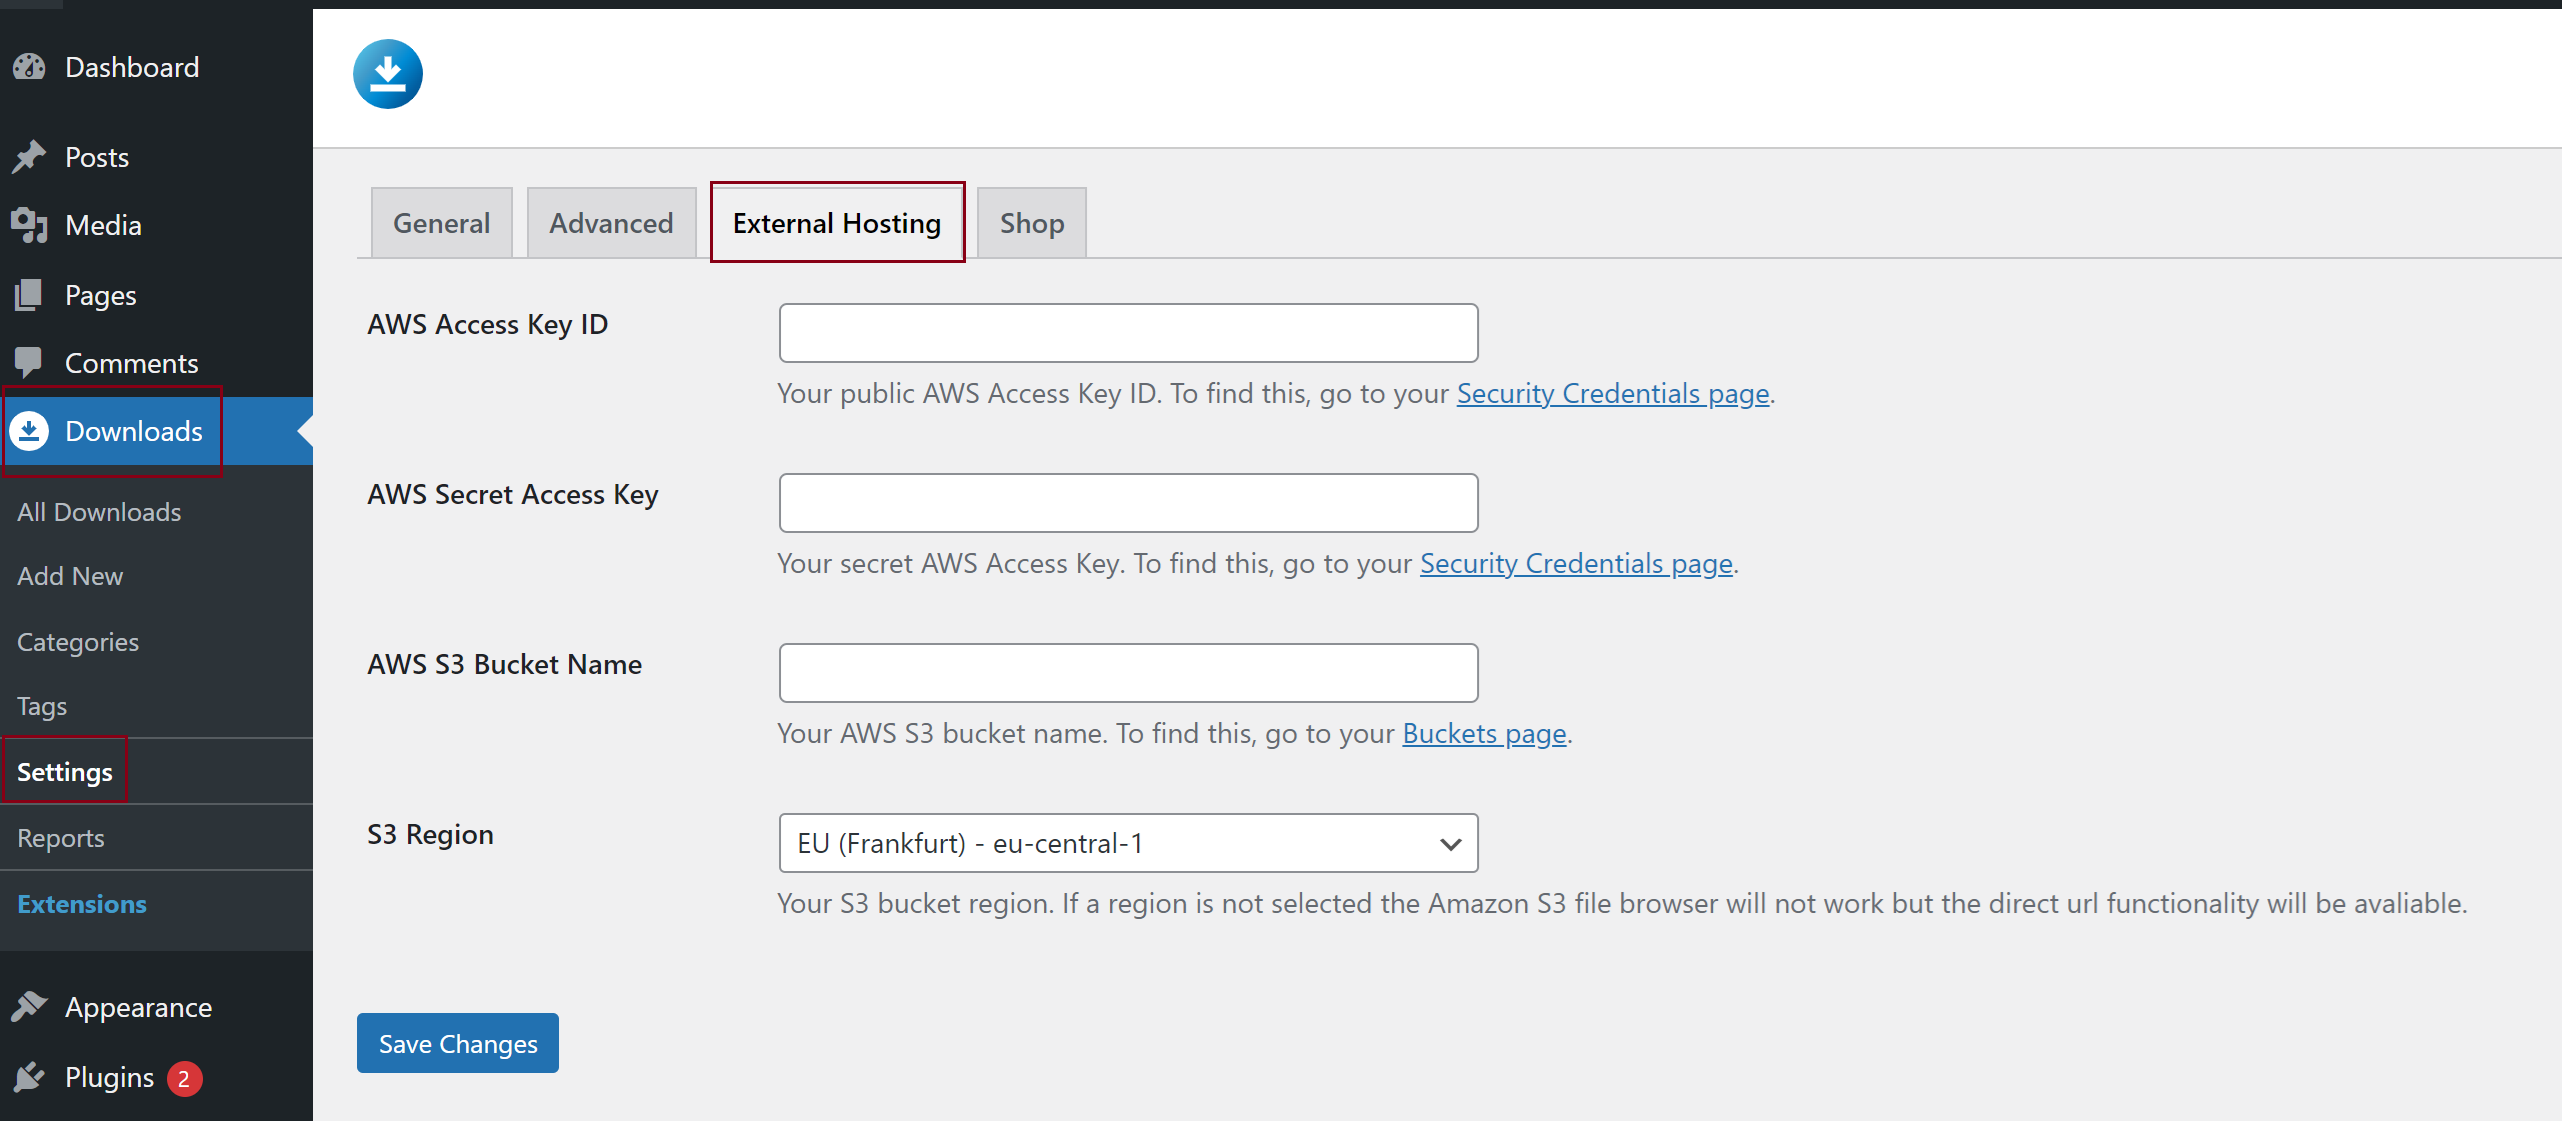
Here you need to enter your Amazon S3 Keys which you can find on your Security Credentials page.
Setting your S3 Region
The Amazon S3 extension will detect your S3 bucket region automatically by the download URL. In most cases, we can correctly detect the S3 region and you can leave the setting to it’s default: Detect Automatically. In some specific cases, Amazon allows you to change the default URL structure by allowing e.g. custom endpoints. If for some reason the extension does not detect your region correctly you can set your correct region in the extension settings.