We recommend making regular backups of your site and database for the health and safety of your site. This is especially essential before you install, update, or remove plugins.
Update Download Monitor
Update Download Monitor from Dashboard
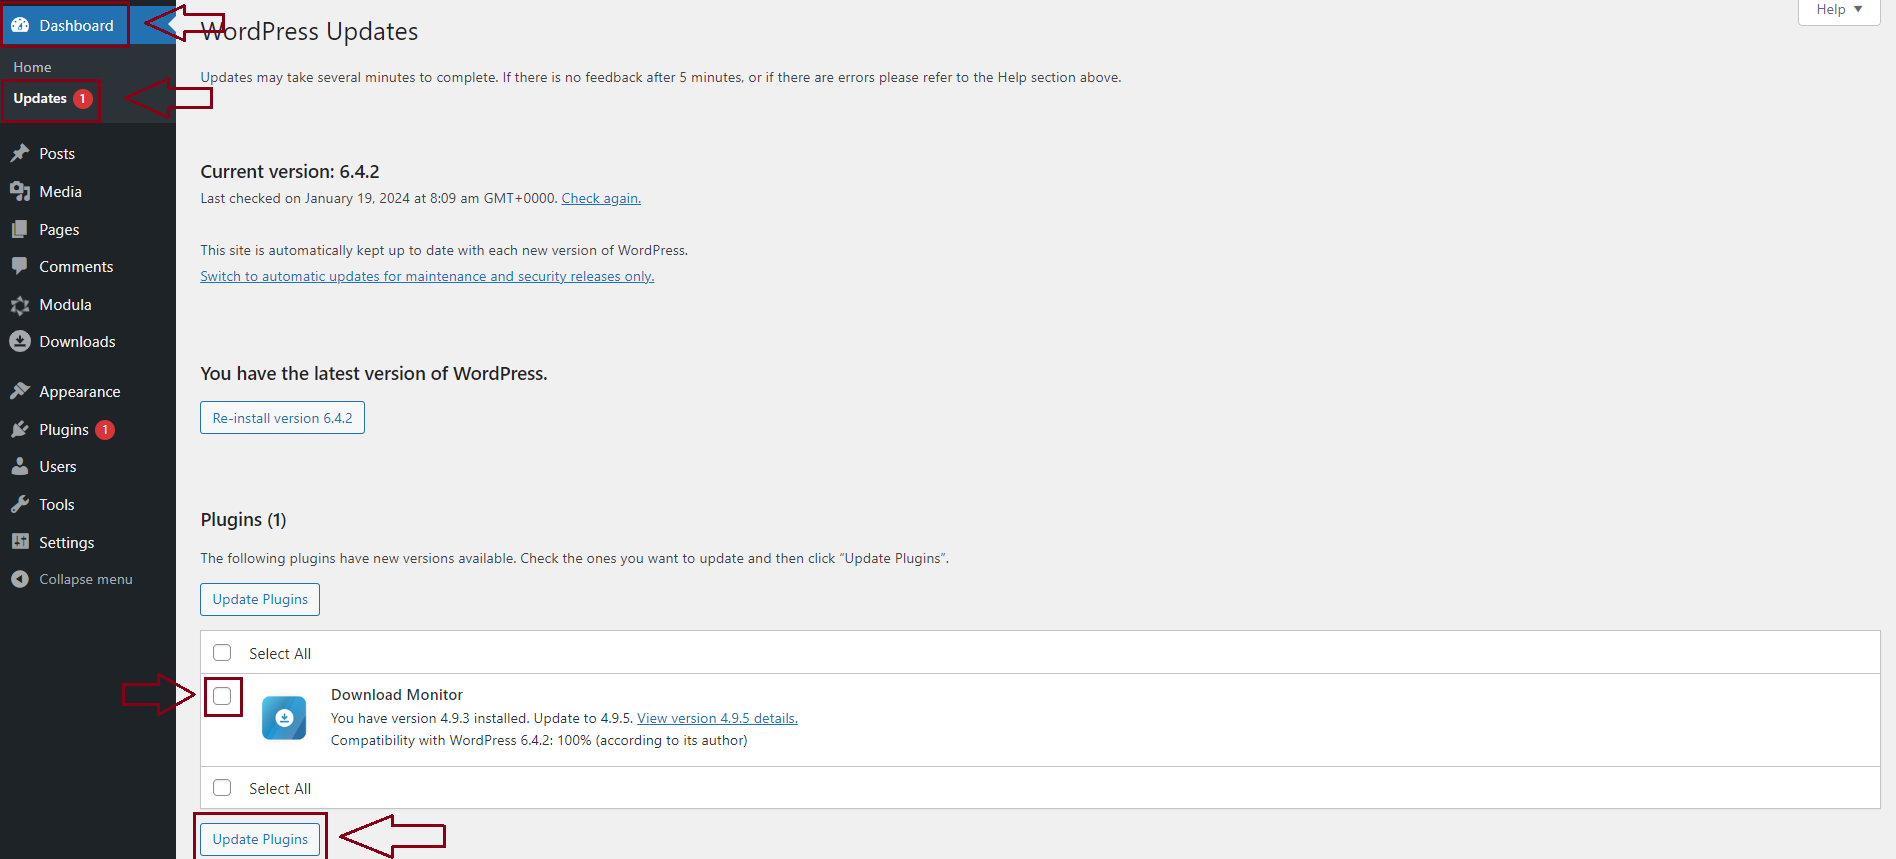
The quickest way to update your plugin is via the updates admin. Go to your WordPress Dashboard > Updates. Here you can see if you have any needed updates. Scroll down to plugins and checkmark the Download Monitor plugin. Click Update Plugins and you’re done.
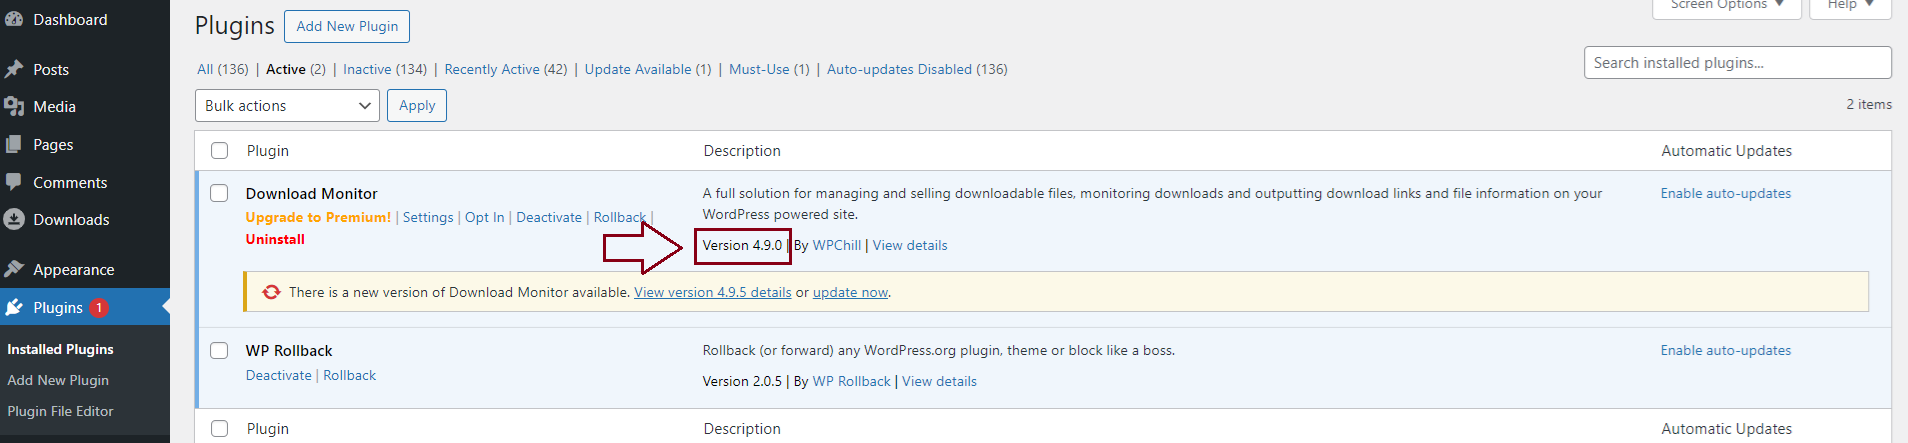
Update Download Monitor from Plugins
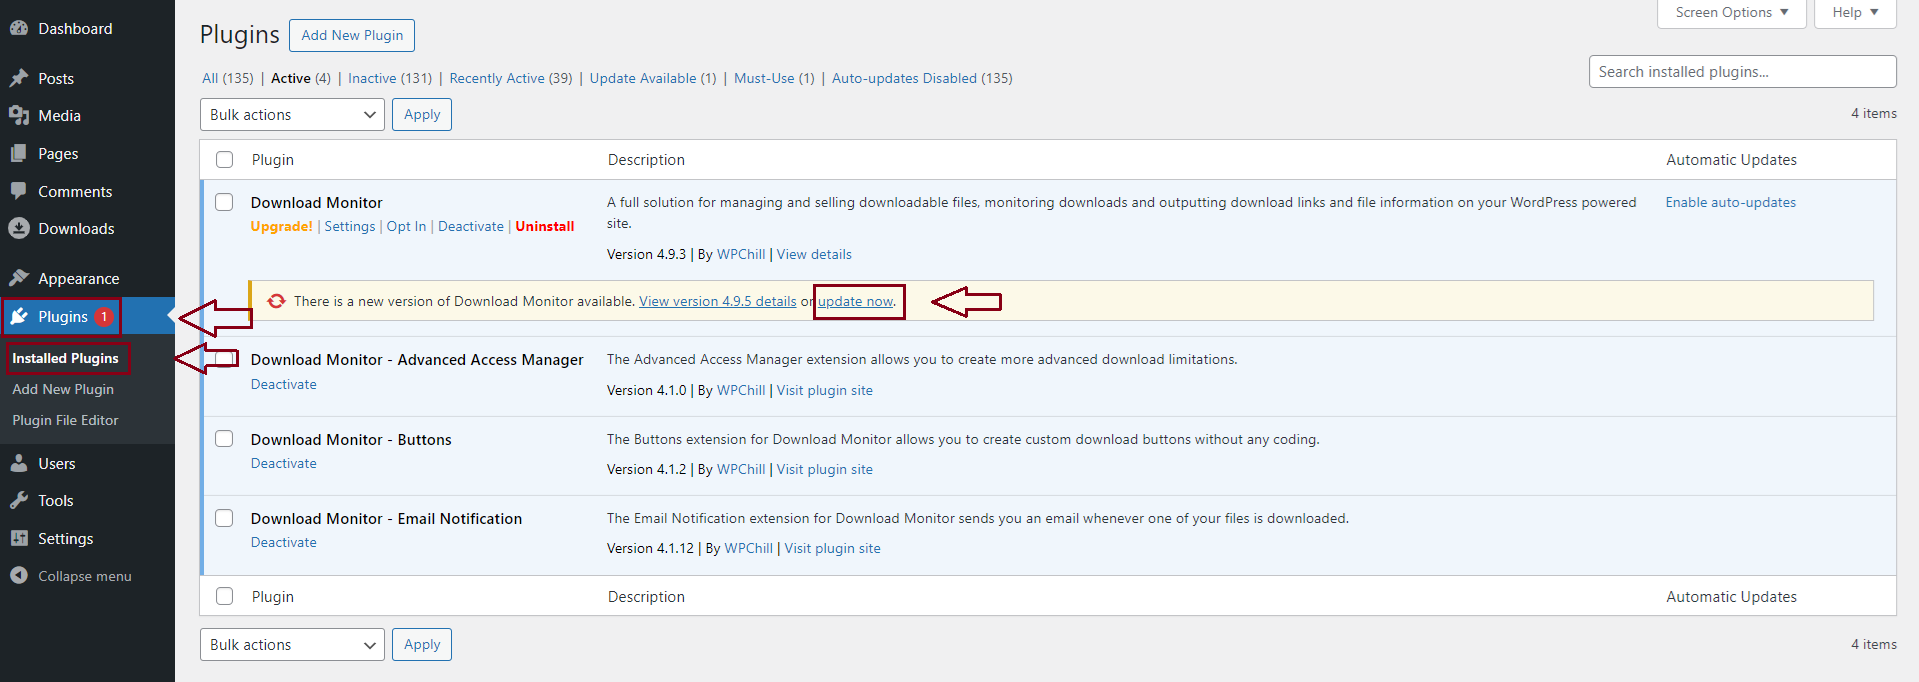
Go to Plugins > Installed Plugins and look for Download Monitor. You’ll be notified if there are any available updates. You can also see version details (new features, bug fixes, etc). All you have to do is to click on update now.
Manual Update
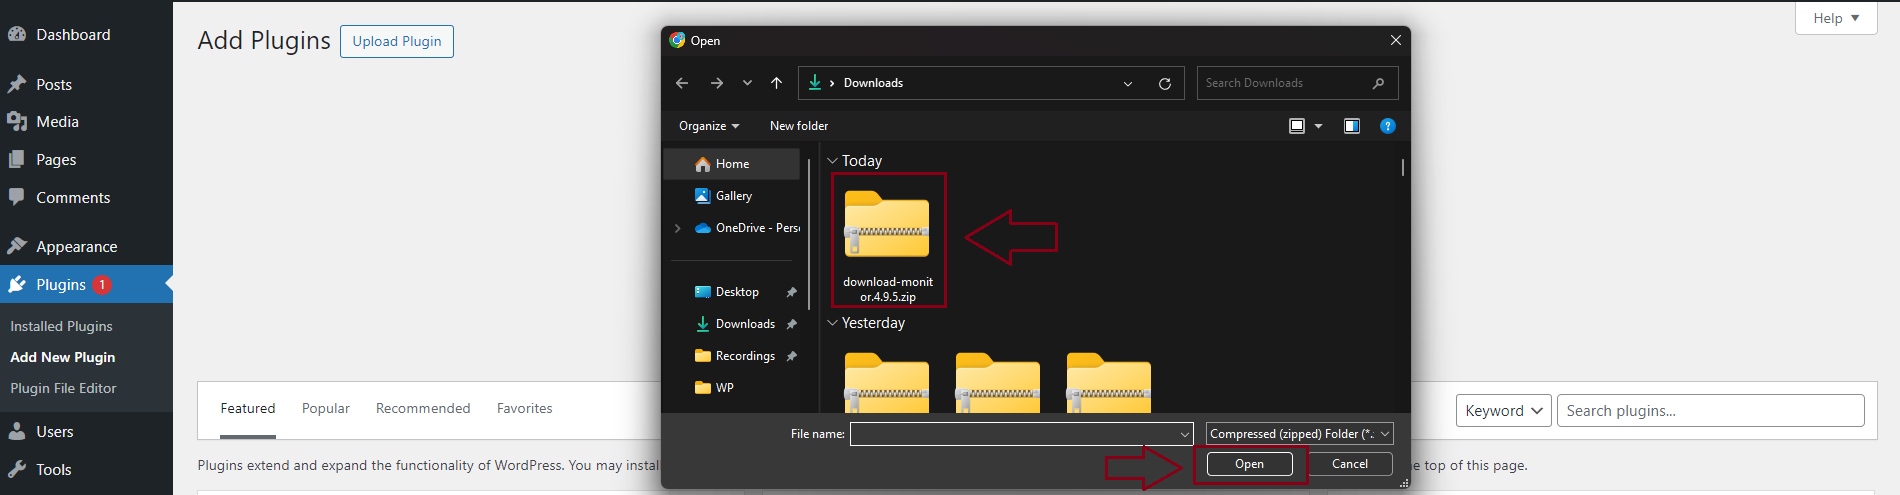
- Download the zip file from WordPress.org > Plugins > Download Monitor to your computer.
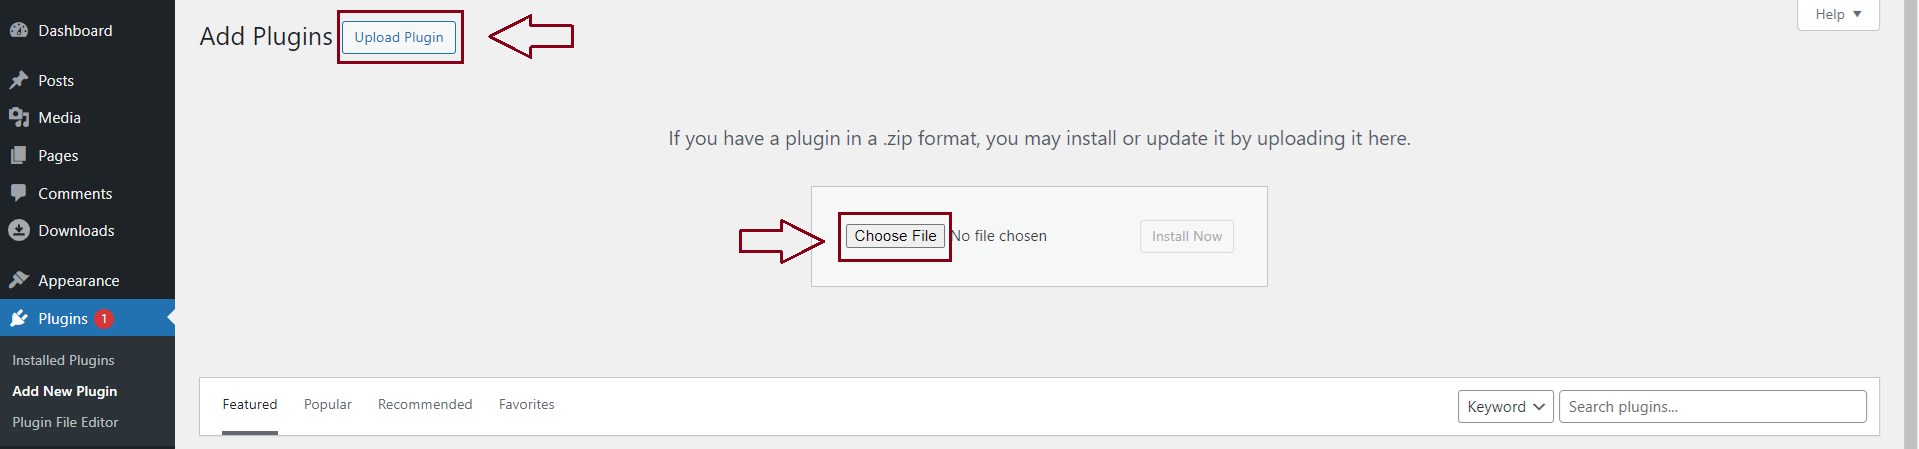
- Return to Plugins > Add New > Upload Plugin > Choose file.
- Upload the zip file from your computer.
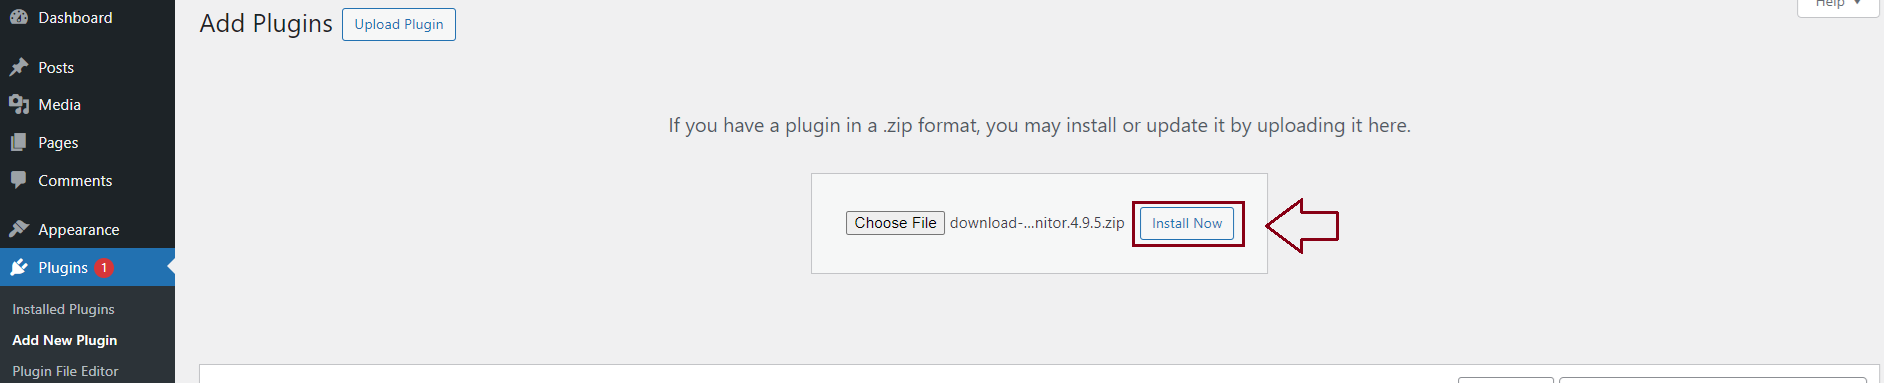
- Click Install Now and wait a couple of seconds.
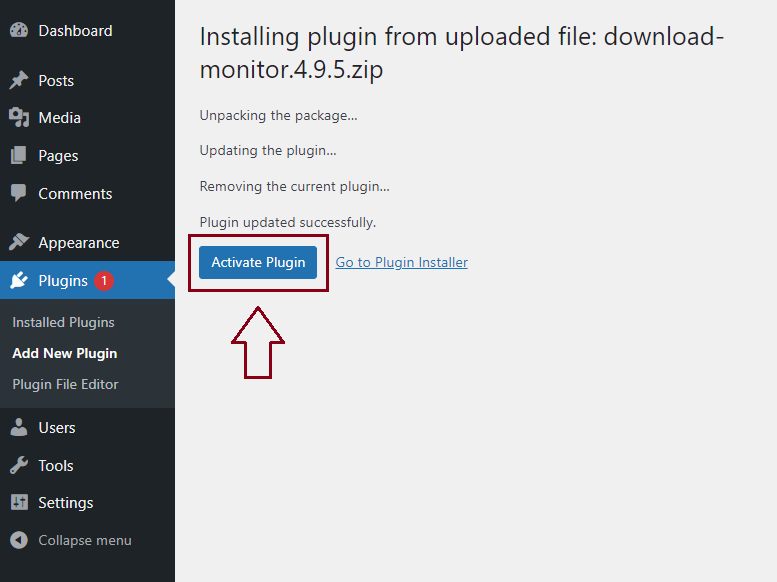
- Once the installation process is over, click Activate and you’re done.
Downgrade Download Monitor
If you want to rollback to an older version of Download Monitor, we have a simple solution for you that involves a free WordPress plugin.
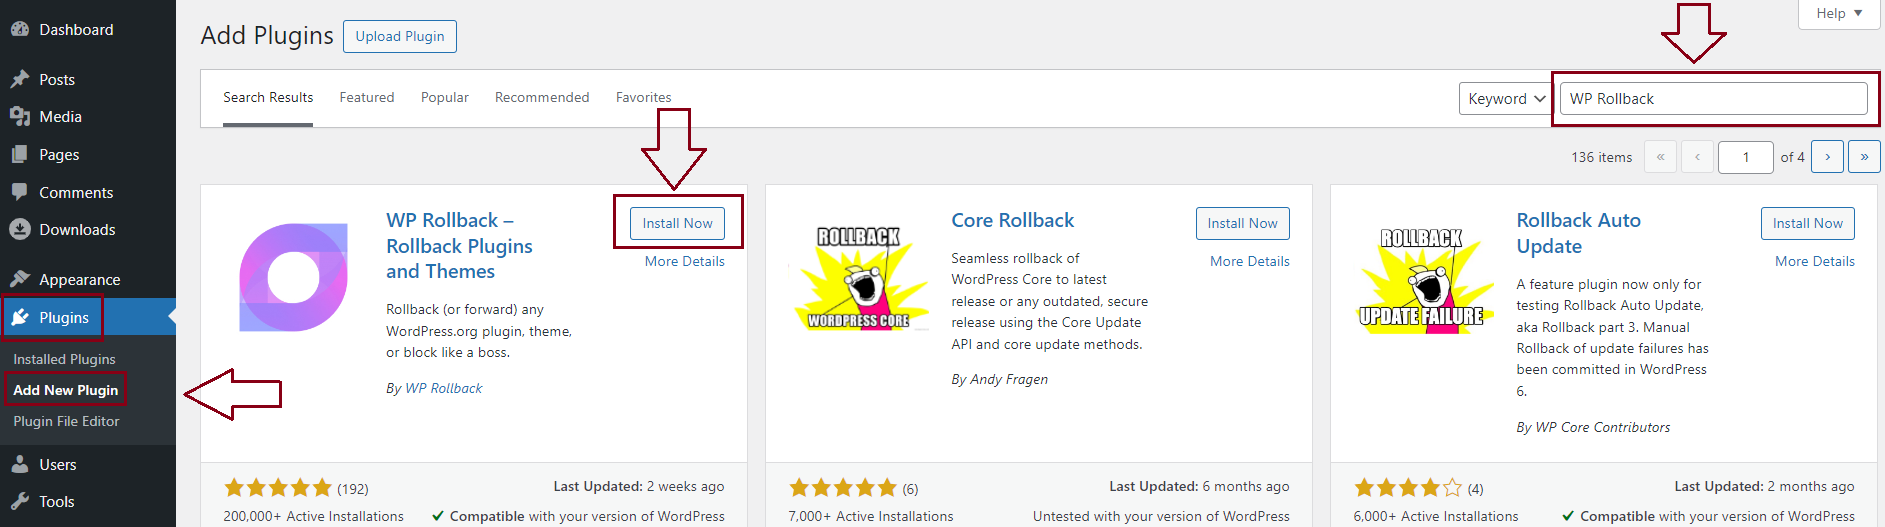
- Go to your WordPress Dashboard > Plugins > Add New. Type WP Rollback in the search bar on the upper right corner. When you find the plugin, click Install Now.
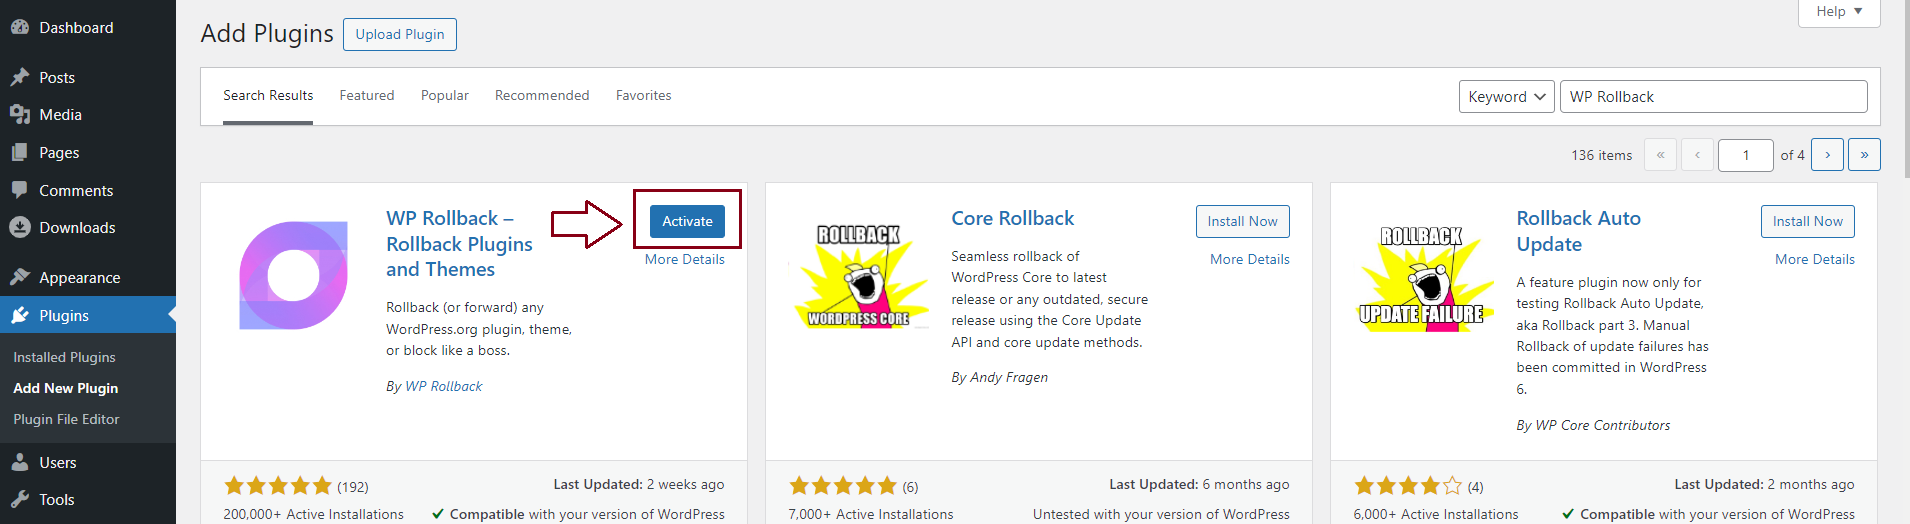
- Click on Activate.
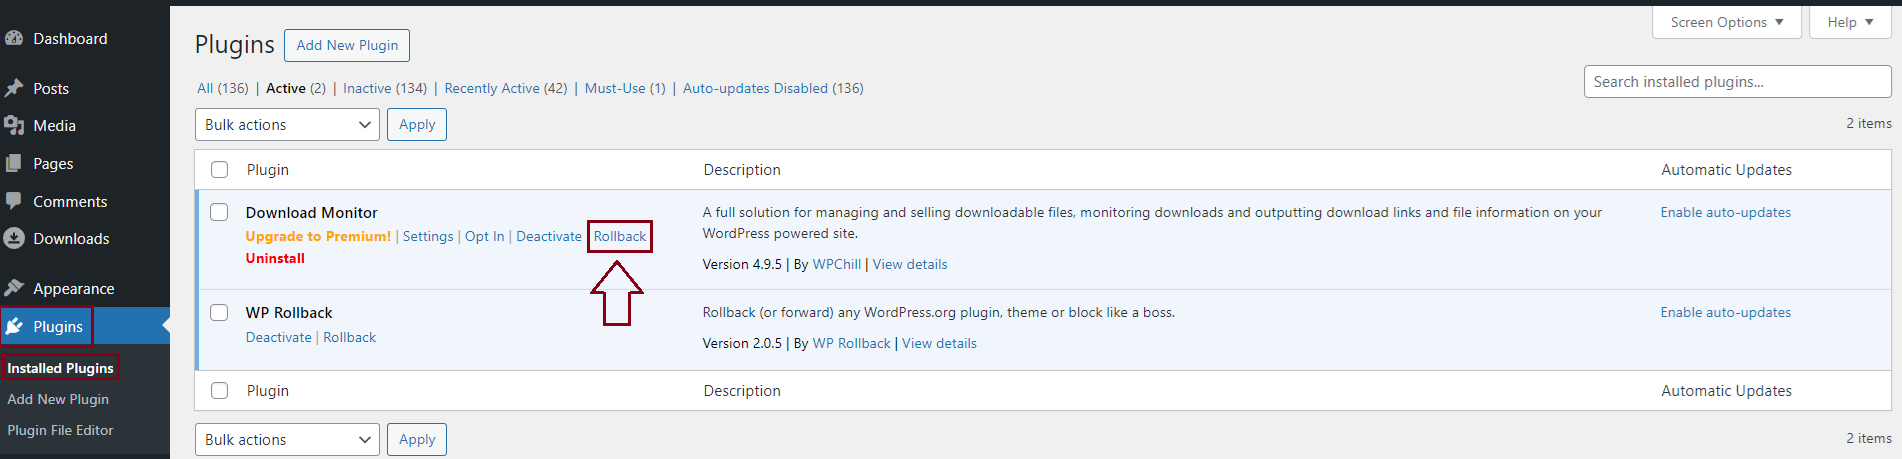
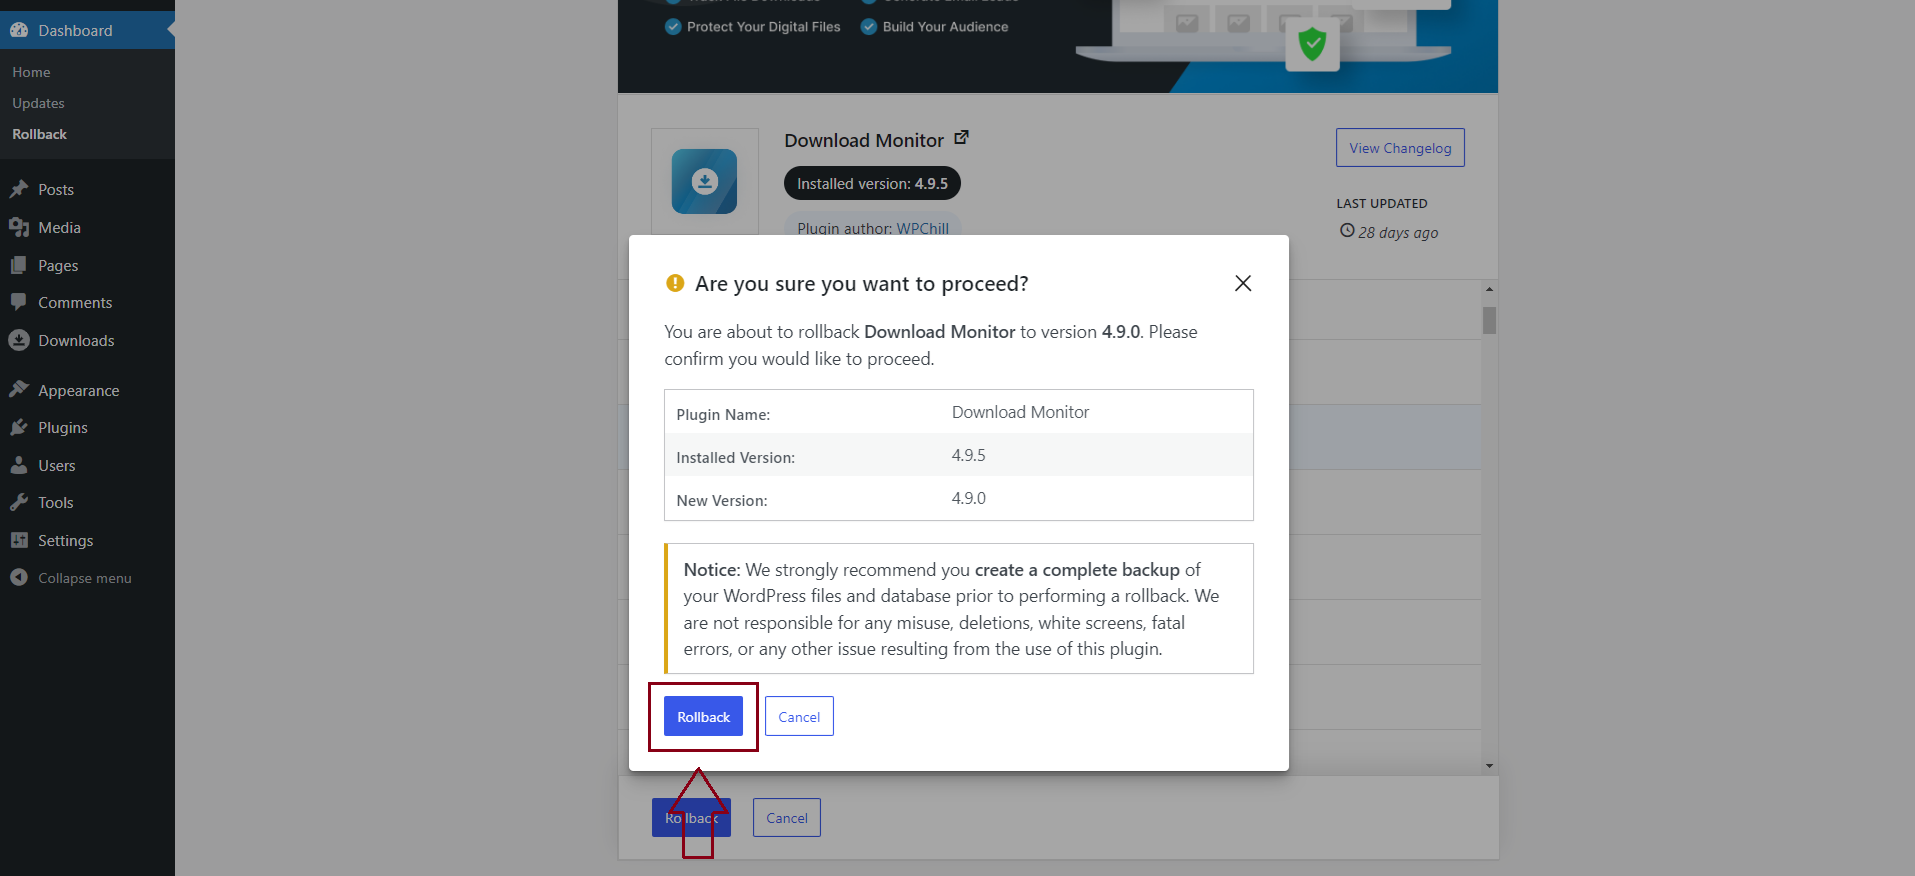
- Go to Plugins > Installed Plugins and when you see Download Monitor, click on Rollback.
- Choose the version you want to downgrade Download Monitor, and click Rollback.
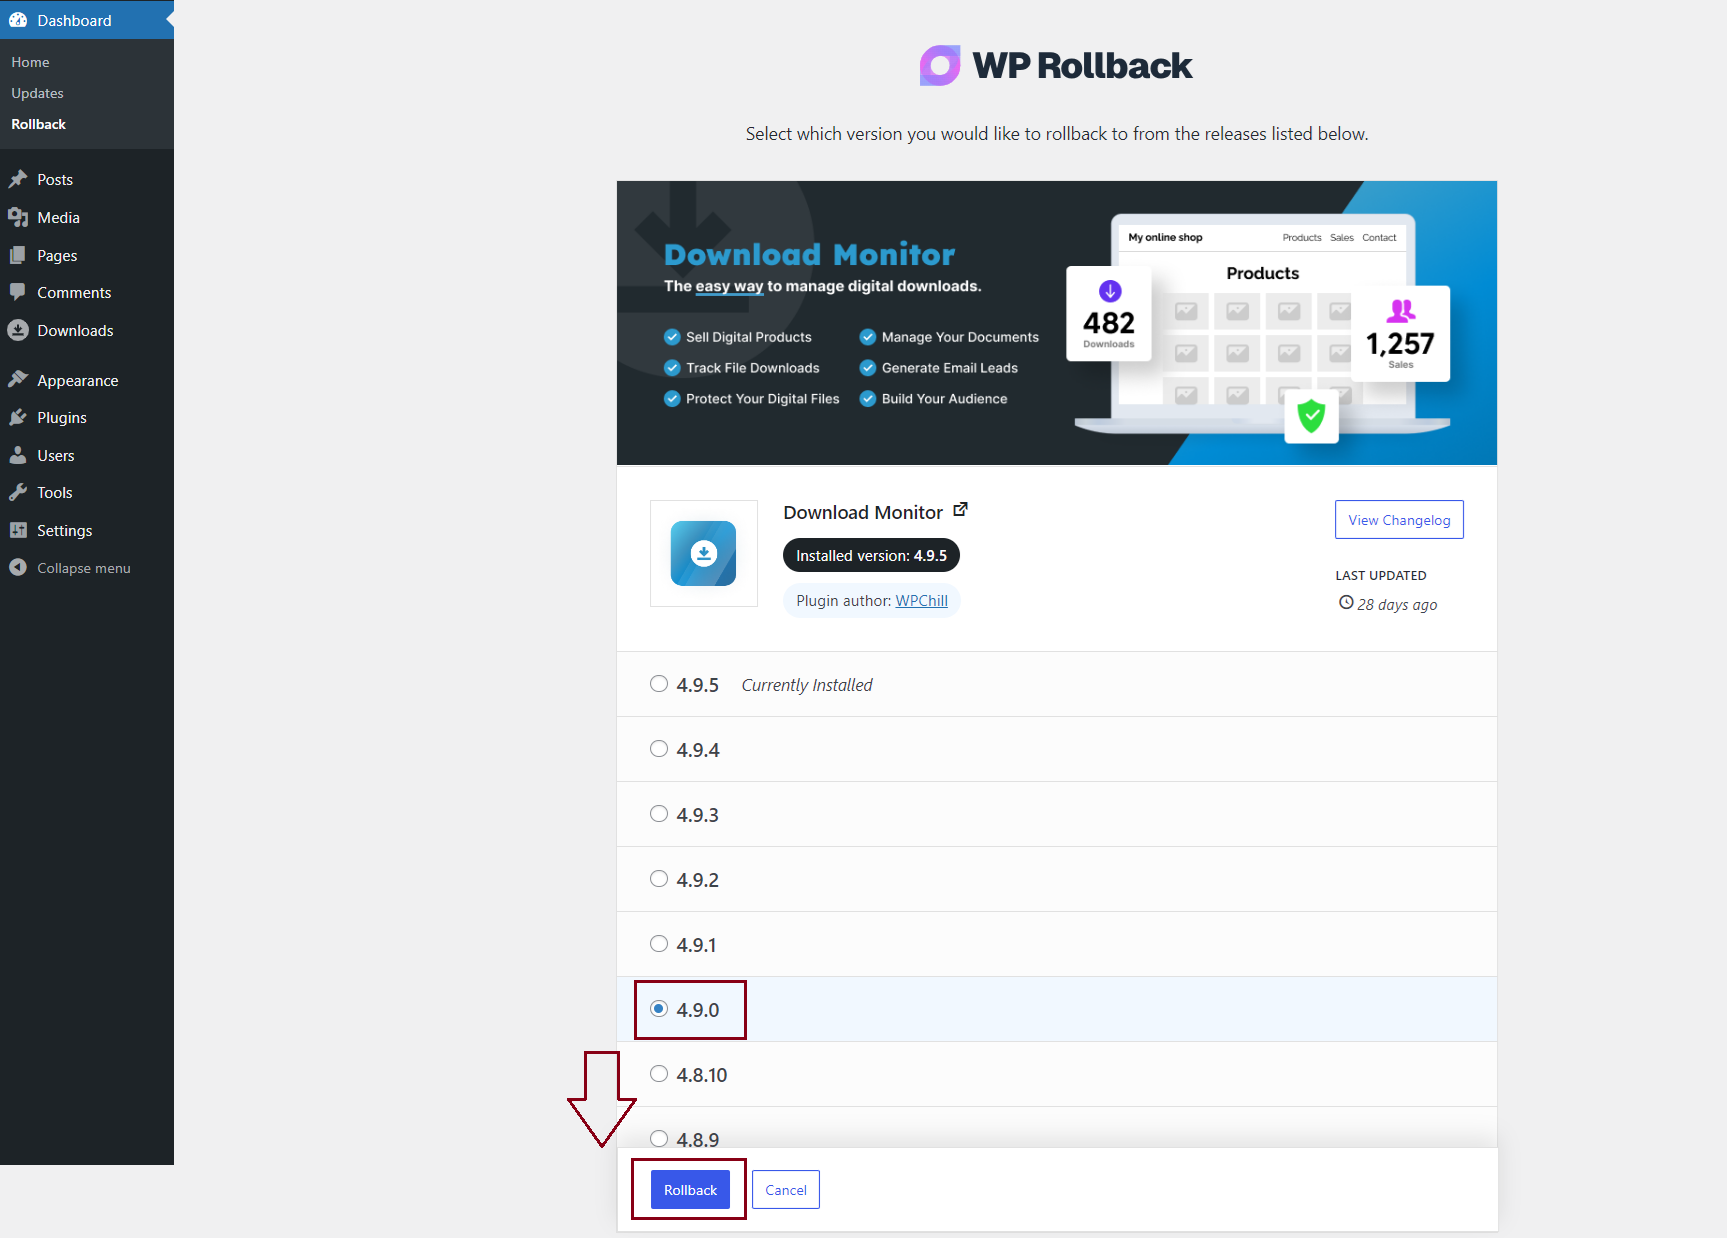
- You’ll see a warning message, so make sure you read it carefully and meet all the requirements before clicking Rollback.
If you return to Plugins > Installed Plugins and look for Download Monitor, you’ll see that the selected version has been downgraded.