
Adding downloads to your page is super easy!
You can either add them via Gutenberg block or with the help of a page builder such as Elementor.
In order to add your downloads to your page using Elementor, you need to follow these steps:
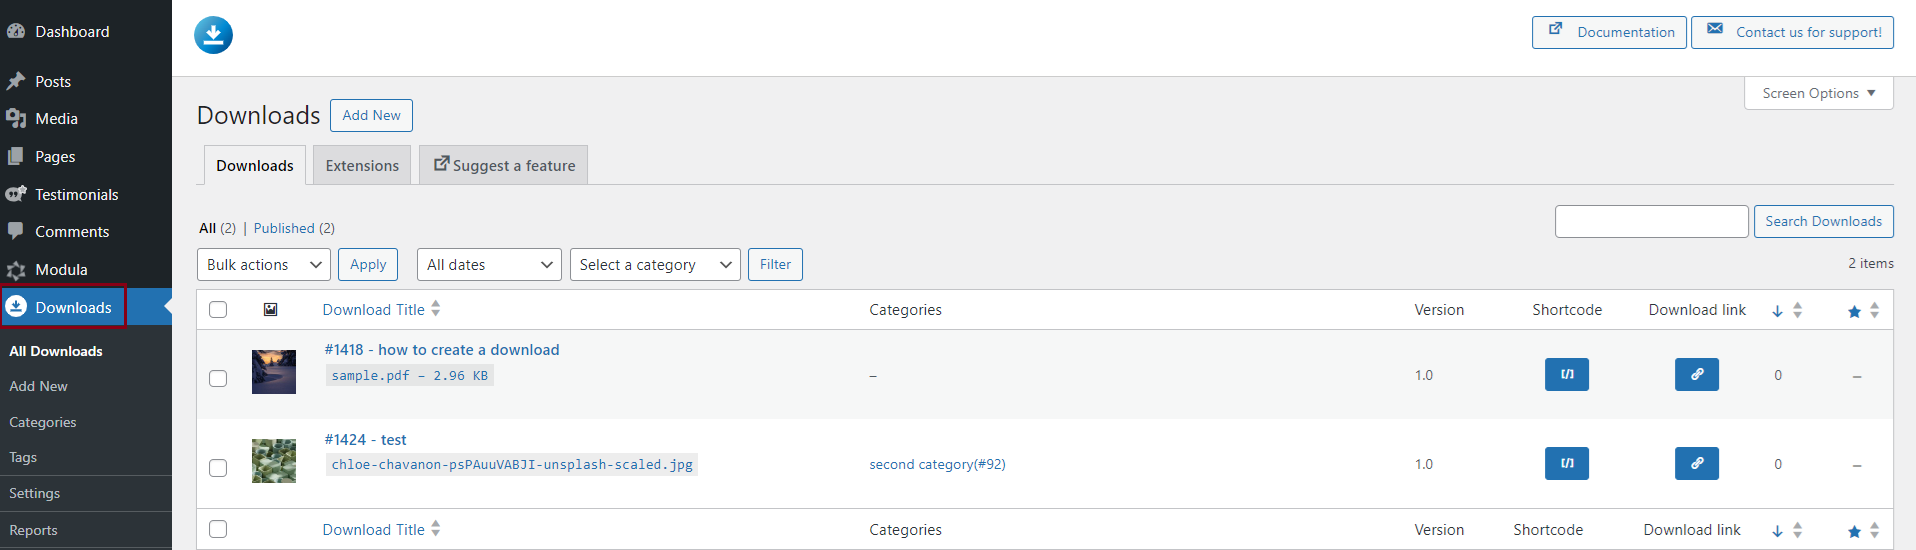
- I assume that you already have a download created with Download Monitor, so go to your WordPress Dashboard > Downloads > All Downloads.
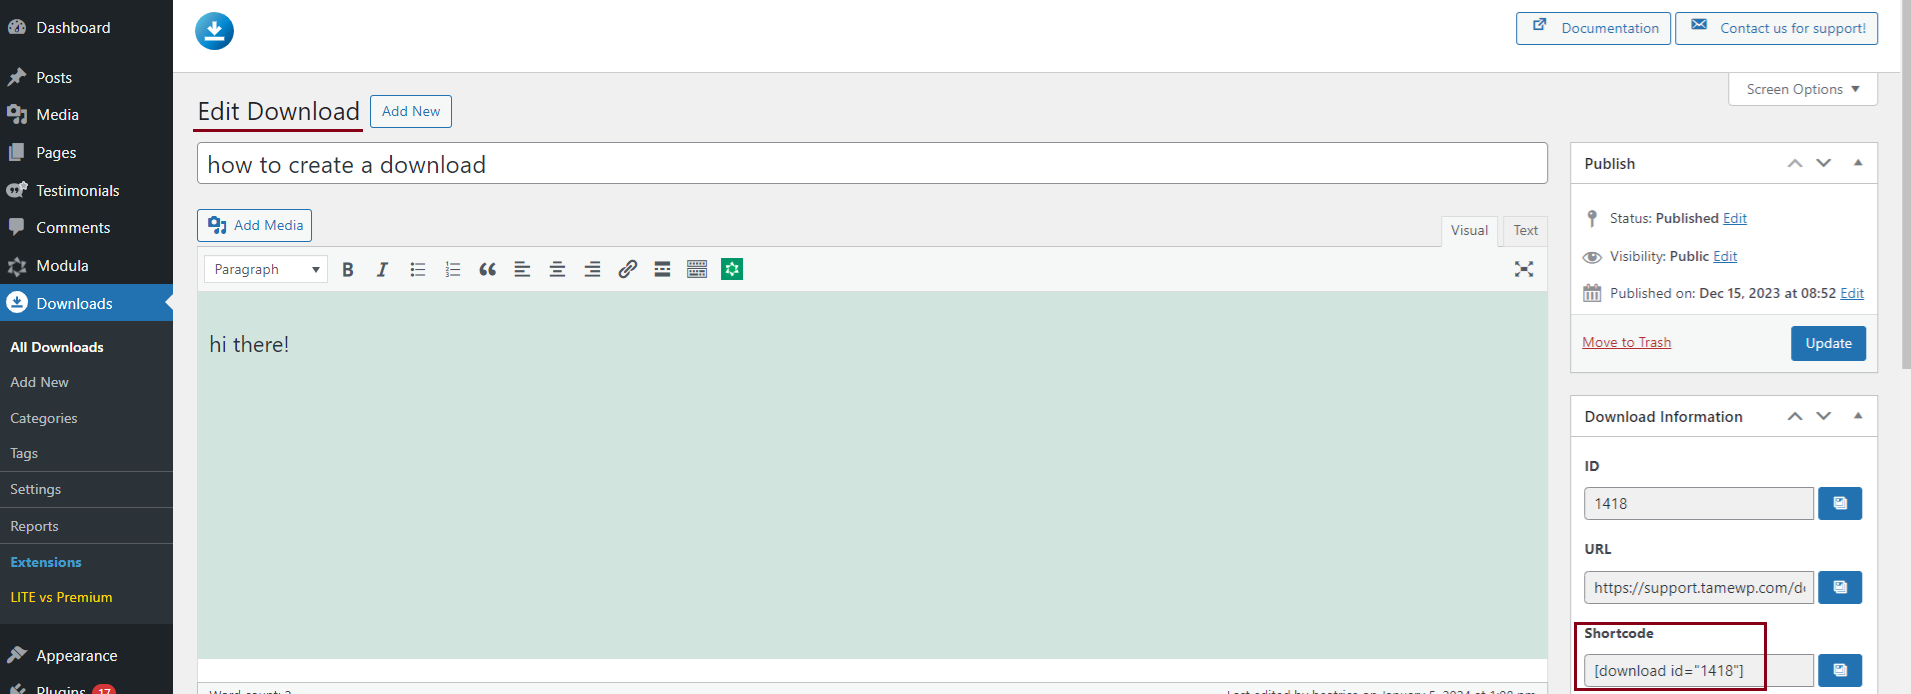
- Click on the download file you want to display on your page and copy the shortcode.
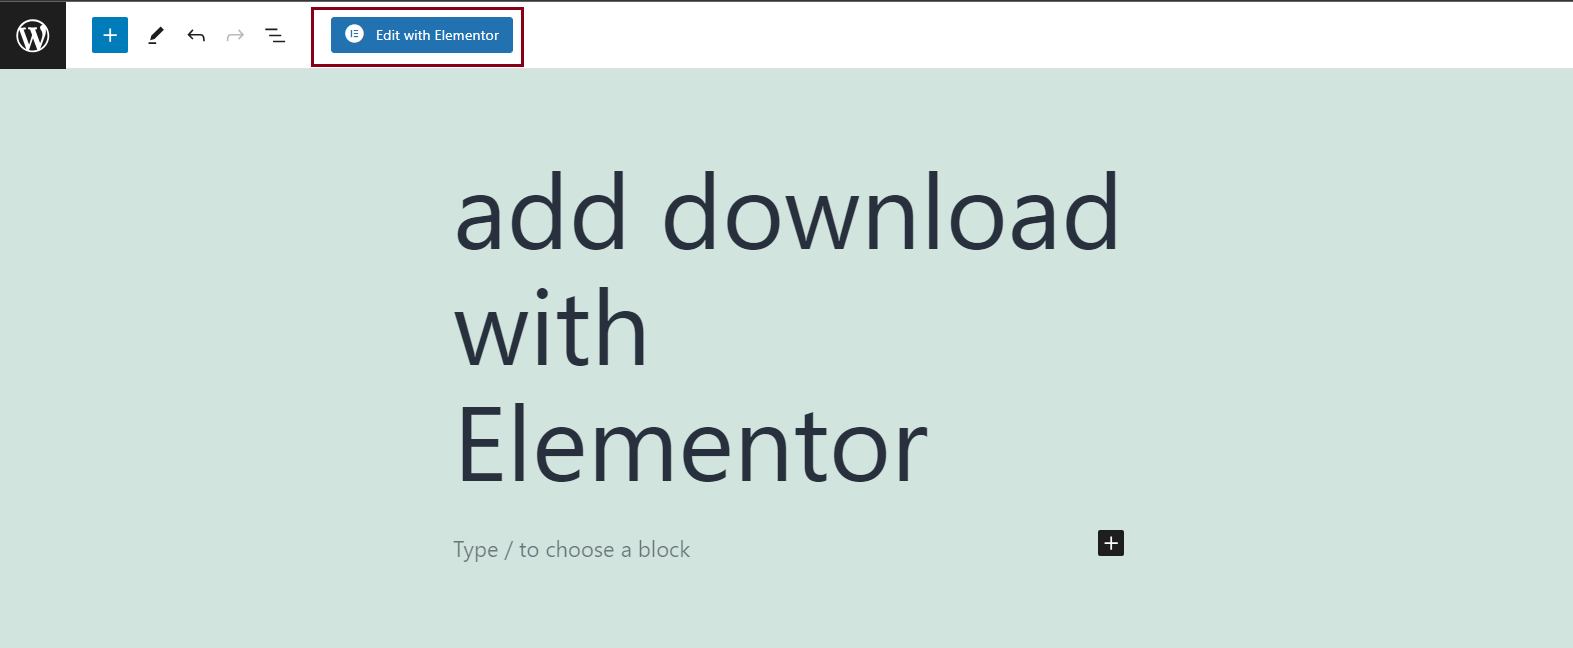
- Head to your Dashboard > Pages > Add New > Edit with Elementor.
Below, we’ll list three ways you can add a download to your page with Elementor.
Add the download through the Text Editor widget
- Go to Elements > Basic, then drag the Text Editor widget. Delete the default text and add the download shortcode.
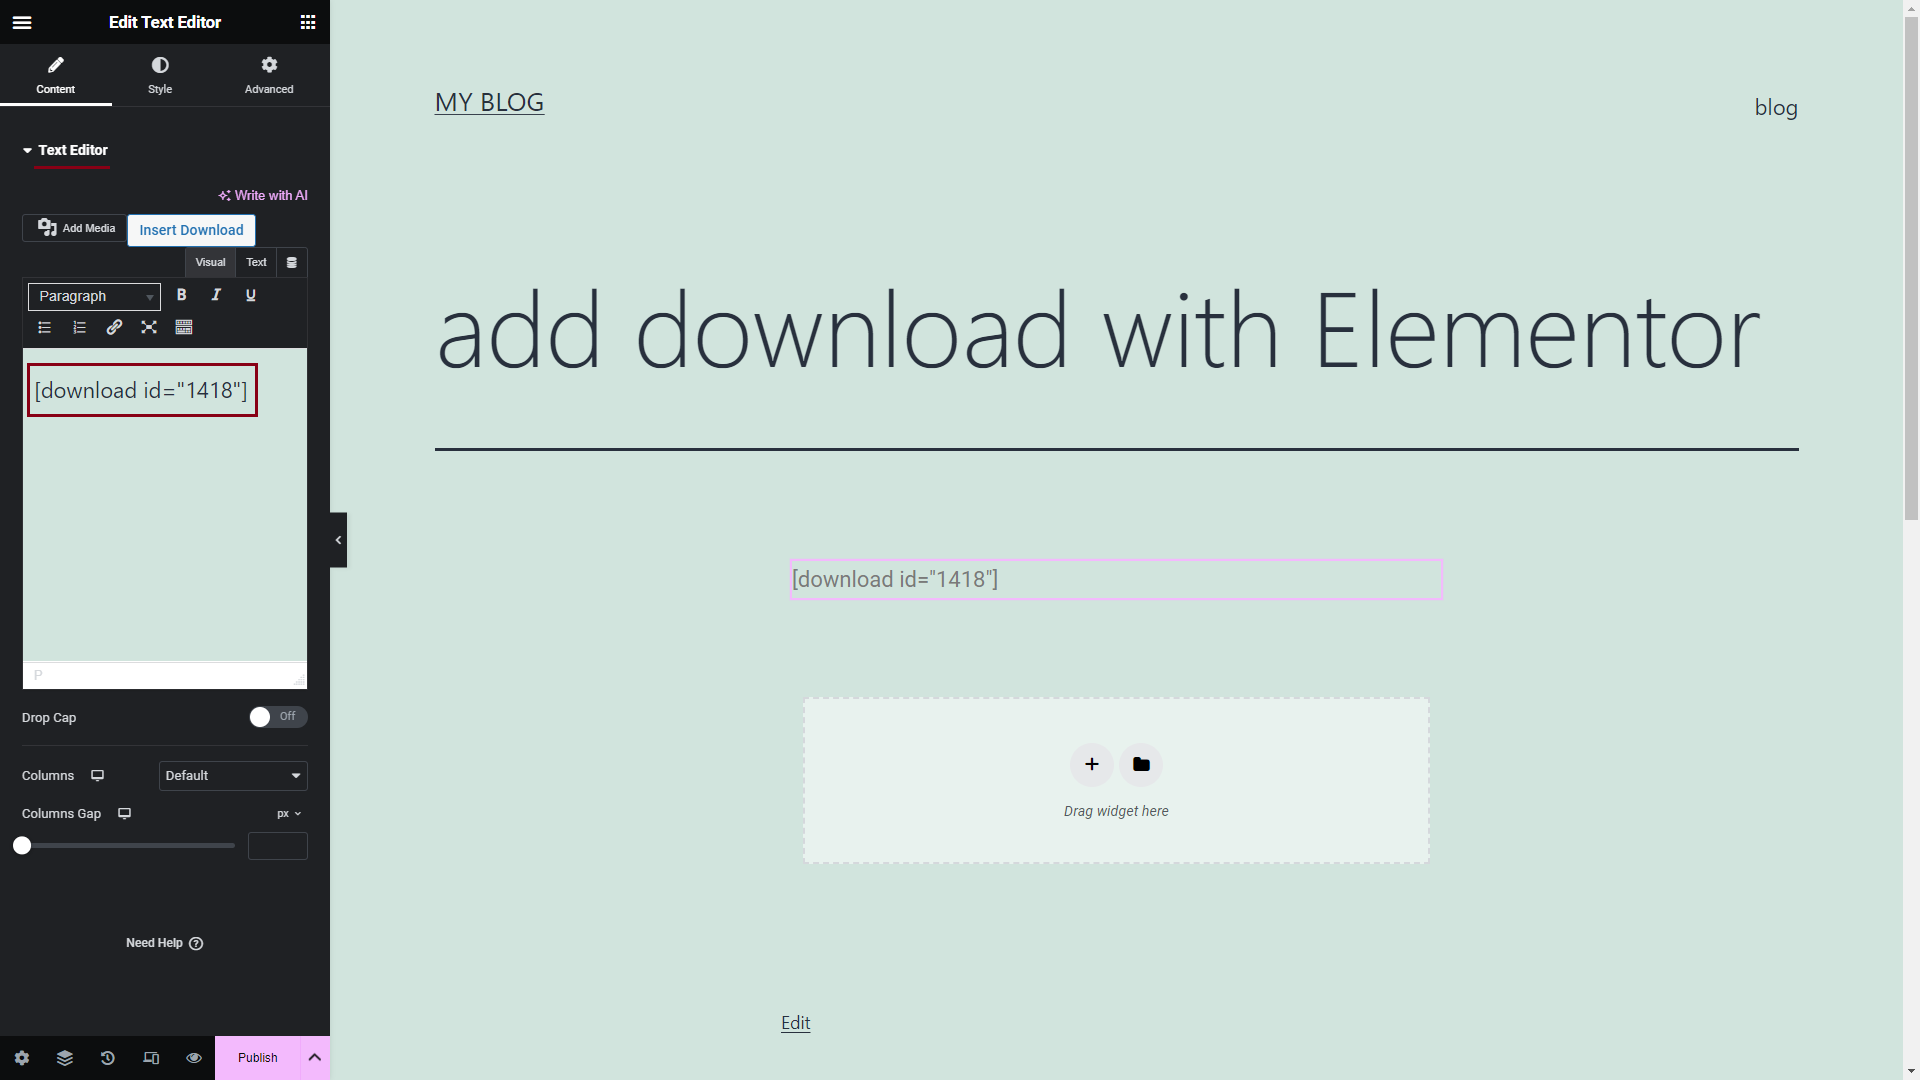
- Once you’re done, click Publish.
Add the download through the Shortcode widget
Alternatively, you can add download files to your page with the Shortcode widget.
- You need to go to Elements > General and drag the Shortcode widget.
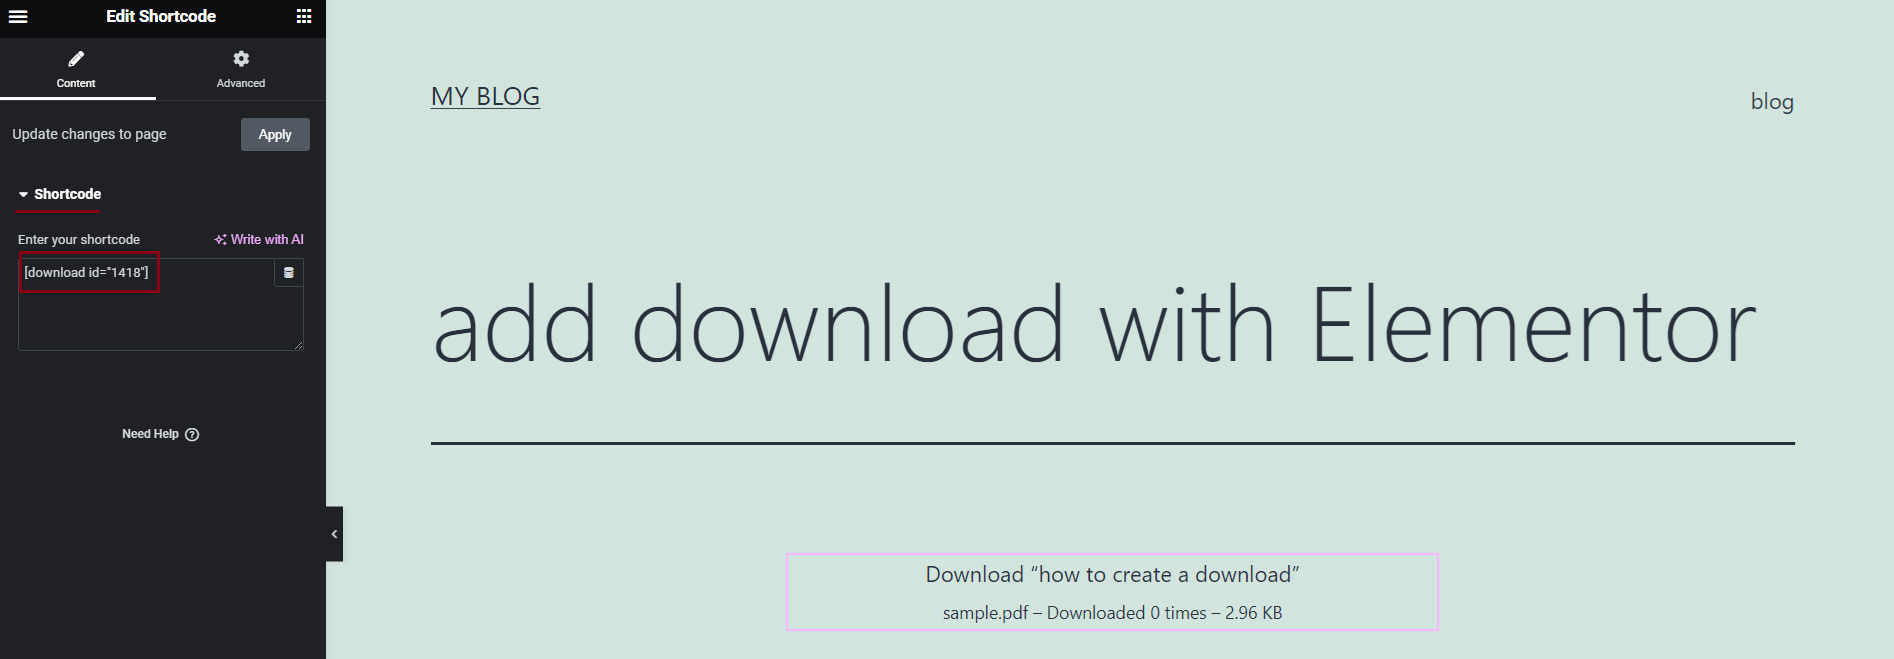
- Paste the download shortcode and click Publish.
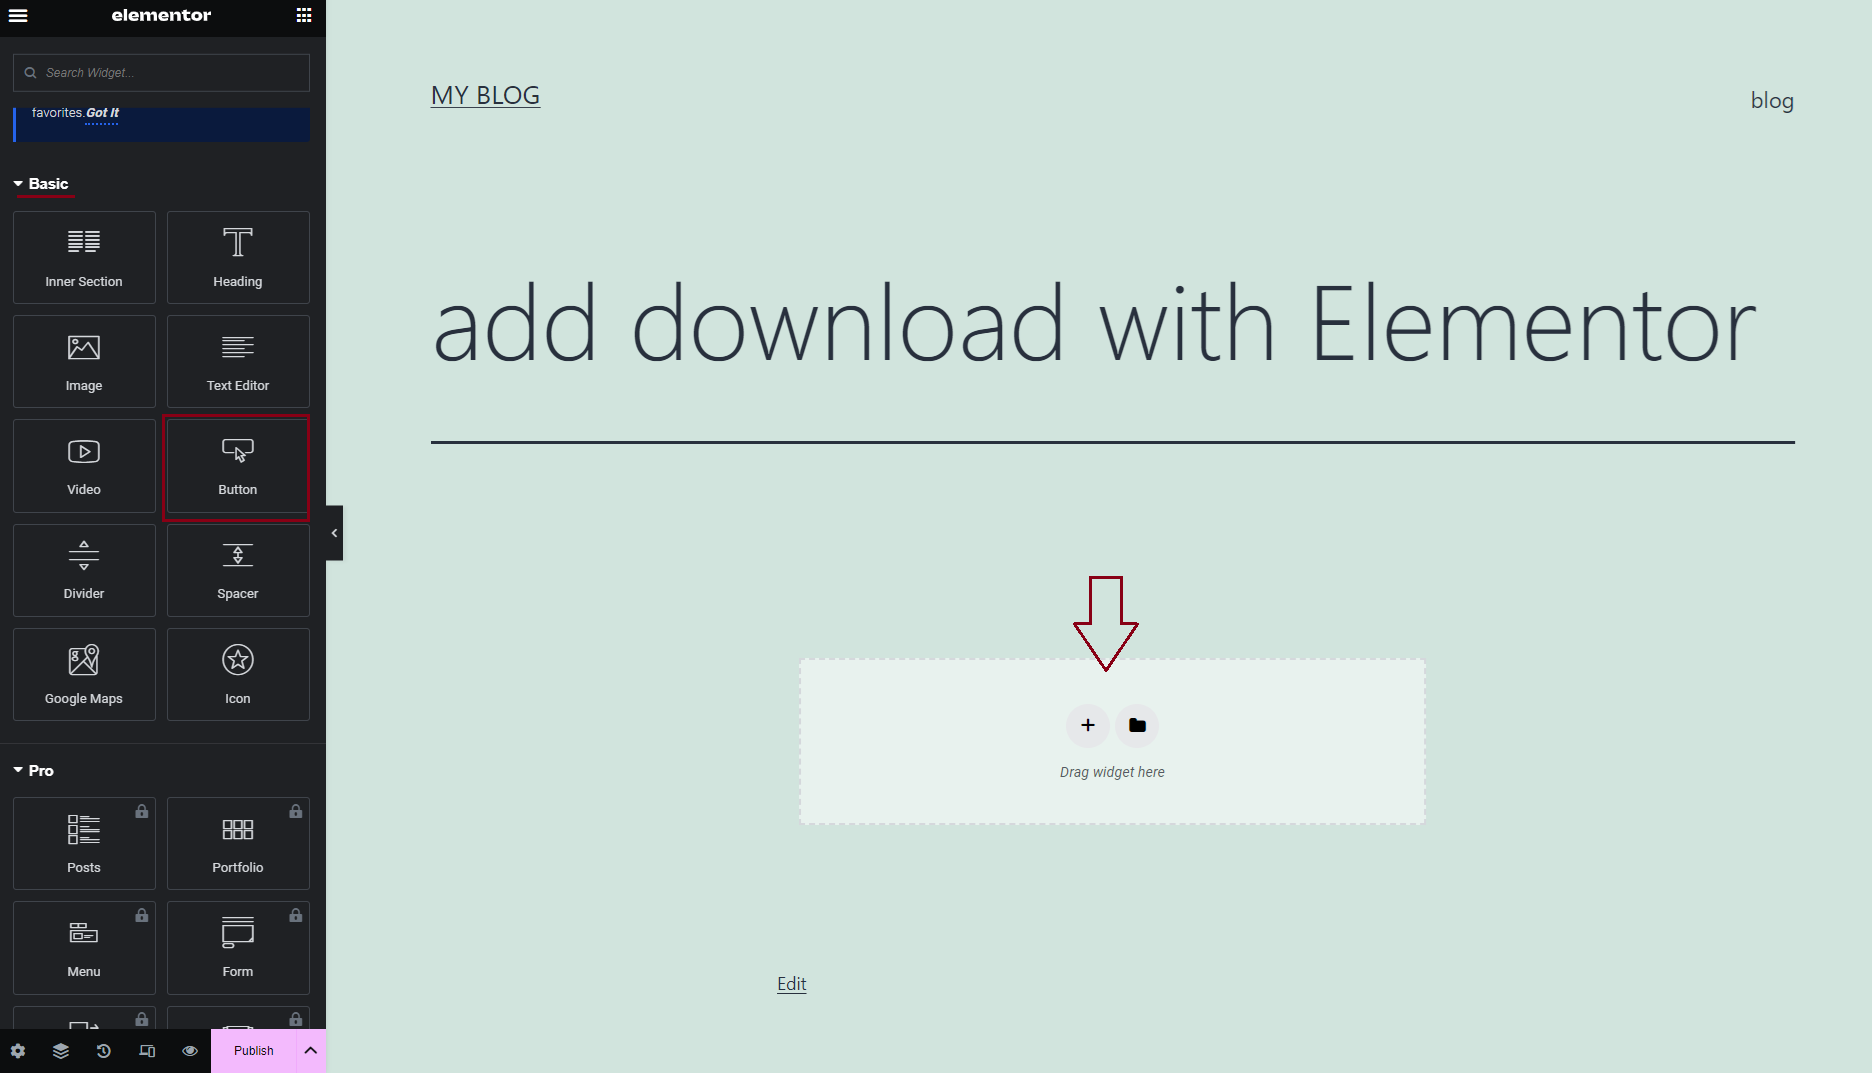
Add the download through the Button widget
Another way to add your download with Elementor is with the Button widget.
- Go to Elements > Basic and drag the Button widget.
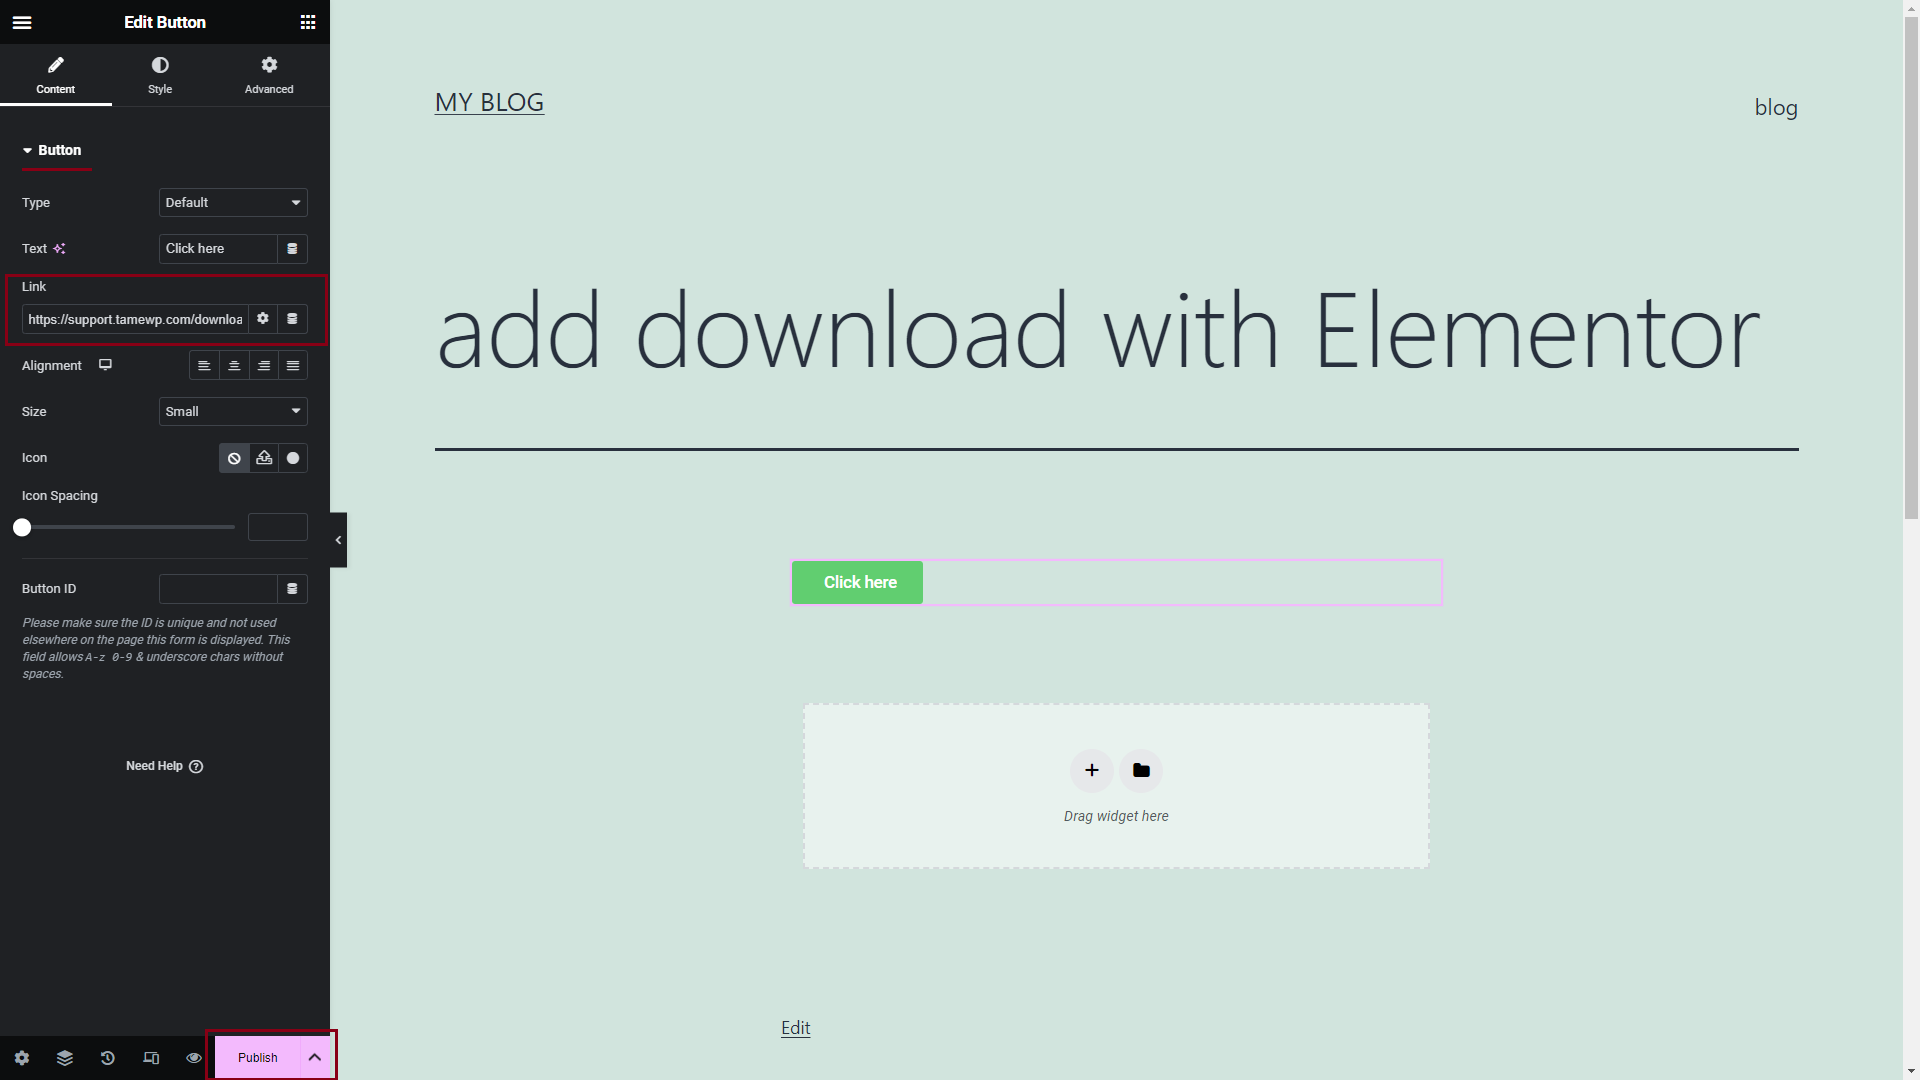
- In the left sidebar, go to Link and paste your download URL which you can copy by going to your Dashboard > Downloads > edit your download > Download Information > URL (make sure to delete the “#” symbol). Click Publish, and your downloadable file is live!
These are all the steps you need to follow when adding a downloadable file to your page with Elementor. Your file is ready to download!