If you use WordPress, you’ve probably wondered how to restrict the content on your WordPress website to only certain user roles.
WordPress is primarily a CMS platform, and any content you publish is accessible by everyone on the internet. But there may be times when you don’t want to show the content to all your visitors. You may want to prevent posts, pages, images, and other media files from being viewed and accessed by people who don’t have the necessary permissions.
In this article, we’ll show you how to easily add a members-only area to your website and restrict access to specific user roles.
Why Would You Want To Restrict Content on Your Website?
There are many reasons why you’d want to restrict content on your WordPress site.
You may want to create a members-only area for exclusive content that only registered users or those who’ve signed up for an account on your site can access. Or you may want to display content differently for different types of users.
You should limit the website content if you want to…
- Show the content to only specific users (and hide it from others)
- Protect the content from unregistered users
- Sell a digital product
- Protect your images from unwanted downloads
- Develop a community and share content within it
You can restrict any type of content, including written content, files, and images.
Now let’s get into the nitty-gritty of restricting content on posts and pages first, and then show you how to restrict files on a WordPress website.
Restricting Content by User Role on a WordPress Website
We’ll be using plugins to make it easier for beginners to follow along with this tutorial. Plugins allow you to easily add functionality to your website without having to write a single line of code.
Before we see how to actually restrict the content, let’s first discuss what user roles come with WordPress and how to add additional user roles and change their permission on the website.
How To Add Custom User Roles to Your WordPress Website
WordPress comes with some default user roles. These roles have different capabilities and permissions to control what users can and cannot do on your website.
They include administrators, editors, authors, contributors, and subscribers.
Sometimes, these default roles aren’t enough for your website. You may need other user roles with specific permission levels that fit your needs better.
You can easily add additional user roles using the free plugin User Roles Editor from the WordPress repo.
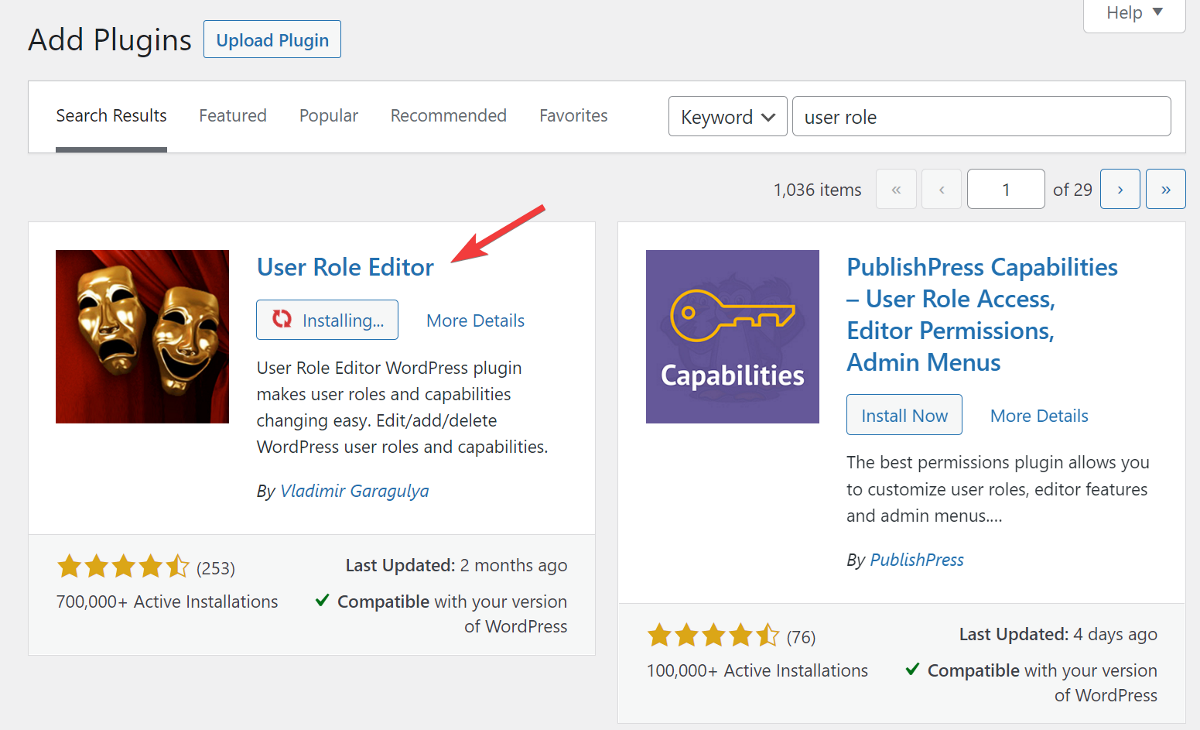
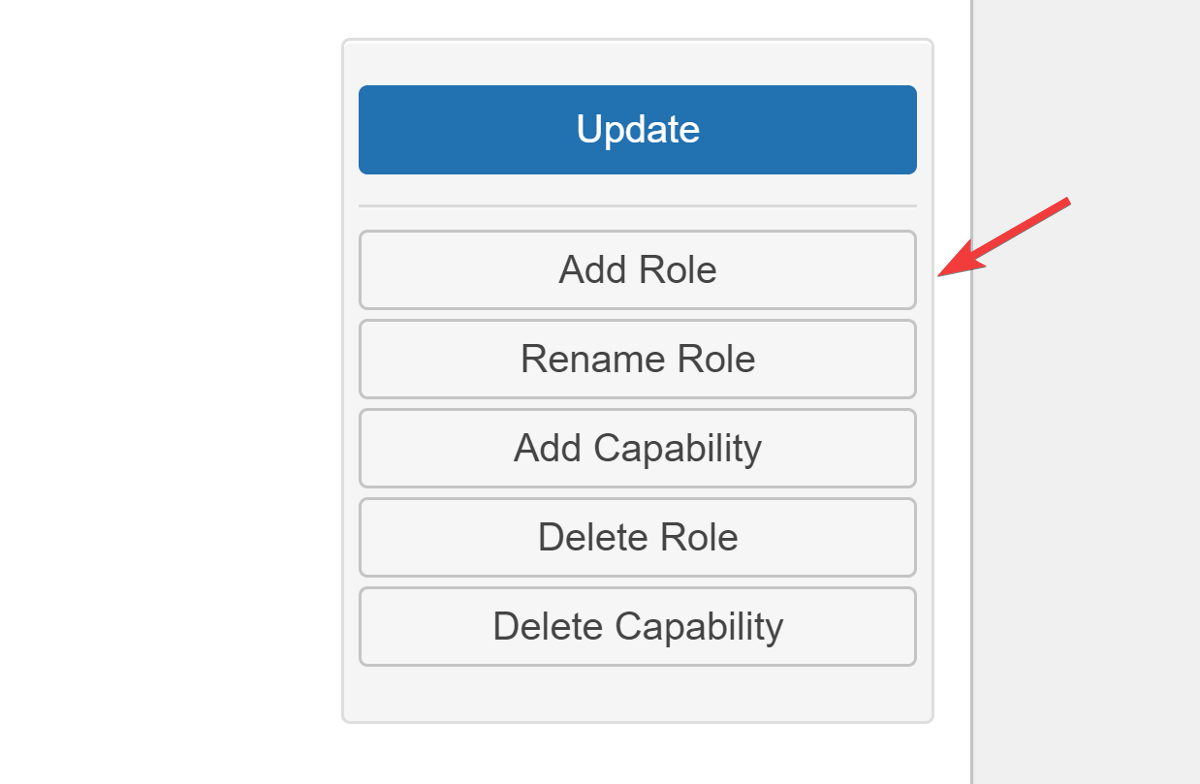
Once installed and activated, navigate to Users > User Role Editor. There, click on Add Role in the sidebar.
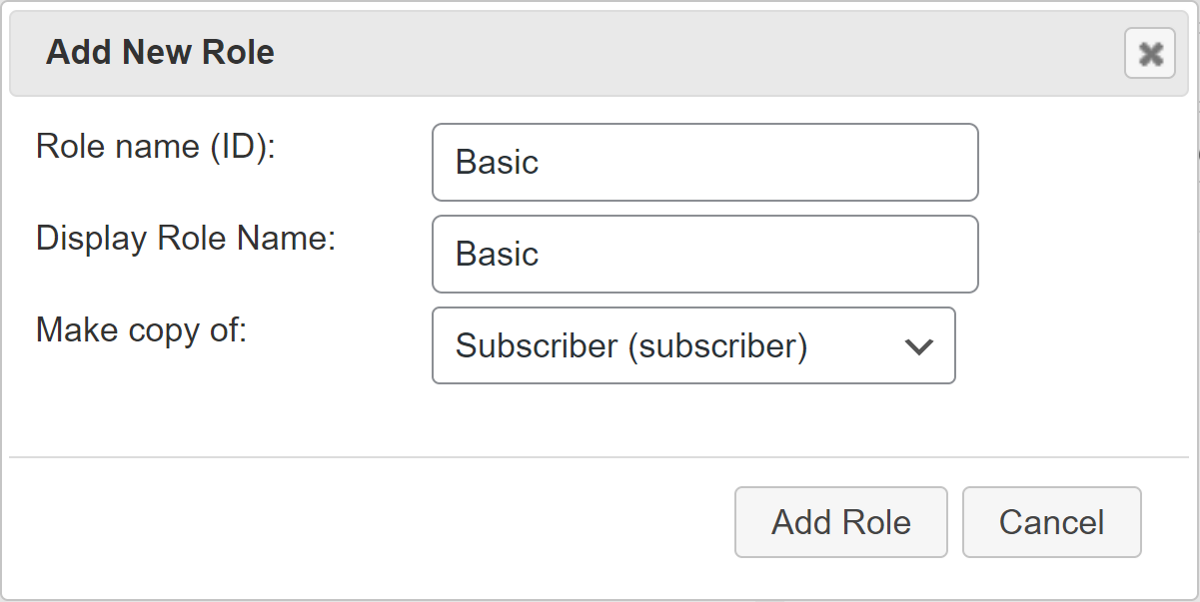
The popup that opens will prompt you to give the user role an ID, a name, and permissions. You can choose to either copy permissions from one of your existing user roles or create a completely new one.
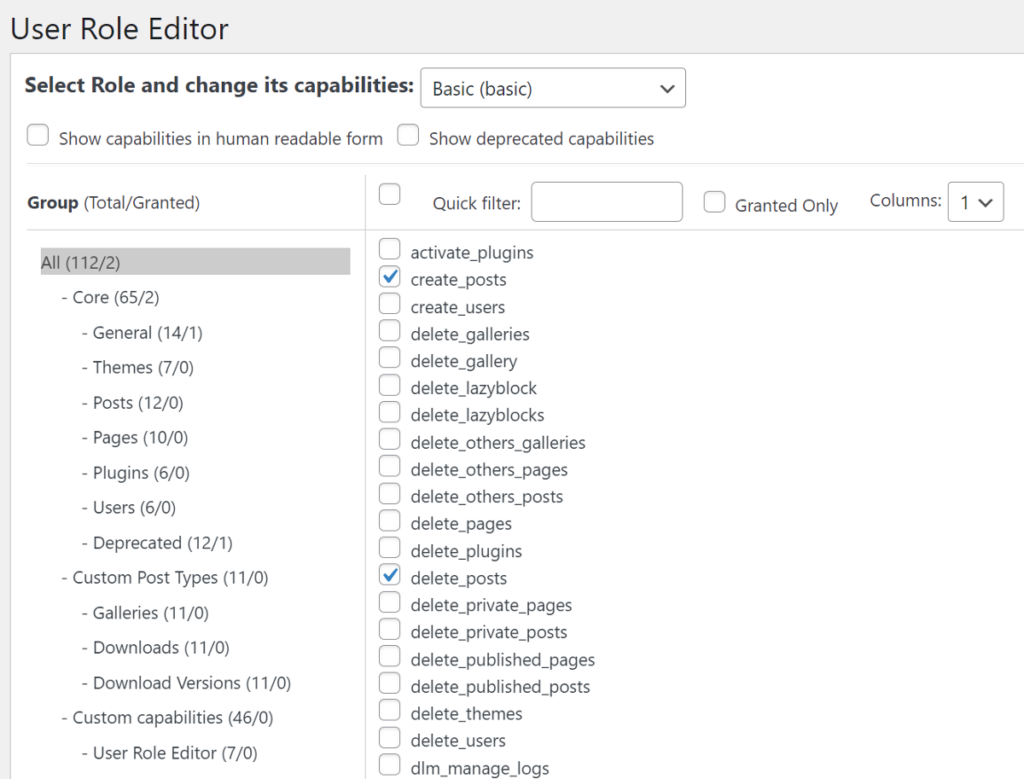
If you want to change the permission for a role, simply select the role from a dropdown and tick all the boxes that you want to add as permissions.
Easy, right? Now that we know how to add and change permission for user roles, let’s now check how to restrict
How To Restrict Posts and Pages by User Roles
You’ve written a great post but don’t want to share it publicly. Maybe you want to put your content behind a paywall, or maybe you want to let registered users access the content. In either case, you can restrict the content so that only certain people can read it.
We’ll use two plugins for this: Paid Memberships Pro and its Roles Addon. Both are free!
Numerous other plugins allow you to restrict content, but what makes Paid Memberships Pro unique is its ability to scale easily in the future.
Let’s start by installing the plugin.
Install Paid Memberships Pro and Roles Addon
To begin, install and activate the free Paid Memberships Pro plugin from the WordPress plugin repository.

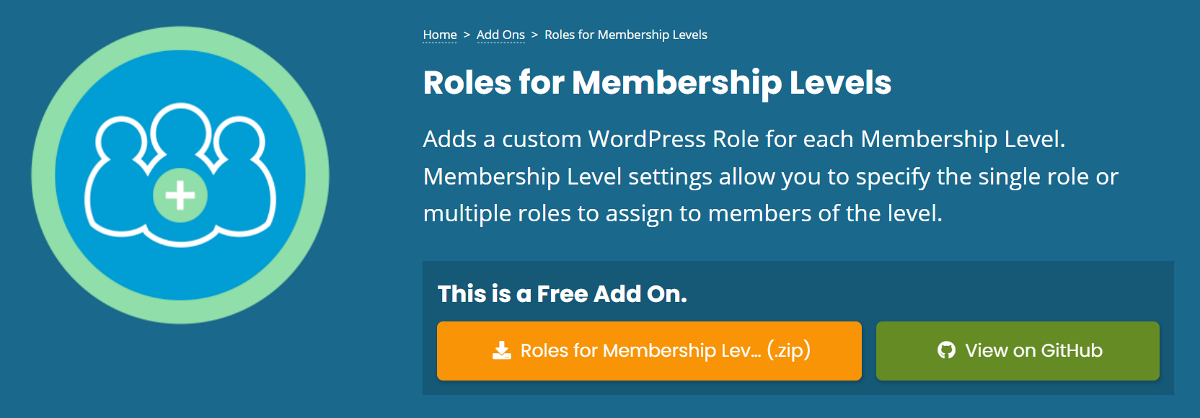
Next, visit the Paid Membership website and create a free account to download the Roles addon. You’ll get a zip file of the addon.
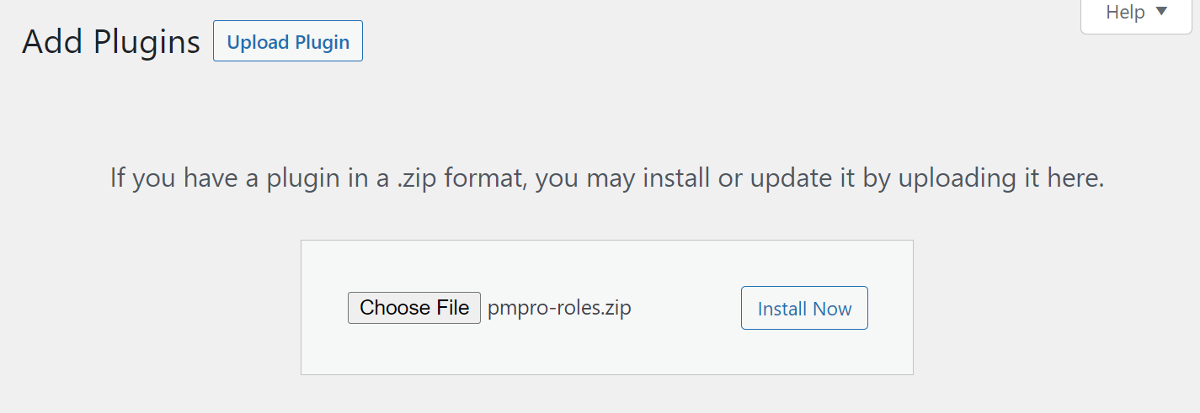
Switch back to your WordPress dashboard and go to Plugin > Add New. Click the Upload Plugin button at the top and select the Roles addon file you downloaded. Click Install Now and then Activate the plugin.
Once the plugin is active on your website, it’s time to create rules for restricting the content.
Before we create membership levels, let me briefly explain how this will work…
We’ll create different membership levels and assign each one a category and a user role. As a result, when we create a new post and assign it to one of our membership categories, the post will be hidden from the general public.
When a user registers on our website, they’re assigned a user role based on their membership level. So whenever new content is published within a specific category, only that specific user role from that membership level can access it.
Now that we understand how this works let’s create our first membership level.
Create Membership Level and Assign a Category and a User Role to It
Since we need to assign a category to each membership level, let’s add the categories first before we begin creating the membership levels.
Go to Posts > Categories and begin adding relevant categories for each membership level you wish to create.
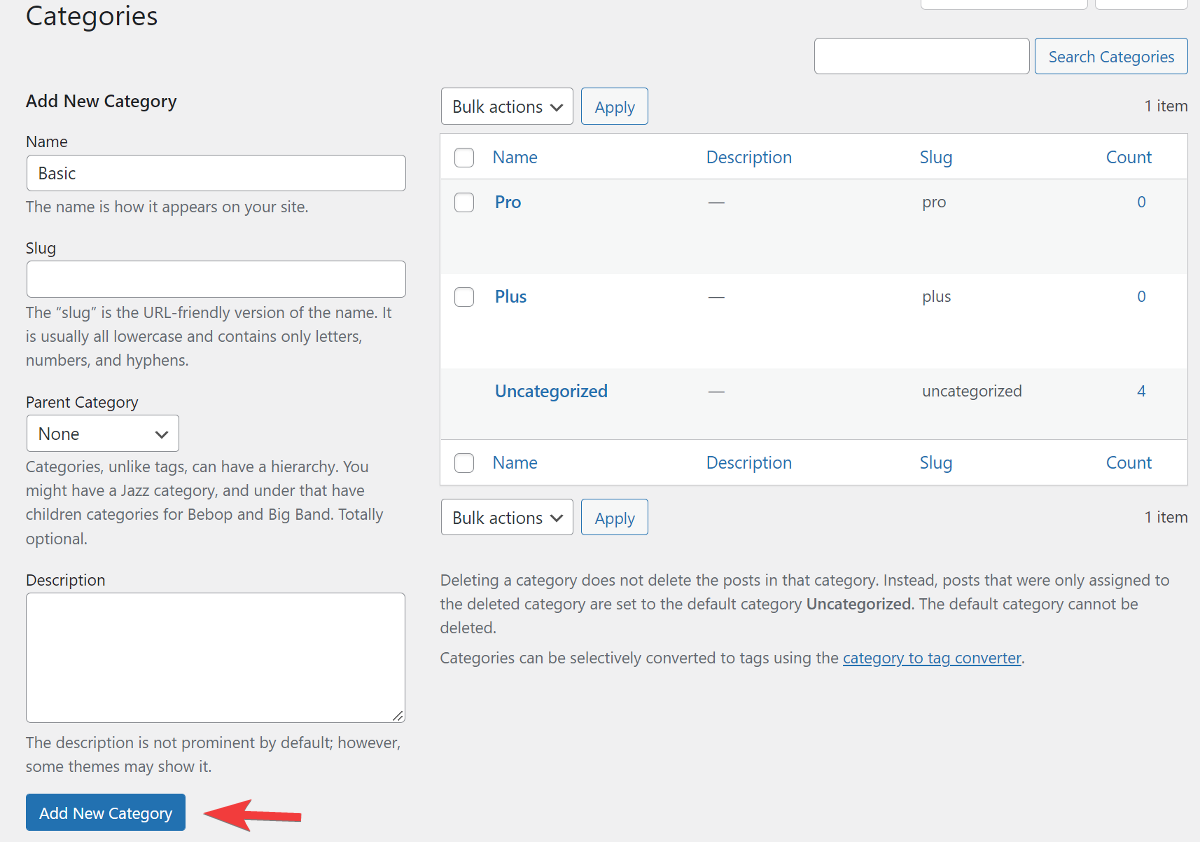
Once you’ve added all the categories, go to the Paid Memberships Pro dashboard. Here, click the Create a Membership Level button under Initial Setup to start creating membership plans.

You’ll be directed to a new page where you can enter the details of your membership plan. Begin by entering the name and a brief description of the plan.
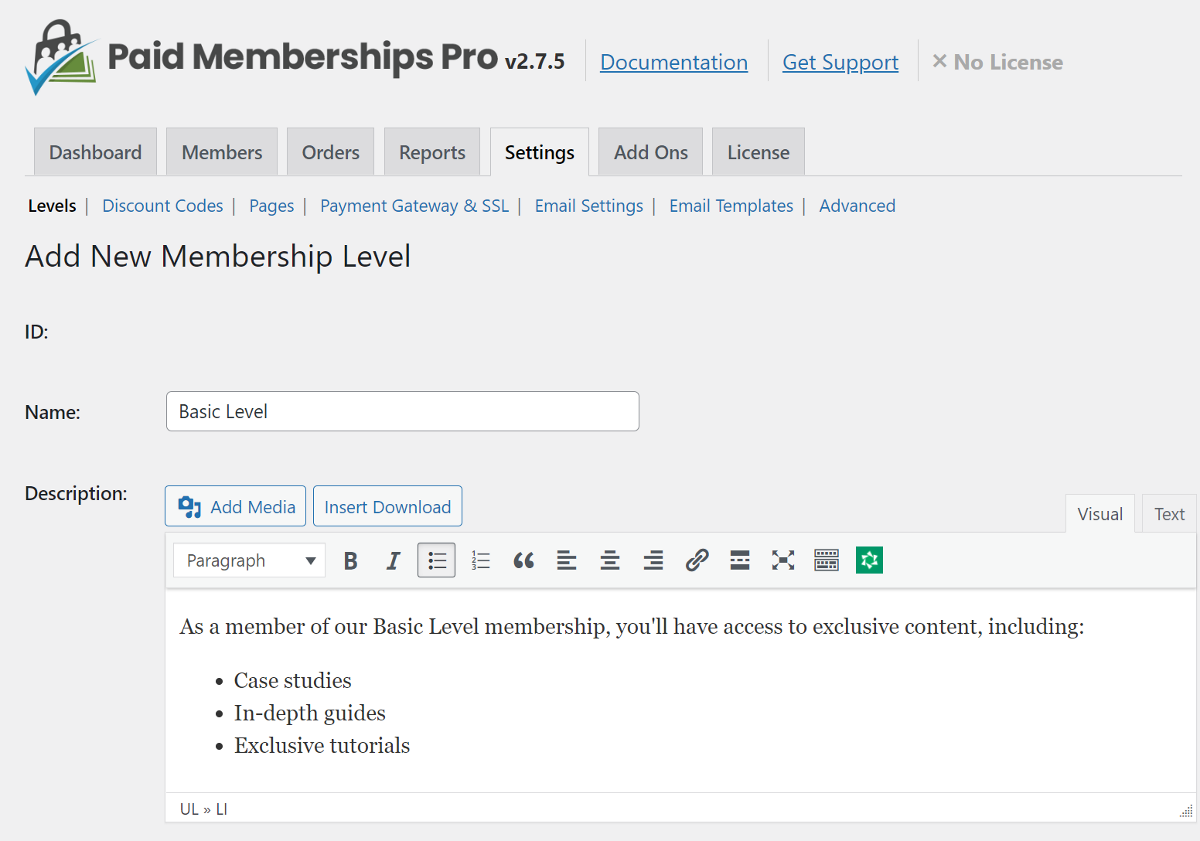
Next, you can add a confirmation message that appears on your website after someone purchases the membership plan. You can add images or graphics to the message to make it stand out. If you want to include the same message in the confirmation email, you can check the box below the message field.

Next are the options for the billing details. Since we just want to restrict content and not charge users for it, enter the Initial Payment as $0 and keep the Recurring Subscription box unchecked.

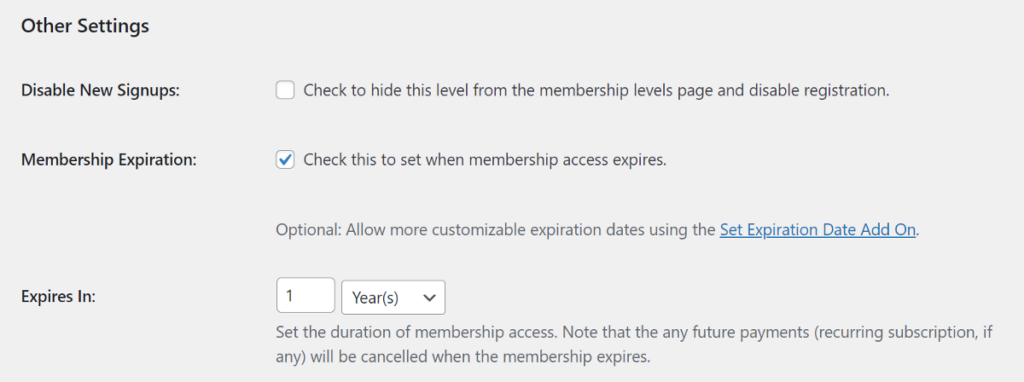
Next are the Other Settings. Simply ignore the first option and check the box for the second if you want to limit access to a specific time period.
Now comes the most important section!
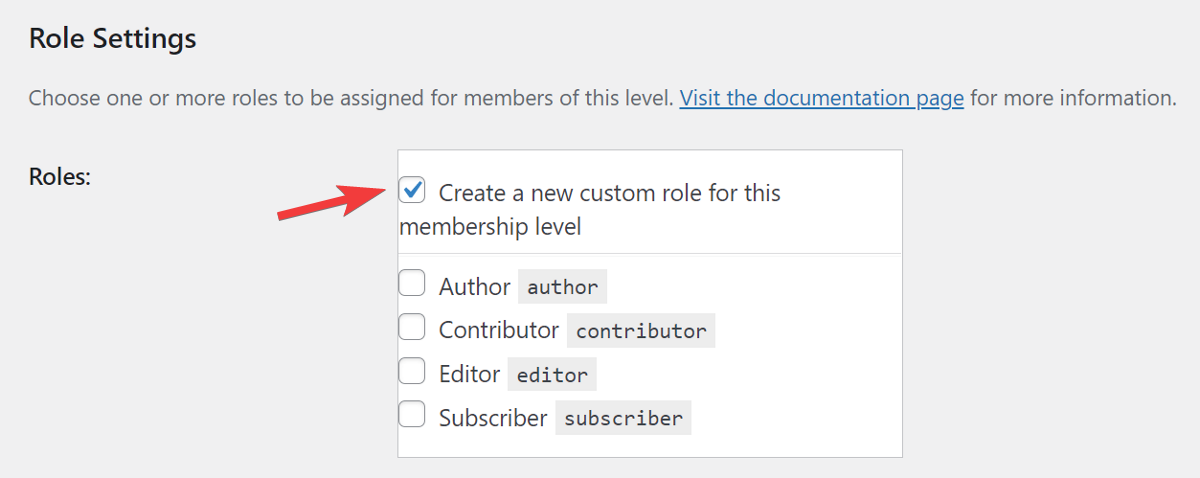
You can specify which user roles will have access to this membership. The Paid Memberships Pro’s Roles Addon allows you to either create a new user role or choose from the WordPress default roles.
The new user roles created with the Roles Addon have the same permissions as the default role set in the WordPress General settings for the new user. The new user role will take up the name of the membership and can be fine-tuned for permissions using the User Role Editor plugin.
For the time being, we’ll simply create a new user role with default permissions. You can check the first box to create a new custom role for this membership.
Role Settings
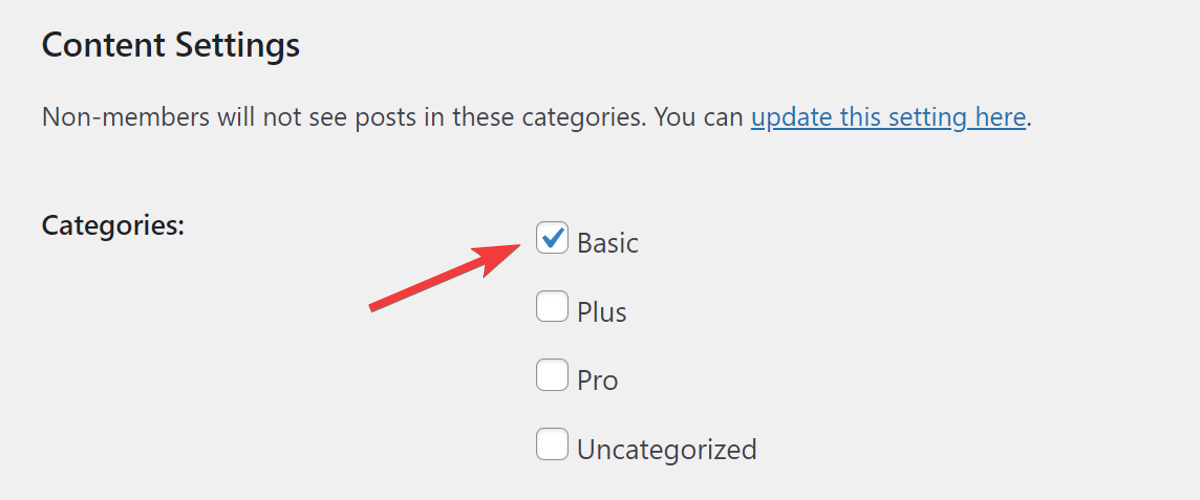
Next, in the Content Settings, select the relevant post category that you want to assign for this membership level.
In the end, don’t forget to click the Save Level button to create this new membership.
You can repeat the same process to create additional membership levels and user roles.
After creating the different membership levels based on user roles, let’s set up important Paid Memberships Pro pages.
These are important pages that’ll let users log in to the website and manage their accounts.
Under the Settings tab, navigate to the Pages section and click the Generate Pages For Me button. You’ll see a message stating that the pages were successfully created.

Below, you’ll find a list of all the pages it created along with edit and view buttons next to each one.

Now that our setup is complete, it’s time to add content that only certain user roles can access…
Add Restricted Content on the Website
To add content, navigate to Posts > Add New and create a new article as usual.
Once it’s ready, select the relevant membership category and membership level from the sidebar and publish the article.
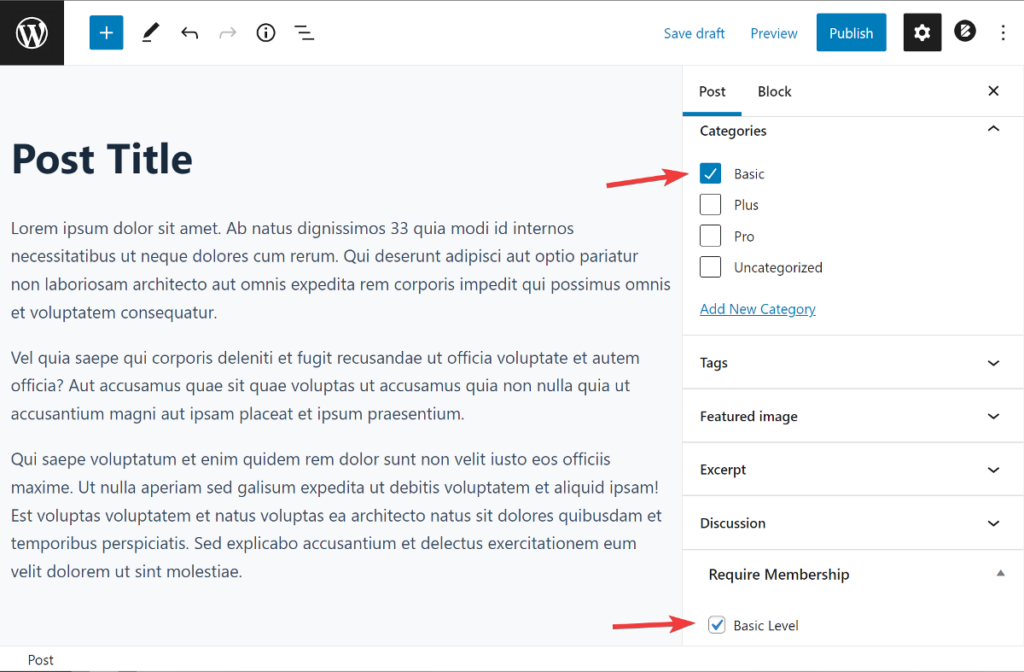
For pages and custom post types, you can simply check the box for relevant membership from the sidebar.
If you look at the front end of your website, you’ll notice that the article isn’t visible. However, if you log in to the website with the appropriate user role, you’ll see the article.
That’s it. Whenever you publish an article by selecting one of the categories created for Paid Memberships Pro, the content will now be visible only to users who have the specific user role of that membership level.
We’re done with restricting content on posts and pages. Now let’s check how to restrict files on the website.
How To Restrict Access to Files by User Roles
While there are many plugins to help you restrict access to posts and pages, you may have noticed that restricting access to files on your site isn’t as straightforward.
Luckily, there are plugins like the Download Monitor that allow you to easily add restrictions to downloadable files. It’s an excellent choice for adding functionalities like password protection and download limitation to any file you upload. There’s also the Advanced Access Manager extension that allows you to restrict access to files from all but specific user roles or individual users.
Let’s see how to use it along with the Access Manager extension to restrict files based on user roles.
Install Download Monitor and Advanced Access Manager Extension
Begin by purchasing the paid plan from the Download Monitor website. To use the Advanced Access Manager, you need to purchase the Complete plan.
ℹ️ To learn more about the Advanced Access Manager extension, read our knowledge base article.
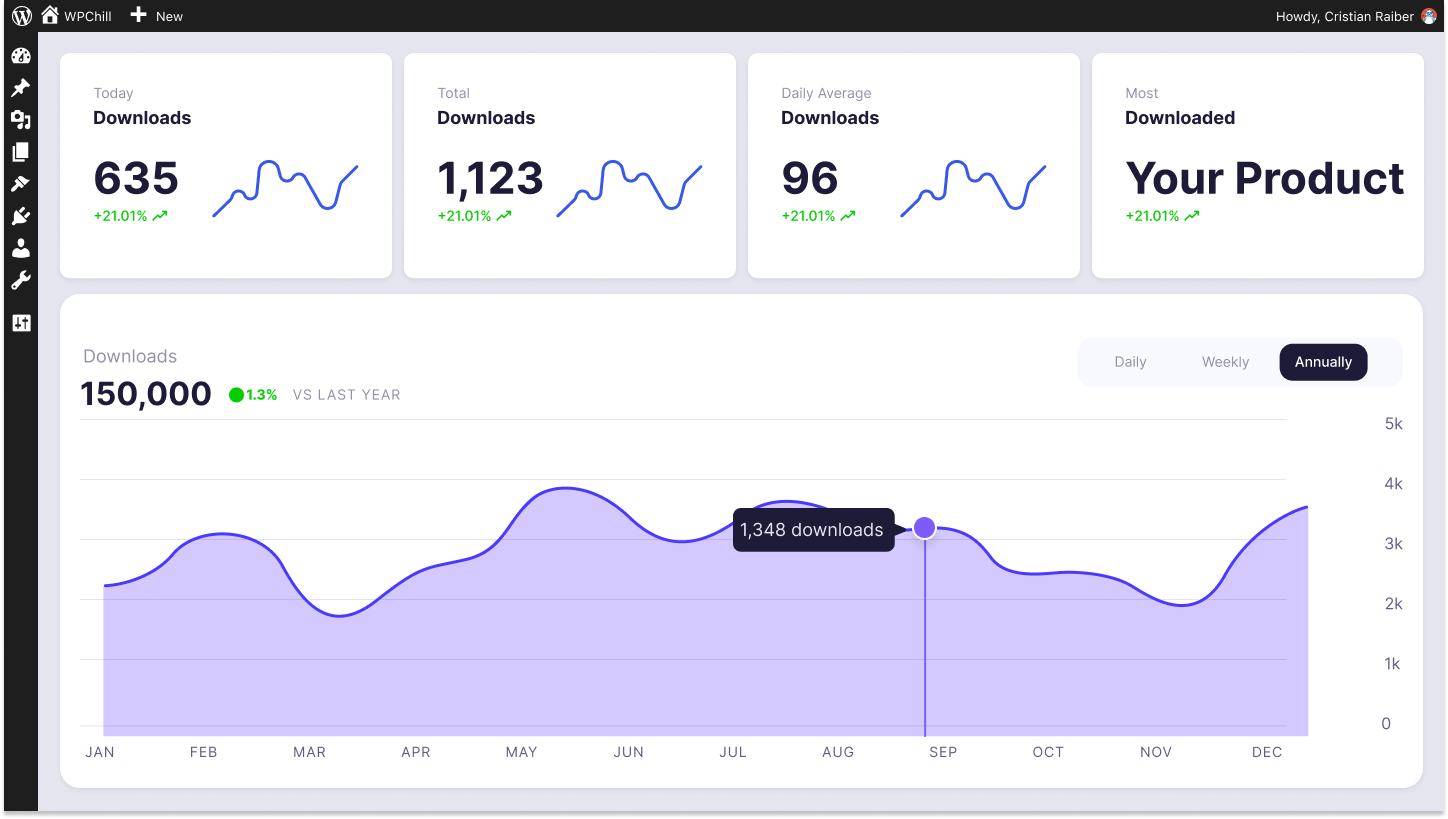
Download Monitor
Grow your audience, track download performance, and convert your traffic into email subscribers with an easy-to-use digital downloads solution for WordPress.
After that, head over to your WordPress dashboard and navigate to Plugins > Add New to install and activate the Download Monitor plugin from the WordPress plugin repo.
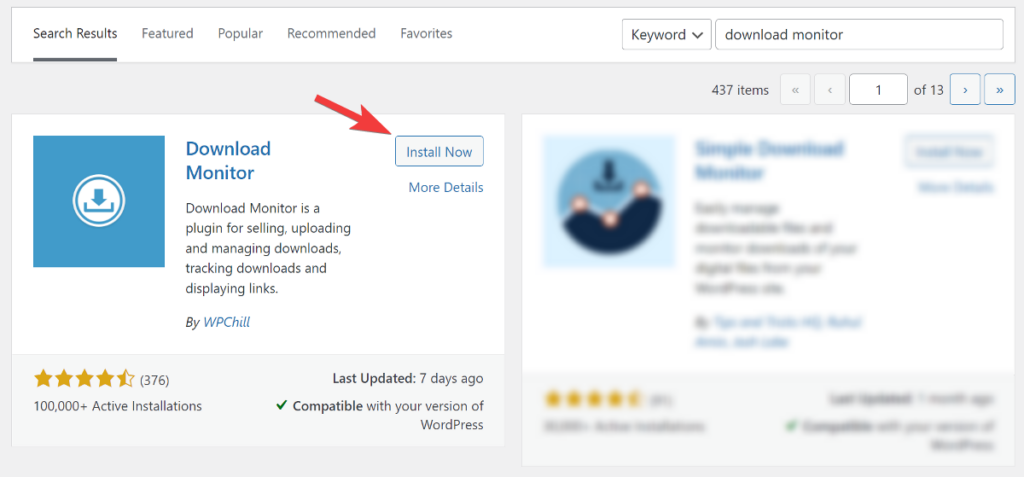
As soon as you install the plugin, you’ll see a message box informing you that you must click the “click here” link to finish the installation.

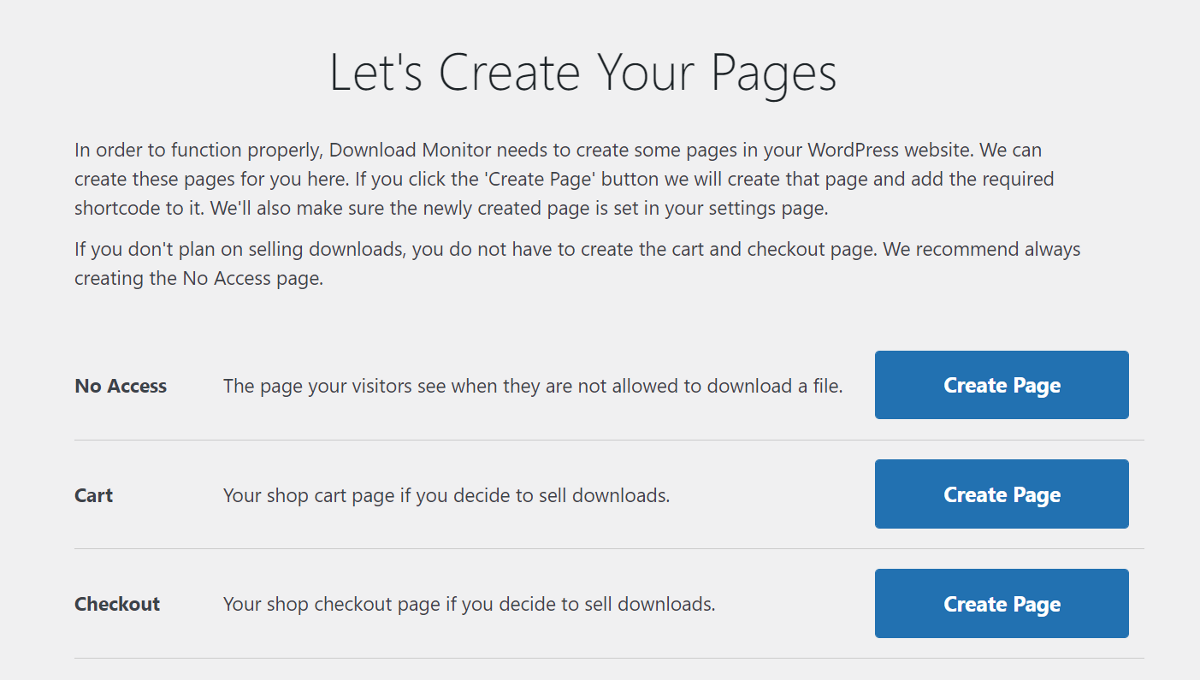
You’ll be taken to a new page where you can set up important pages with a single click.
Next, navigate to the Download Monitor website and download the Advanced Access Manager extension from your account.
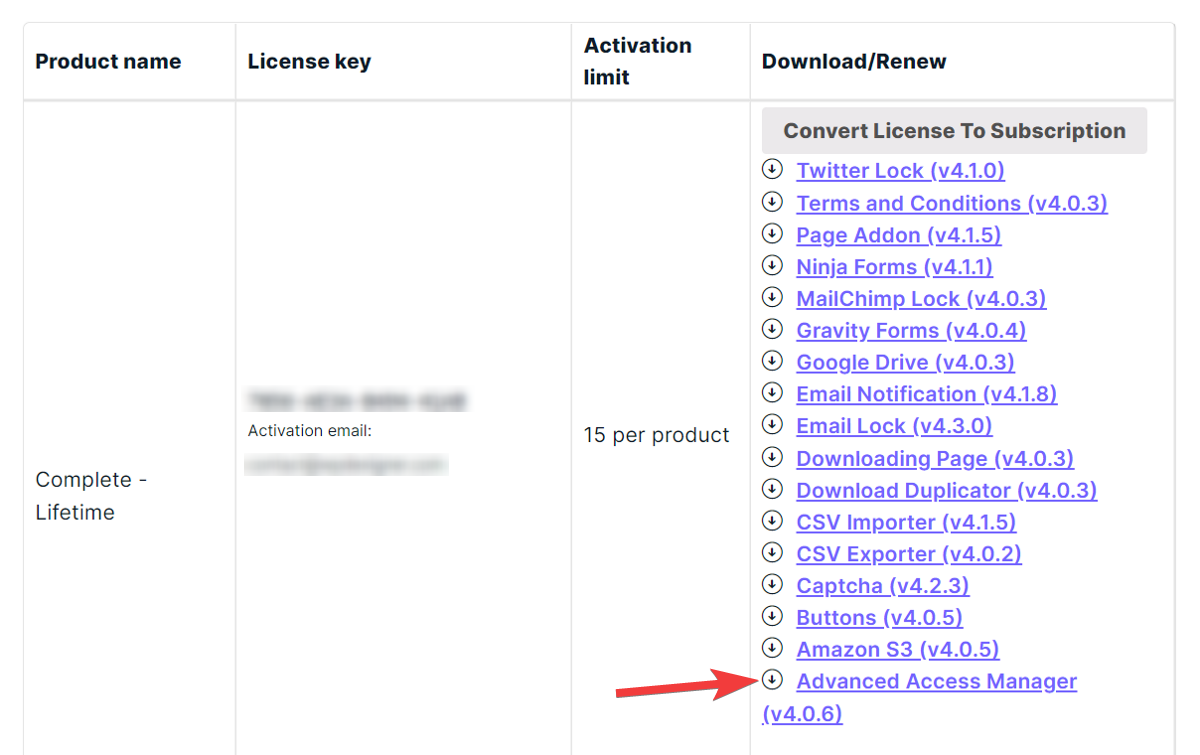
Return to your WordPress dashboard and navigate to Plugins > Add New to upload and install the extension. After it’s installed, don’t forget to validate your license key to start using it.
If you want, you can also install other extensions from the list.
Download Monitor doesn’t allow you to create new user roles. As a result, you’ll need to use the User Role Editor plugin mentioned earlier to create new roles.
Now that setup is complete, let’s see how to add files and restrict access to them…
Add Files to the Website
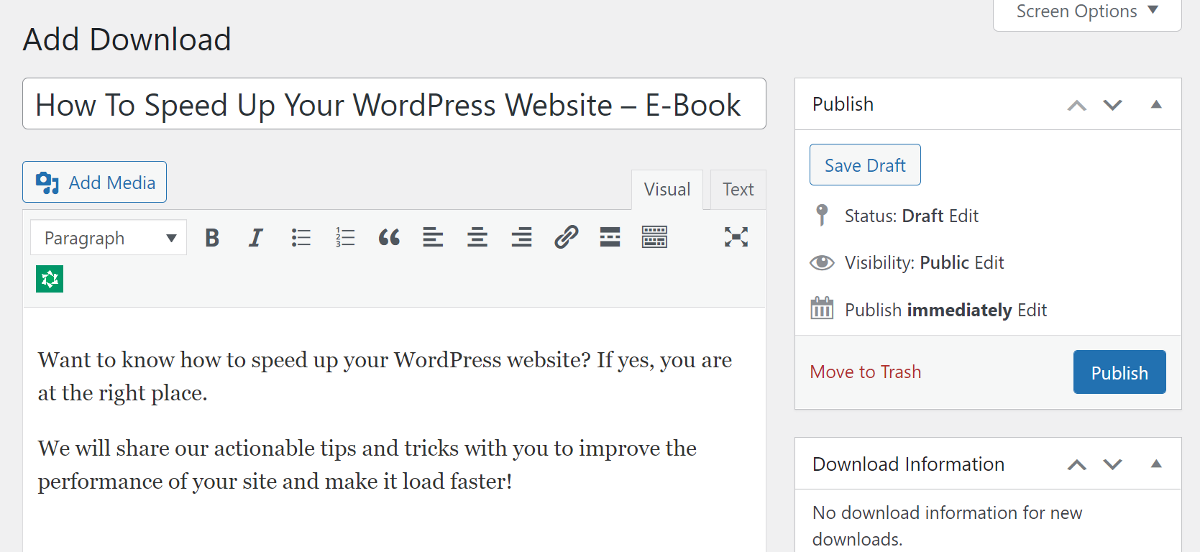
To start adding files, go to Downloads > Add New and give your file a title. If you’ve enabled the Page Addon, you can also add a description that’ll show up on the front end.
Next, scroll down to the Downloadable Files/Versions metabox and upload your file. You can give your file a version number and assign a download limit to it.
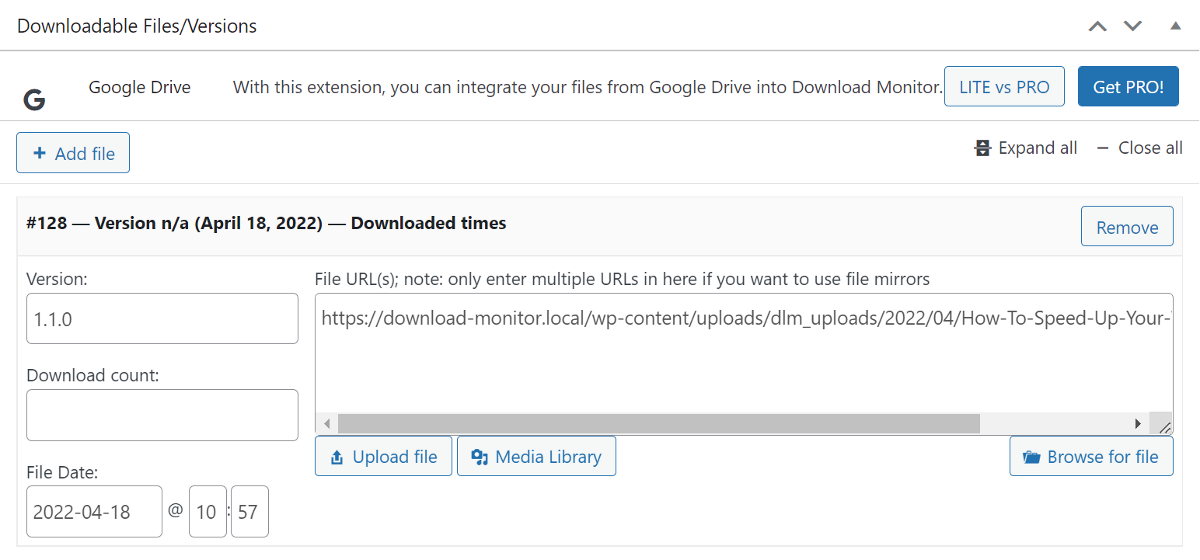
If you don’t want to upload the files to your own server and instead want to serve them from Google Drive or Amazon S3, Download Monitor allows you to do so.
Once the file is added, move to the next metabox where you can add a rule to limit the access to specific user roles. Let’s check that out briefly…
Restrict Files Based on User Roles
To start creating access rules based on user roles, click on the Add Rule button. This will add a new row to the metabox. You can set the rules by selecting the appropriate option from the dropdown in each column.

If you want to grant access to multiple user roles, you can do so by adding another new row to the box.
Next, check the relevant category of your download file and add tags and the featured image. If you have other extensions installed, you can configure them in the Download Options in the sidebar.
Once you’ve confirmed that everything is okay, you can publish the download on the website.
We aren’t done yet! Let’s see how to display these downloads on the website…
Add Downloads on the Website
Download Monitor works with both the Classic Editor as well as the new Gutenberg Editor. It lets you easily display the downloads either by using a shortcode or a Gutenberg block.
Both the shortcode and the Gutenberg block are customizable, allowing you to display exactly what you want.
The default shortcode [download id=”123″] is pretty simple and you can use it anywhere on the website to display the download link. You can also further customize this shortcode to display content templates like a download box, button, and more.
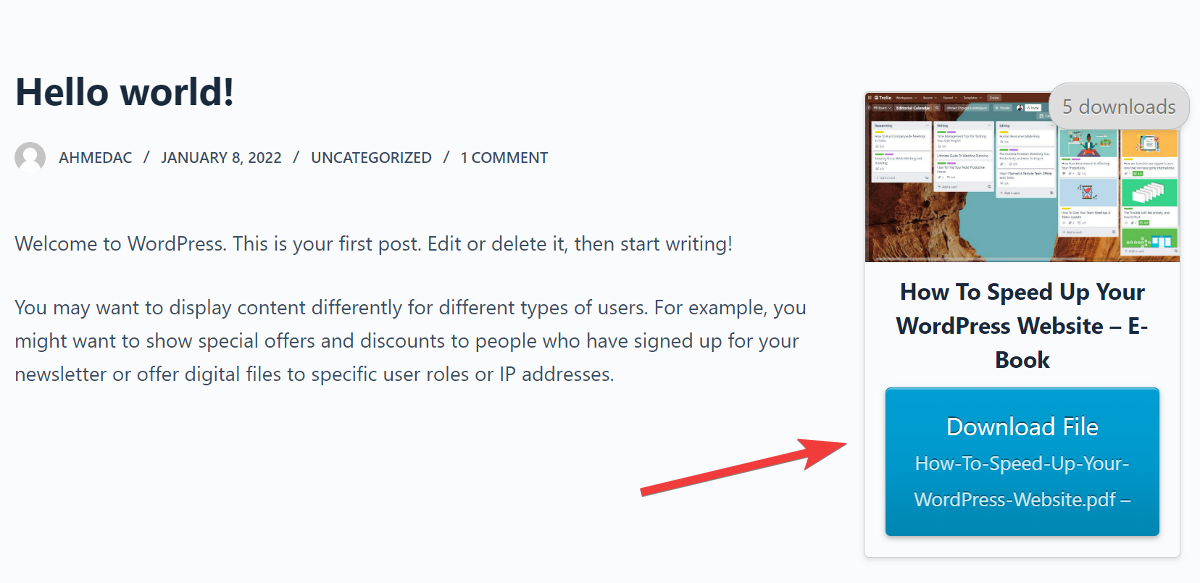
Regardless of whether or not the member is logged in, the download will be displayed. However, if they attempt to download the file without logging in with the appropriate user role, it will inform them that they don’t have permission to do so.
If you want, you can also gate your content and use it for generating leads with one of our extensions: Gravity Forms, Ninja Forms Lock, Email Lock, MailChimp Lock, or Twitter Lock.
Voila! Now that you know the basics and how to go about using both the plugins, you’re one step closer to protecting your website content and files from unwanted access!

Download Monitor
Grow your audience, track download performance, and convert your traffic into email subscribers with an easy-to-use digital downloads solution for WordPress.
Create Your Own Digital Store
Download Monitor is a powerful plugin that empowers you not only to configure and restrict download files, but also to create your own digital store.
It comes with features that let you easily set up a shop and manage, track and control your digital files. You can use it to sell e-books, digital art, creatives, templates, and much more.
The best part about Download Monitor is that there are no commission fees to pay. This means that whatever money you make from selling digital files is yours to keep.


