WordPress has long been the go-to platform for building any type of website. Its user-friendly interface, robust features, and vast ecosystem of plugins and themes have made it the preferred choice for bloggers, businesses, and developers alike.
However, to build a website using WordPress, you need a reliable hosting environment to run it on. This is where cPanel comes into play.
cPanel, often called the control panel for website management, simplifies the process of managing web hosting accounts.
One of the most common tasks performed on cPanel is installing WordPress, and in this guide, we’ll walk you through the process step by step.
Installing WordPress on cPanel is easy! Even if you’re a newbie, this guide will help you to get your job done only in 10 minutes.
Seems unbelievable?
Well, let us show you then!
What is cPanel – A Quick Overview
While building a website, you have lots of different things to manage – your files, your email accounts, your databases, and more. cPanel is like your central hub for managing all of these things.
Imagine cPanel as the dashboard of your car, where you can control different functions without needing to understand how the engine works.
It provides a user-friendly interface where you can do tasks like:
- Managing Files: Just like organizing files on your computer, you can upload, download, and organize files for your website.
- Creating Email Accounts: You can create email accounts associated with your website, like yourname@example.com.
- Installing Software: This is a big one. With cPanel, you can install all sorts of software to power your website, like WordPress, Joomla, or Drupal, with just a few clicks.
- Managing Databases: Websites often use databases to store information. cPanel helps you create, manage, and back up these databases.

Download Monitor
Grow your audience, track download performance, and convert your leads into paying customers with an easy-to-use digital downloads solution for WordPress
How to Install WordPress on cPanel – 5 Easy Steps for Beginners

As we said earlier, we will complete the whole WordPress installation process on cPanel only in 5 steps, so, here are the 5 steps:
- Log in to Your cPanel
- Find the Softaculous Apps Installer
- Insert Your Domain Name
- Configure the Basic Settings
- Select a Theme
After taking a quick look at the steps, now let’s get into the details!
Step 00: Prerequisites to Install WordPress on cPanel
Before jumping into the first step, let us show you the prerequisites.
- First, you’ll need a hosting provider that offers cPanel as part of their hosting package. So, if you haven’t already bought a hosting package to run your website, buy a hosting for you from reputed hosting providers like Hostinger, Namecheap, Kinsta, Bluehost, etc.
- If you don’t already have a domain name registered, you’ll need to acquire one before setting up your website. You can buy the domain and hosting package from the same seller.
Step 01: Log in to Your cPanel
Once you’ve signed up for hosting with a provider that offers cPanel, you’ll need to log in to your hosting account to access cPanel.
Usually, your hosting provider will send you an email with login credentials (such as a username and password) or provide a link to access your hosting account. Once you’re logged in, you’ll be able to access cPanel, where you can manage various aspects of your website, including installing WordPress.
If you can’t find your cPanel login URL, you can simply type https://www.(domain-name).com/cPanel on your browser and you will be redirected to the login interface.
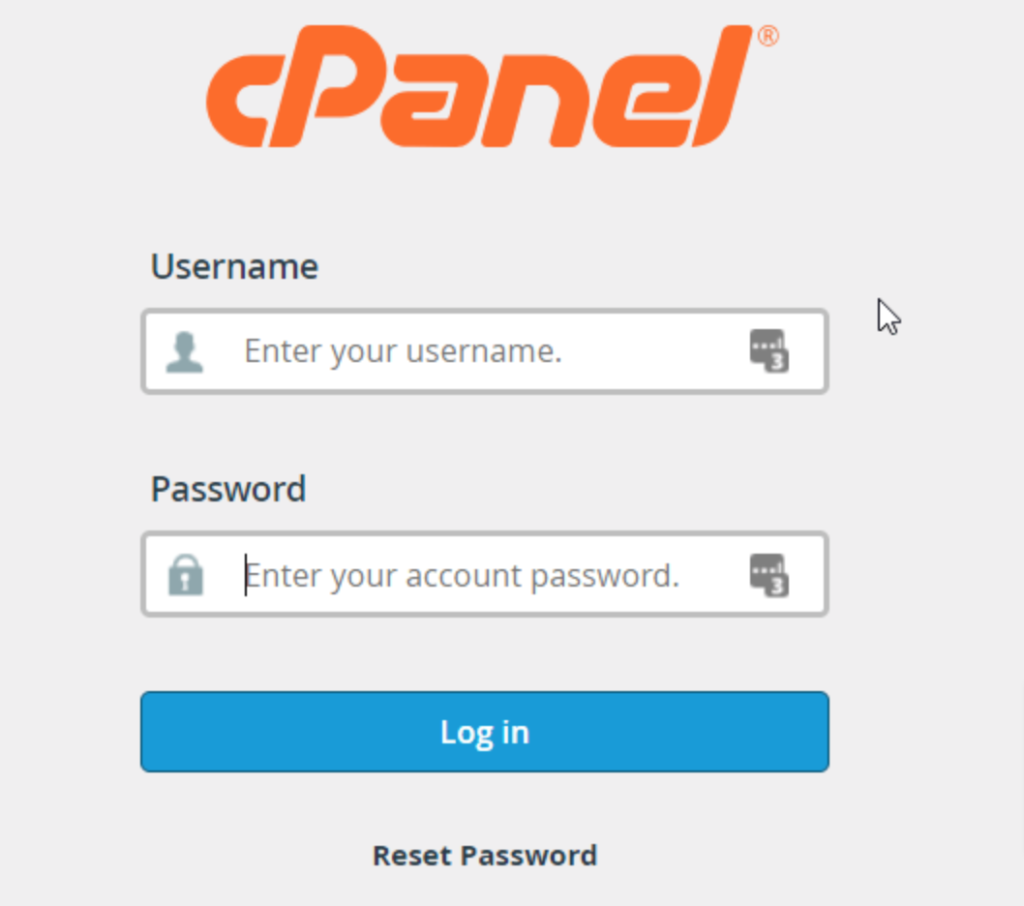
Then insert your username and password to log in to your account.
Step 02: Find the Softaculous Apps Installer
After logging into your control panel account, find the Softaculous Apps Installer. If you scroll down a bit, you will find it there. Also, you can simply find it by searching it into the search bar.
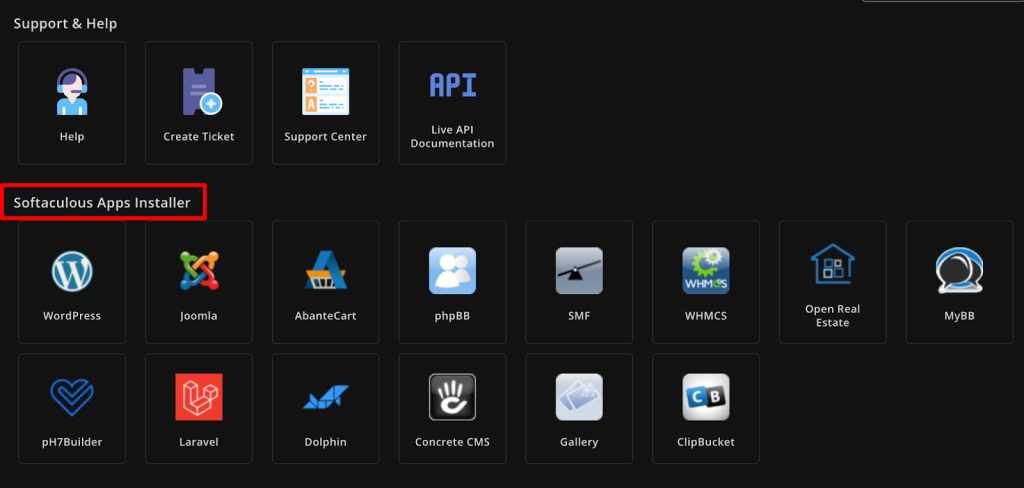
Now click on the WordPress option under the Softaculous App Installer. It will redirect you to a new interface.
Download Monitor
Grow your audience, track download performance, and convert your traffic into email subscribers with an easy-to-use digital downloads solution for WordPress.
Step 03: Insert Your Domain Name
From this interface, click on the Install Now button. It will extend the page.
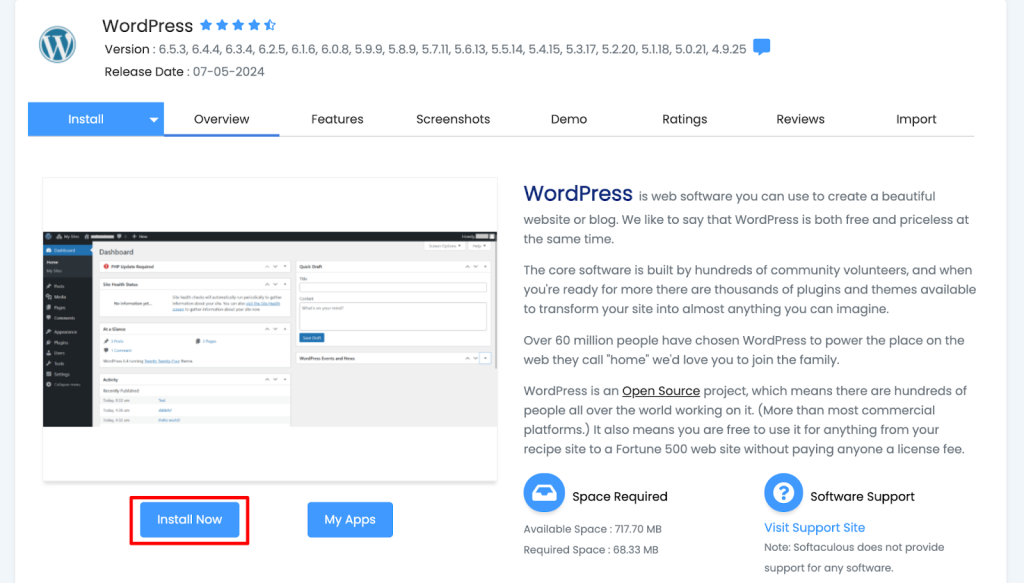
Focus on the Software Setup portion.
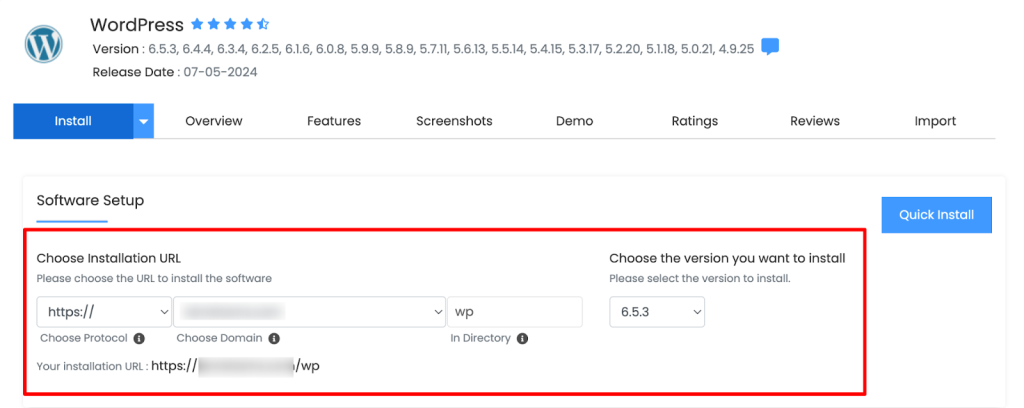
Choose your preferred protocol. You should choose the “https://www” from the drop-down list. After that insert your Domain and Directory name. Leave the directory blank if you want it to be in the root directory.
Also, you need to choose the version you want to install. It’s always the best practice to install the latest version of the software.
Step 04: Configure the Basic Settings
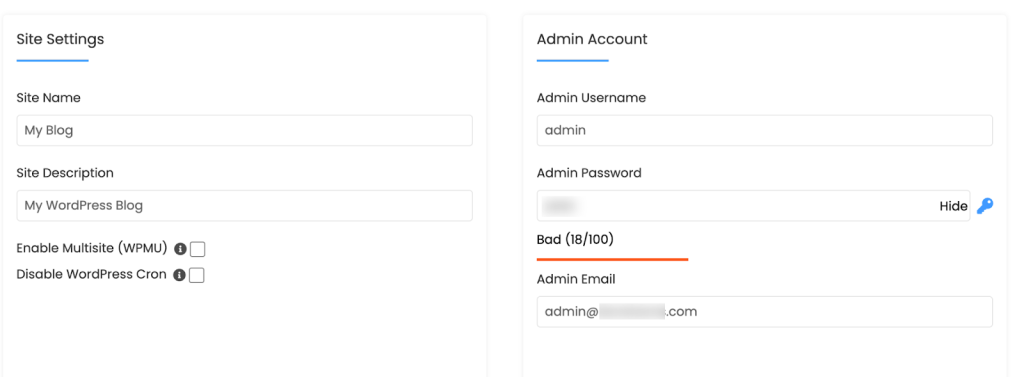
Scroll a bit down again and you will come to the portion of Site Settings and Admin Account.
If it’s a blogging site, you can name it My Blog or anything you want. If it’s an eCommerce site, you can put the store name here. Next, give a short description of your website.
Once you are done with Site Settings, come to the Admin Account section.
Here you need to set a username and a password. Create a unique admin username and passwords that become difficult for cybercriminals to track. Set an admin email address at the end.
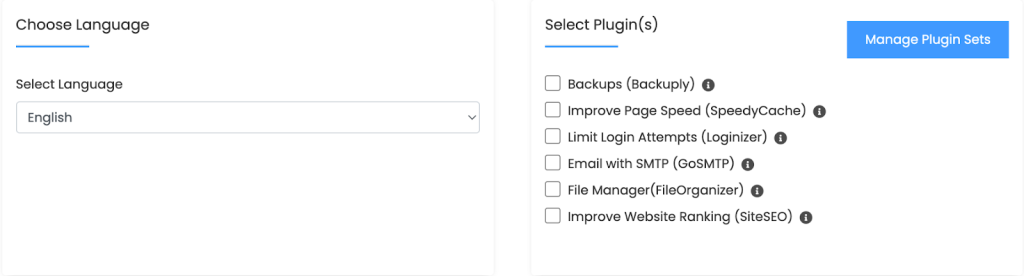
Then scroll down a bit and you’ll find an option to choose the language for your site. If you want to create a website based on the English language, choose English from the drop-down list.
On the right side of the Language option, there is another option – Select Plugin(s).
From this list, you can select plugins that you want to install alongside WordPress installation. That being said, if you don’t want to install any plugin now, you can simply simply skip this part.
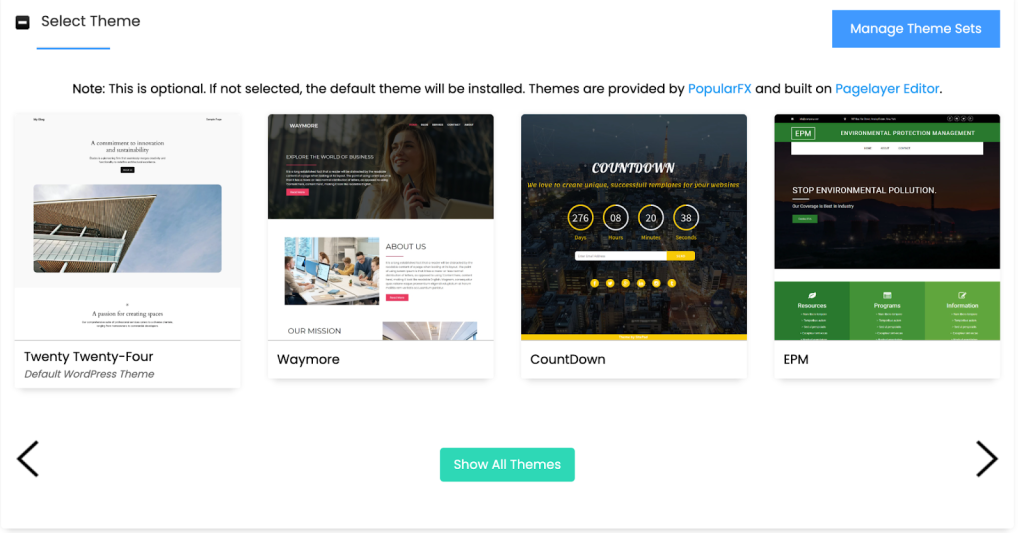
Step 05: Select a Theme
It’s another optional step.
Scrolling down to the end of this page, you will see the Select Theme option. Click on the arrow icons to slide show more themes. Also, you can click on the Show All Themes button to see all the available themes at a glance.
Click on the theme that you have liked most. It will take you to the demo page where you can explore some of its features. If you finally agree to go on with this plugin, click on the Select Theme button.
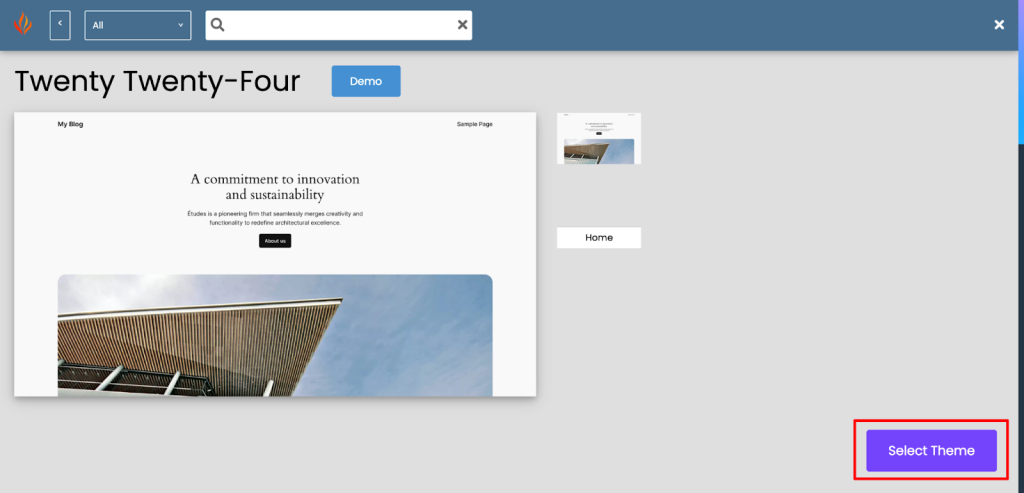
You will get back to the WordPress settings page. If all your requirement selection is done, click on the Install button from the end of this page. Also, provide an email address to get a report once the installation is done.

When the installation is done, you get a congratulatory message like the below one.
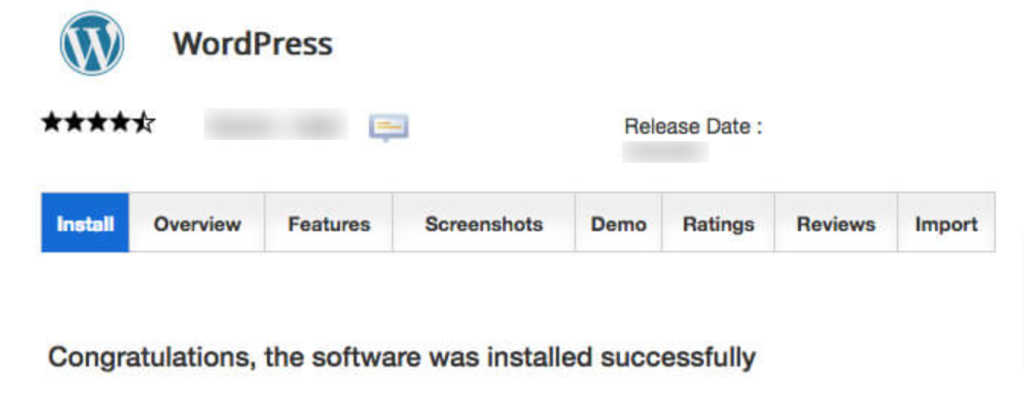
That’s all!
That’s how you can install WordPress on cPanel.
Download Monitor
Grow your audience, track download performance, and convert your leads into paying customers with an easy-to-use digital downloads solution for WordPress
Bonus: How to Access Your WordPress Dashboard (Backend)
After you’ve installed WordPress on your hosting account via cPanel, you’ll need to log in to your WordPress admin panel to start customizing your website, adding content, and managing its various aspects.
To do this, you typically navigate to your website’s domain followed by “/wp-admin” in your web browser’s address bar (e.g., www.example.com/wp-admin).
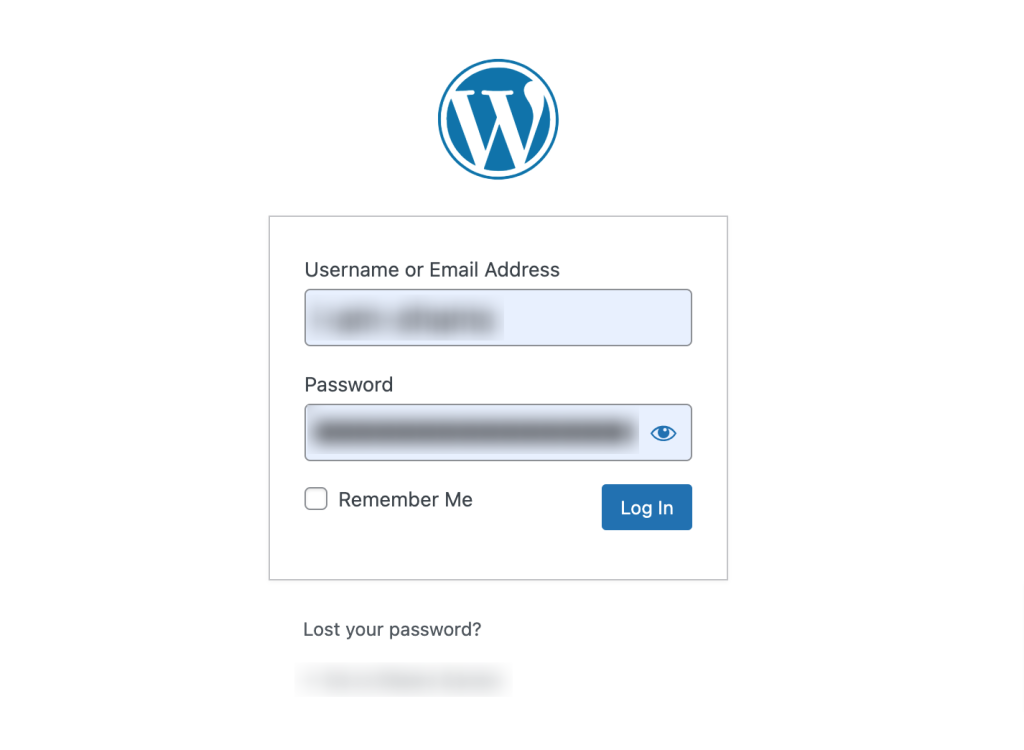
This will take you to the WordPress login page where you can enter the username and password you created during the WordPress installation process. Once logged in, you’ll have access to your WordPress dashboard, which is the control center for managing your website.
Get Introduced to the WordPress Dashboard

The WordPress dashboard is the central hub where you can control and customize everything about your website.
It’s divided into different sections, each serving a specific purpose:
- Dashboard Home: This is the first screen you see upon logging in. It provides an overview of your site’s activity, including recent posts, comments, and updates.
- Posts: This section allows you to create, edit, and manage your blog posts or articles. You can categorize posts, add tags, and schedule them for publication.
- Media: Here, you can upload and manage images, videos, and other media files used in your posts and pages.
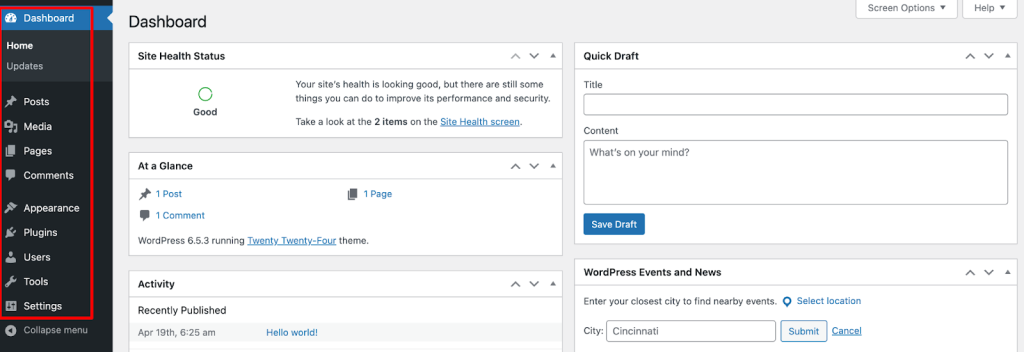
- Pages: Similar to posts, but for static pages like your site’s About page, Contact page, etc. You can create, edit, and organize pages here.
- Comments: This is where you can view and moderate comments left by visitors on your posts.
- Appearance: This section controls your site’s appearance, including themes (design templates), customization options, menus, widgets, and the theme editor.
- Plugins: Here, you can install, activate, deactivate, and manage plugins, which add extra functionality to your site.
- Users: This section allows you to manage user accounts and their roles on your site. You can add new users, edit existing ones, and control their permissions.
- Settings: This is where you can configure various settings for your site, including general settings, reading, writing, discussion, permalinks, and more.
11 Things to Do After Installing WordPress
Now let’s check what to do after installing WordPress to make it ready both for users and SERP. Here are 11 things to check-
- Know Your WordPress Admin Panel
- Access your admin panel at yoursite.com/wp-admin.
- Explore the menus and sub-menus to familiarize yourself.
- Write Your Site Title with a Catchy Tagline
- Go to Settings > General.
- Enter your Site Title and Tagline and save changes.
- Select Your Preferred Timezone & Language
- Set your timezone and language in Settings > General.
- Choose from the dropdown menus and save changes.
- Personalize Your User Profile
- Go to Users > Profile.
- Add details like First Name, Last Name, and Profile Picture via Gravatar.
- Install a Theme & Customize It
- Go to Appearance > Themes > Add New to install a theme.
- Customize your theme under Appearance > Customize.
- Add Your Logo & Favicon
- Go to Appearance > Customize > Site Identity.
- Upload your logo and a 512×512 pixels favicon.
- Customize the Permalink Structure
- Go to Settings > Permalinks.
- Choose a structure like Post name and save changes.
- Remove the Default WordPress Contents
- Delete default posts, pages, and comments from Posts > All Posts and Pages > All Pages.
- Remove unnecessary themes and plugins.
- Configure SEO for Your WordPress Site
- Install Yoast SEO or Rank Math from Plugins > Add New.
- Activate and configure the plugin for optimal SEO settings.
- Connect Google Analytics & Search Console
- Create a property at analytics.google.com and verify it at search.google.com.
- Install and set up Google Site Kit to connect both services.
- Install the Essential Plugins for Your Website
- Install key plugins like Akismet (anti-spam), Contact Form 7 (forms), WP Super Cache (caching), UpdraftPlus (backup), and Jetpack (security).
- Write, Edit & Publish Your First Blog
- Go to Posts > Add New.
- Write your content, add media, and publish your first post.
These steps will help you establish a well-configured and functional WordPress website.
How to Install WordPress on cPanel and Make it Ready for Users- Over to You
Congratulations! You’ve successfully installed WordPress on cPanel and taken your first step toward building your online presence.
WordPress offers tons of themes and plugins to customize your site and make it truly unique. The possibilities are endless! Whether you’re crafting a personal blog, building an online store, or showcasing your portfolio, WordPress empowers you to bring your ideas to life.
So, don’t wait any longer! Install WordPress on your cPanel by following this tutorial and start building your online presence now. Happy website building!
Download Monitor
Grow your audience, track download performance, and convert your traffic into email subscribers with an easy-to-use digital downloads solution for WordPress.